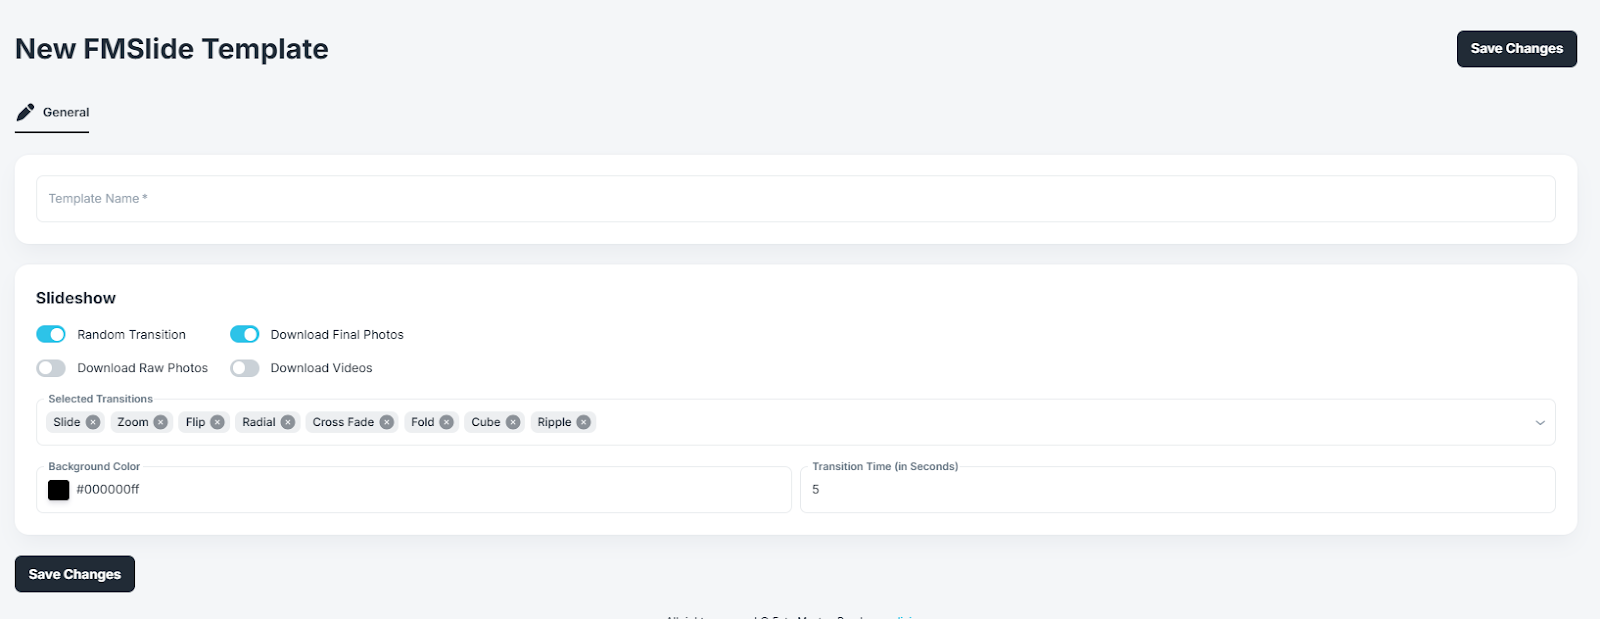
How to Create FMSlide TemplateUpdated 4 days ago
Hello All,
In this article, you will learn how to create your own FMSlide Template.
Ready to learn? Let’s go!
1. Log in to your Fotomaster Cloud account using any web browser (e.g., Google Chrome for Windows, Safari for Mac).
2. Navigate to the Software tab on the left-hand side of the page and select Selfie WiFi. If the Software tab is not visible, click the three-line menu icon in the upper left corner to expand the menu.
3. Once you enter the FMSlide tab, locate the +New Template button in the top right corner and click it to begin creating a new template.
4. FMSlide Template Configuration

Template Name
Enter a descriptive template name, preferably related to the event, for easy identification.
Slideshow
Selected Transitions:
● By default, all transitions are selected.
● Remove unwanted transitions by clicking the X button next to the transition.
● To select a transition, click the down arrow at the right end of the field and choose from
the available options: Slide, Zoom, Flip, Radial, Cross Fade, Fold, Cube, Ripple
Random Transitions:
● Enabling Random Transitions will shuffle the selected transitions.
● Disabling this feature will play transitions in the order they were selected.
Download Raw Photos:
● Enabling this option allows any synced raw photos to appear in FMSlide.
Note: Ensure that Auto Sync Raw Files is enabled in FMBooth for Windows under Settings > Online Gallery.
Download Final Photos: Enabled by default. This allows final photos synced to the cloud to be displayed.
Download Videos: Enabled by default. This allows synced videos to be displayed.
Background Color: Click the white square to select a background color. Alternatively, enter a hexadecimal color code in the field.
Timer Duration (Seconds): Adjust the duration for which each photo is displayed.