How To Use the AI Headshot (Single Person) FeatureUpdated 24 days ago
In this guide will show you how to use the amazing Headshot feature!
1. Set Up Your Foto Master Cloud Account
To use the AI Headshot feature, a Foto Master Cloud account is required. If you don’t have one yet, sign in or create an account at cloud.fotomaster.com and choose your plan (Pro, Basic).
2. Quick Start
The fastest way to get started is by using the built-in AI Headshot feature already included in the default preset pack.

3. Understanding the Workflow Configuration in FMBooth for Windows
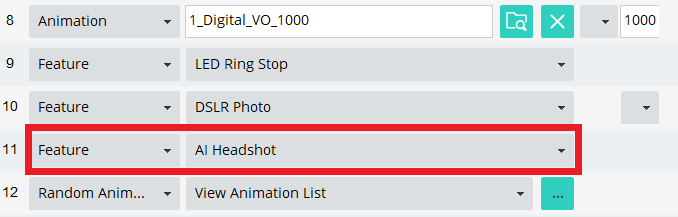
After going to the workflow tab:
We added a Cloud state to your workflow.
From the dropdown menu, we select "AI Headshot" as the feature.
To preview the results in time we should add:
AI Processed Trigger: Add an animation with this trigger to ensure the workflow pauses until the AI processing is complete.
Reload Raw Photo: Include this state to automatically replace the original photo with the AI-generated headshot.
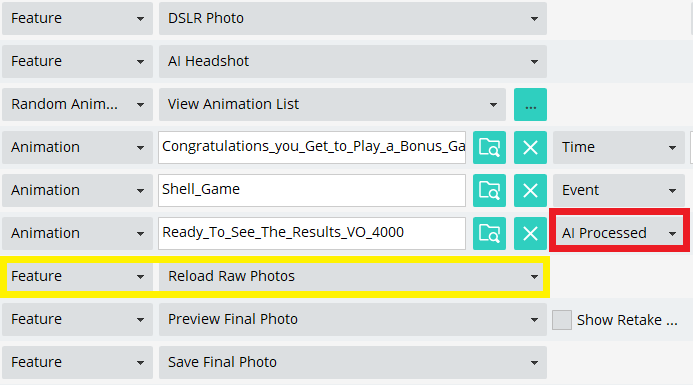
Also, make sure to have the "Reload Raw Photo" feature in your workflow as that is when the original Raw photo is replaced with the new photo that the AI created.
4. Feature Settings
Click the settings icon within the “AI Headshot” workflow state to customize the output:
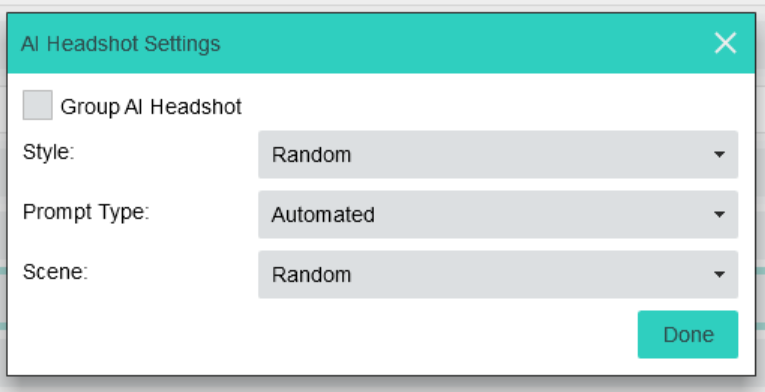
Style: Choose the output style — options range from realistic to cartoon-like.
Prompt Type:
Auto: AI picks the look.
Custom: You provide full control over the prompt.
Mixed: You set a core theme (e.g., “desert background”), and AI fills in the rest.
Scene: Define the setting and thematic context of the final image.
5. You're Ready to Go
With your workflow and settings in place, you’re ready to offer powerful, professional AI Headshots at your events — fast, fun, and fully automated.