How To Use The FMSlide SoftwareUpdated 3 days ago
Hi all!
In this article, we will walk you through using FMslide software, which allows you to experience a real-time slideshow on another display without using an additional cable connection! With this new software, you don’t need to connect the booth to another display using an HDMI cable, and you can simply install this software on another computer (regardless of the distance) to show the slideshow of your event photos.
Before using the FMslide software, you will need a Cloud account with a “Basic" or "Pro" subscription.
Once you have it, you can purchase the software - free of charge - from your Cloud account in the "License" tab.
Log In Using Your Cloud Credentials
Once you open the FMslide software, you will need to log in your cloud credentials on the following boxes:
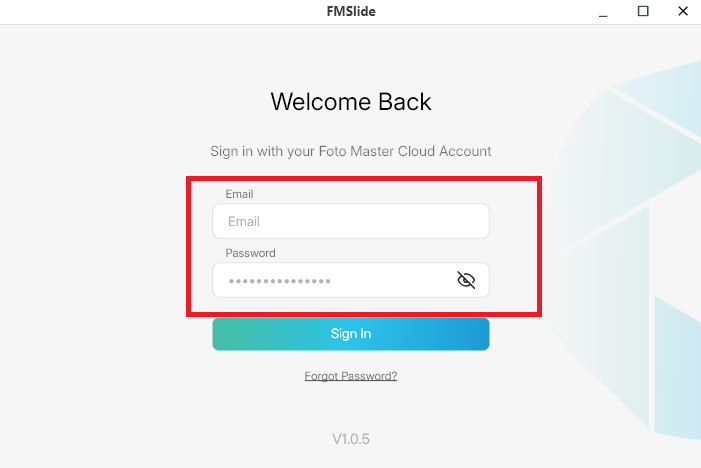
Log In to Your Cloud Account
After logging in on the FMslide, you will need to log in to your cloud account on the Fotomaster cloud to set up the template and select the event:
Setting Up Your FMSlide Template
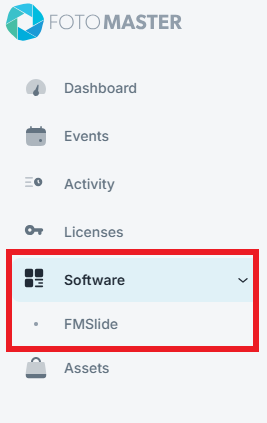
Once you are logged in, navigate to the right side of the screen, select the “Software” option and, after that, select “Fmslide"
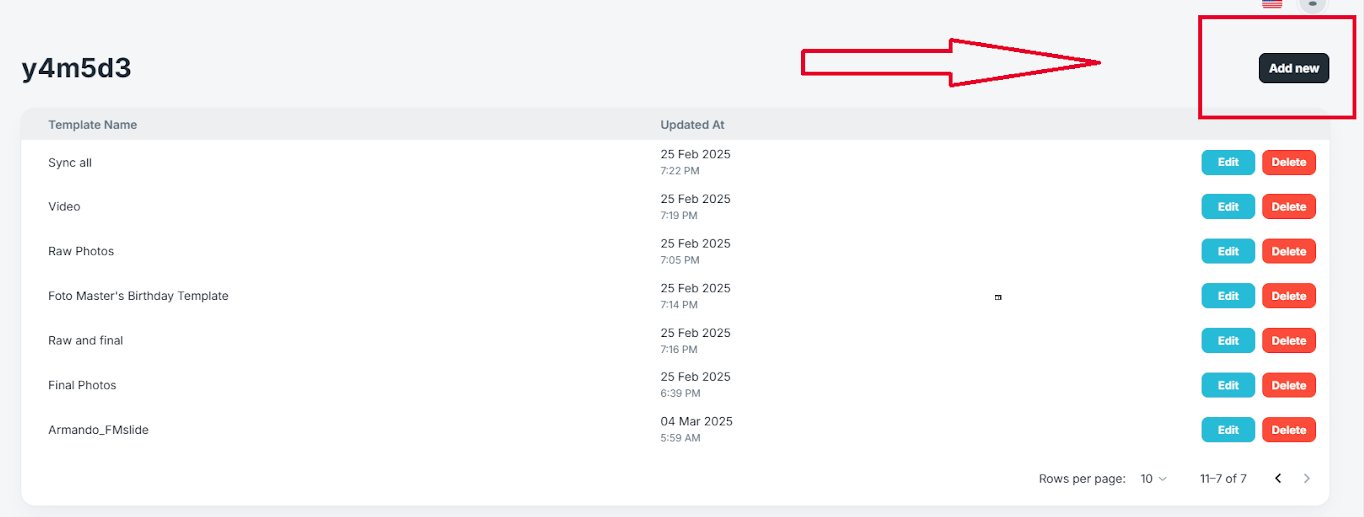
Next is adding your template. You will see on this page all of your created templates. Click “add new” on the top left to create a new template.
Then you will see this page:
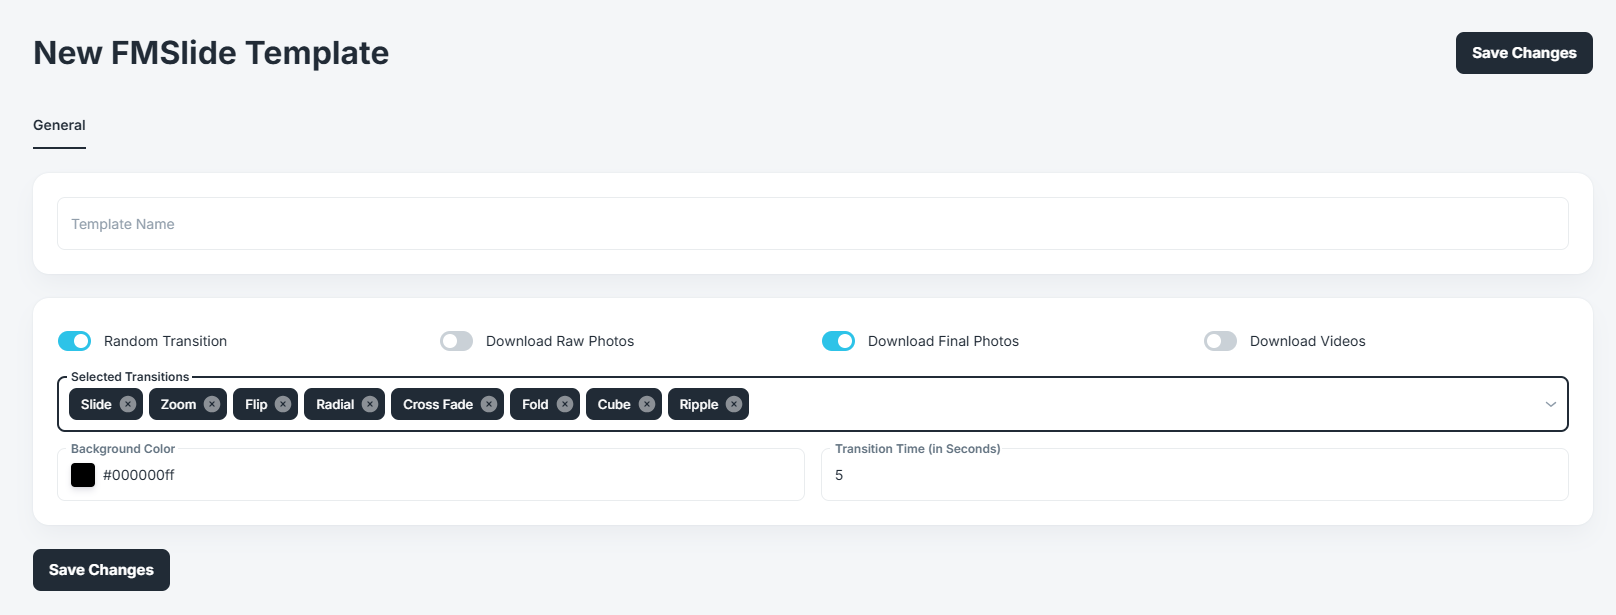
Template name: This will allow you to name your template. It will be the name you will see once you add the template to your event folder.
Random Transition: Enabling this will show the different transitions randomly during the presentation.
Download Raw Photos: The FMslide will download all the raw photos from your cloud event to your local folder (if they are synced).
Download Final Photos: The FMslide will download all the final photos from your cloud event to your local folder(if they are synced).
Download Videos: The FMslide will download all the videos from your cloud event to your local folder (if they are synced).
Selected Transitions: Clicking on it will show a drop-down list in which you can select and delete the different transitions. You can either select one or select all of them.
Background Color: This will allow you to change the background color of the FMslide software. If there's a specific color you want to use, you can enter its Hex code on the code space.
Transition Time: This will allow you to set the time for how long the photos are presented once you start the presentation.
Save Changes: Always click "save changes" once you are done setting up your template.
Selecting Your Cloud Event.
Go to the events tab and select the cloud event that you want to present via the FMslide software. Once selected, click on the “Software” tab, and in the drop-down menu, select the name of your desired FMslide template.
Then click "save changes".

Syncing The Template On The FMSlide Software
After opening the FMSlide, select your desired event folder.
Click the Sync settings and then make sure the “Online gallery Sync” is enabled. This will allow your slideshow to be updated in real-time each time a new photo is added to your Event folder.
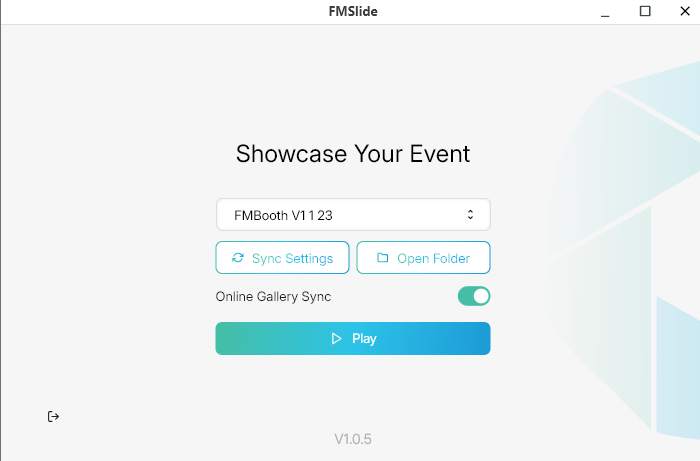
Once done, you can now click the "Play" button and start your slideshow.
And that's it- you are ready!