Hi Everyone!
This article will show you how you can easily make your own customized Thumbnails for your preset and use them in the Multi Preset's selection screen.
As you may already know, changing your Photo Layout design does not change your thumbnail presentation. The Thumbnails are image files created to help you recognize your preset while scrolling through the "Presets" tab, and also for your Multi Presets Selection Screen presentation.
Microsoft Windows has a really simple app - the "Snipping Tool" that can help you create a custom Thumbnail in a few easy steps. Use the "Snipping Tool" to capture a selected section of your computer's screen and save it as a PNG or JPG file.
1. Open "Snipping Tool": Type "snipping tool" in your Windows search bar.

2. Click to open this app:

Make sure to have the Photo Layout tab open before continuing to the next step.
3. Press on the New button and capture the desired part of your screen using your mouse.

4. Once captured, release the mouse button. The captured image will appear in the Snipping Tool:

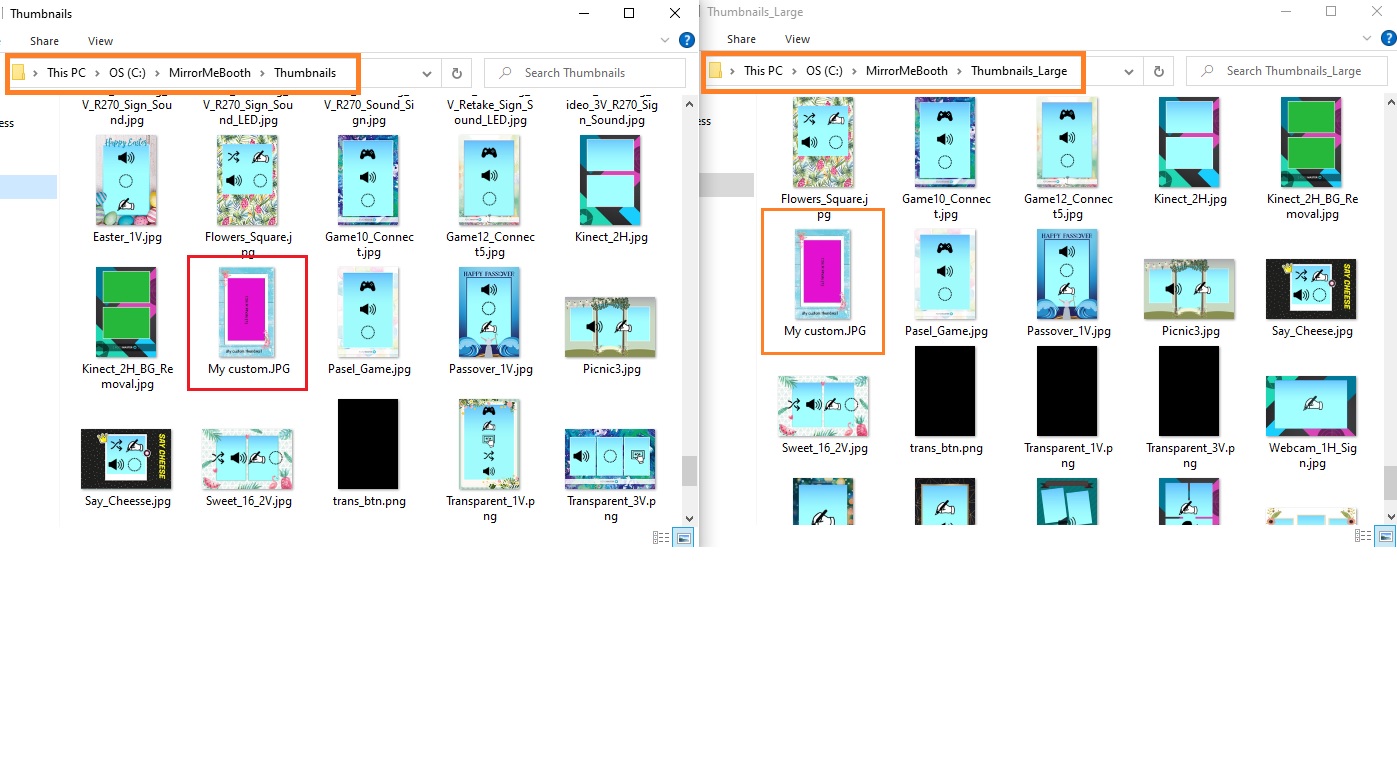
5. Click File > Save as > Save the file as a .JPG file in the two following folders under the same name: Thumbnails and Thumbnails_Large - in your MirrorMe preset pack:

7. In the Mirror Me Software, select your preset and load the new thumbnail from C:\MirrorMeBooth\Thumbnails by clicking the browsing button and selecting the image file you desire to use:

8. Save.
That's it!
- To learn more about the Multi Presets feature, check this article.
- To learn about Positioning your thumbnails on your multi preset selection screen, check this article.