Creating Cloud Event and Linking an FMSlide TemplateUpdated 9 days ago
Greetings!
In this article, you will learn how to:
Create a Cloud Event Gallery to use the FMSlide Software.
Link an FMSlide Template to Cloud Event
Ready to learn? Let’s go!
First, you need to log in to your Cloud account
Creating a Cloud Event
After you log in, go to the Events tab on the left side of the screen and create your Event by clicking the +New Event on the top right corner of the screen.

You can name your Event in the “Event Info”, change the Start date for a future event, and set its duration.
Don’t forget to click on Save Changes.
GENERAL TAB
Event Name: Enter the name of your upcoming event.
Start Date: Specify the date when your event will begin.
Duration: Indicate the total number of hours your event will last (event can be used even if time lapsed)
GALLERY TAB

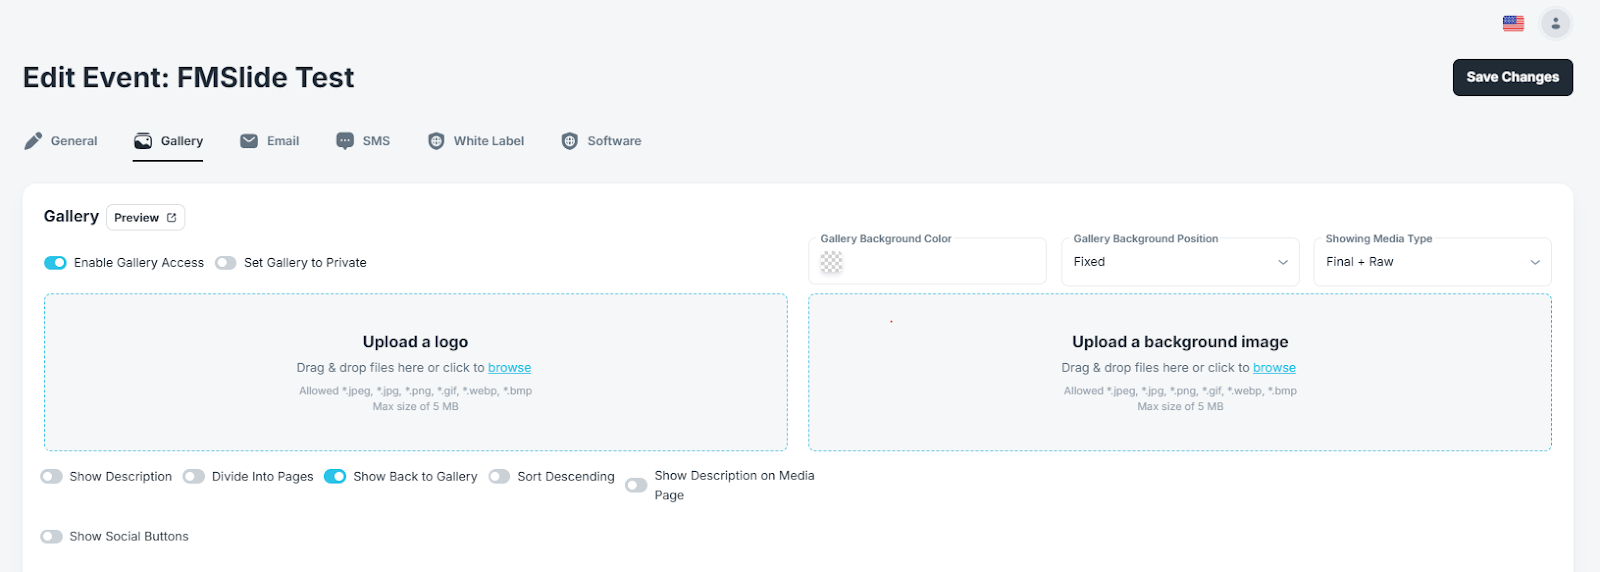
Click on the Gallery tab in your selected Event, and then simply enable Gallery from the toggle button.
*Note: It is required to enable this feature to use the FMSlide Software.
Once the gallery is enabled, you will see all the different options you have to customize your Gallery:

Private Gallery: with this, you will set a password for the gallery that the guests will have to enter to access it. (only available in Pro accounts)
Customize the Gallery Look: you can add your logo and background (which can be an image or a solid color) and even add a description to the gallery
Customize Gallery Options: you can enable different options to customize the options available for your gallery such as dividing it into pages (the default is for all pictures to be visible on a single page), showing the Back Button (meaning guests can view the full gallery and not just their photo), sort showing of pictures in descending/ascending order
Social Sharing: by enabling the Social Button option you can choose which social platforms you’d like to be available for your clients.
Creating an FMSlide Template
For step by step guide on how to do that, please check out this article.
Linking a Template to a Cloud Event
SOFTWARE TAB
In your selected Event go to the Software tab and Enable the FMSlide option. 
Once you enable the FMSlide, you will see this dashboard.
Click on the Selected Template and select your desired FMSlide template.
Click Save Changes, and you're all set!