This guide explains how to create a Selfie Wi-Fi template in Foto Master Cloud.
Ready to learn? Let’s go!
1. Log into your Foto Master Cloud account using any web browser (e.g., Google Chrome for Windows, Safari for Mac).
2. Navigate to the Software tab on the left-hand side of the page and select Selfie WiFi. If the Software tab is not visible, click the three-line menu icon in the upper left corner to expand the menu.
3. Locate the New Template button in the top right corner and click it to begin creating a new template.
4. Selfie Wifi Template Configuration
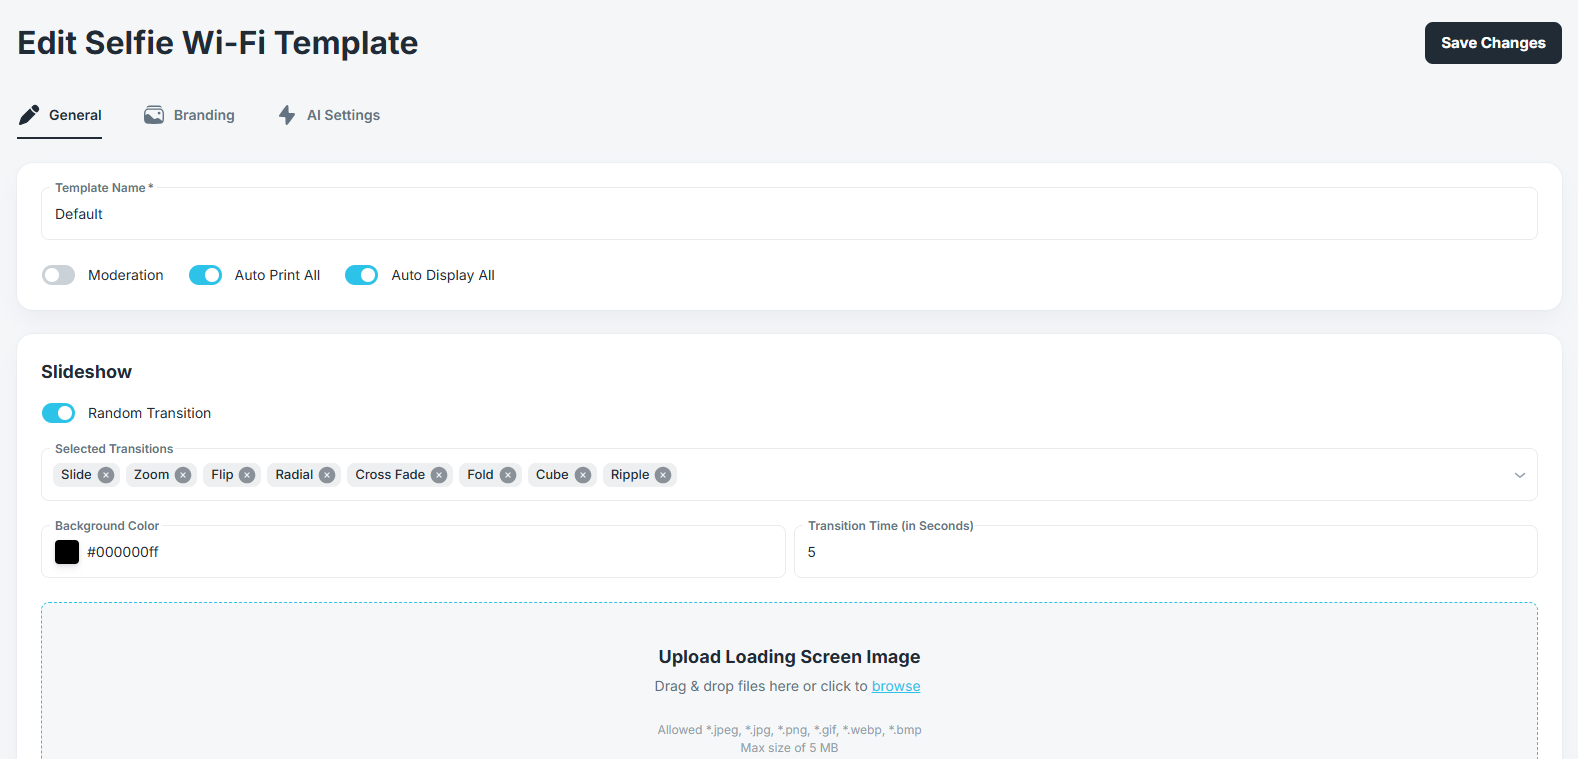
GENERAL TAB
Template Name
Enter a descriptive template name, preferably related to the event, for easy identification.
Moderation: if enabled, each incoming photo will need to be approved or rejected manually
Auto Print All: If enabled, it will automatically print one copy of each photo that is approved. The printer that will be selected is the one that is marked as the Default Printer on the computer.
Auto Display All: If enabled, it will automatically display on the monitor the approved photos
Slideshow
Random Transition: if enabled, it will shuffle the selected transitions. Disabling this feature will play transitions in the order they were selected
Selected Transitions:
● By default, all transitions are selected.
● Remove unwanted transitions by clicking the X button next to the transition.
● To select a transition, click the down arrow at the right end of the field and choose from the available options: Slide, Zoom, Flip, Radial, Cross Fade, Fold, Cube, Ripple
Background Color: Click the white square to select a background color. Alternatively, enter a hexadecimal color code in the field.
Transition Time (Seconds): Adjust the duration for which each photo is displayed.
Upload Loading Screen Image: Uploading a photo that will be the photo that is displayed on the monitor, presenting the slideshow of approved photos. The photo uploaded here will be displayed only until the first photo is approved and uploaded to the slideshow.
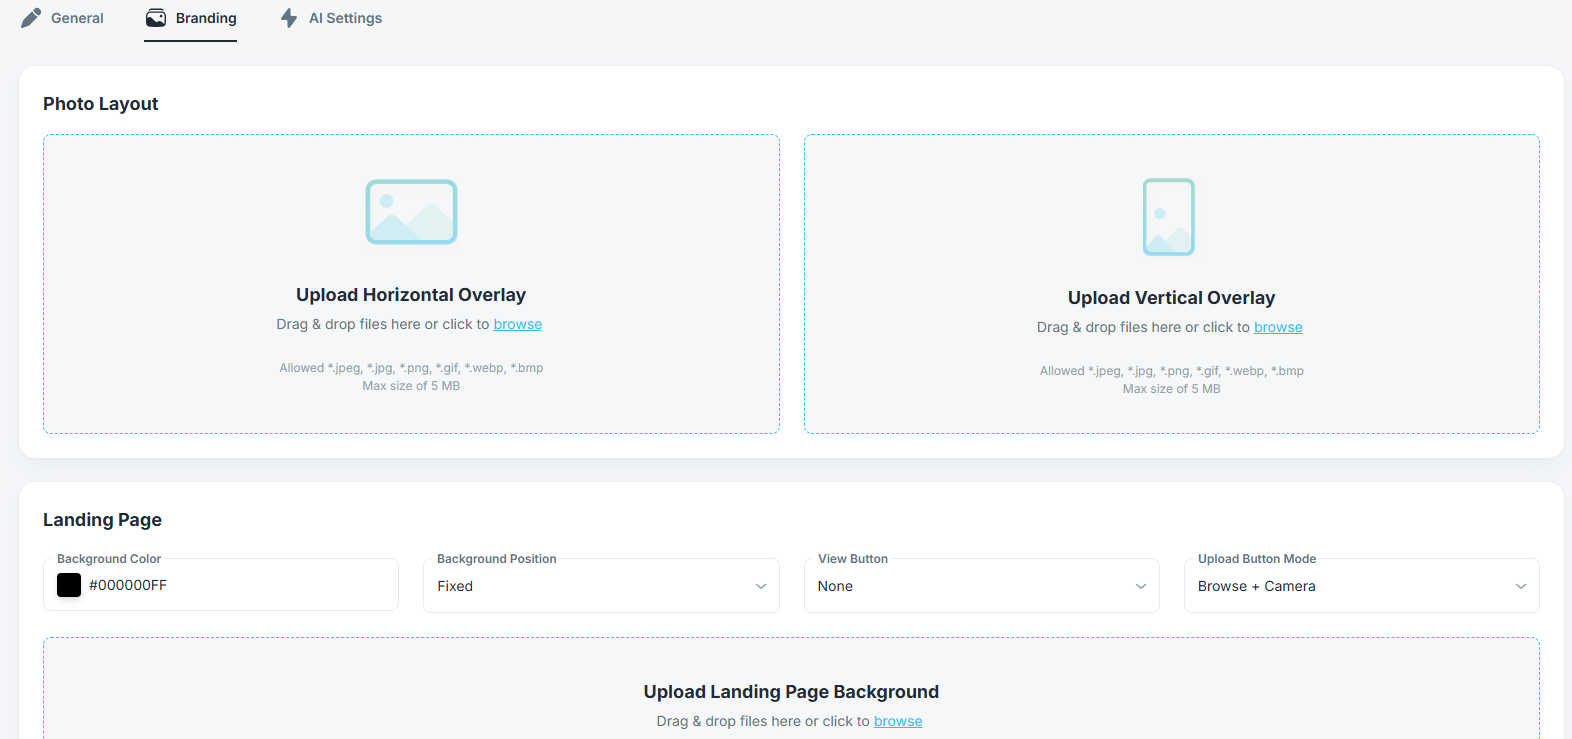
BRANDING TAB
Photo Layout
Upload Horizontal Overlay: upload a horizontal overlay that will be added to each approved photo automatically
Upload Vertical Overlay: upload a vertical overlay that will be added to each approved photo automatically
Landing Page
Background Color: Click the white square to select a background color. Alternatively, enter a hexadecimal color code in the field.
Background Position: Select the position of your background image: Fixed, Stretched, Repeated
View Button: After uploading a photo, you can present an option via a button to the guests.
View Online Gallery: This will open the online gallery on their device and present all uploaded photos
View My Last Upload: Will present the photo that was uploaded. If an AI feature is used, the photo will be shown after the AI has processed the image
None: No button will be displayed
Upload Button Mode: You can select from where a photo is being uploaded by the guest.
Browse + Camera: They can either take a photo with the camera on their device or browse for one that already exists in the photo gallery
Camera Only: A photo can only be uploaded by taking a new one via the device's camera
Upload Landing Page Background: Customize your Landing page by uploading a background image.
Note: If the image is a transparent PNG file, then the selected Background Color will be visible beneath it.
AI SETTINGS TAB
In this tab, you can enable the Selection Screen. If enabled, you can choose between several different AI services or a regular photo. You can also select several/all options and have the guest select the one they want to use. Once they upload their photo/drawing, it will go back to the Selection Screen.
The options are: AI Headshot, AI StylePop, AI Line2Life, AI Face Switch, and a regular photo.
If the Selection Screen is not enabled by default, a regular photo option is selected, meaning no AI will be applied to the uploaded photo.