How To Use the White Label Option
The White Label feature allows Pro Cloud plan users to completely brand the guest experience. By connecting your own custom domain, your online galleries, URLs, and automated sharing emails will reflect your unique business brand instead of a generic Foto Master address.
Requirements
- Pro Cloud plan
- A domain or subdomain you control
- Access to your domain DNS settings
Add Your Domain
- Sign in to your account dashboard at cloud.fotomaster.com.
- Click on your Profile Image / Name in the bottom-left corner of the sidebar menu.
- Select Settings from the pop-up menu.
- Click on the White Label tab at the top of the settings page.
- Click the + New Domain button. An Add new domain modal window will appear.
Configure the following selections inside the modal window:
Gallery domain (Radio Buttons): Choose the specific function for this white label setup:
Select gallery if this domain is intended specifically for hosting your custom web-based user photo galleries.
Select events if this domain is intended for handling underlying sharing flows and system application links.
New domain (Input Field): Type your custom domain or subdomain. Do not add
wwwat the beginning of your domain name (unless explicitly instructed by support) and click Add.
Your domain will appear in the list with a yellow Pending status.
Verify DNS
- Click the three dots (
...) next to your newly added pending domain and select Verify. - A window will pop open displaying 6 unique DNS records (4 CNAME records and 2 TXT records) required to authenticate your custom layouts and email delivery.
- Copy each Host and Data string value exactly as displayed, and paste them into your domain registrar's DNS control dashboard.
- Use the lowest TTL available if your provider asks for one.
- Click Done when finished.
- Return to Cloud and click Verify again.
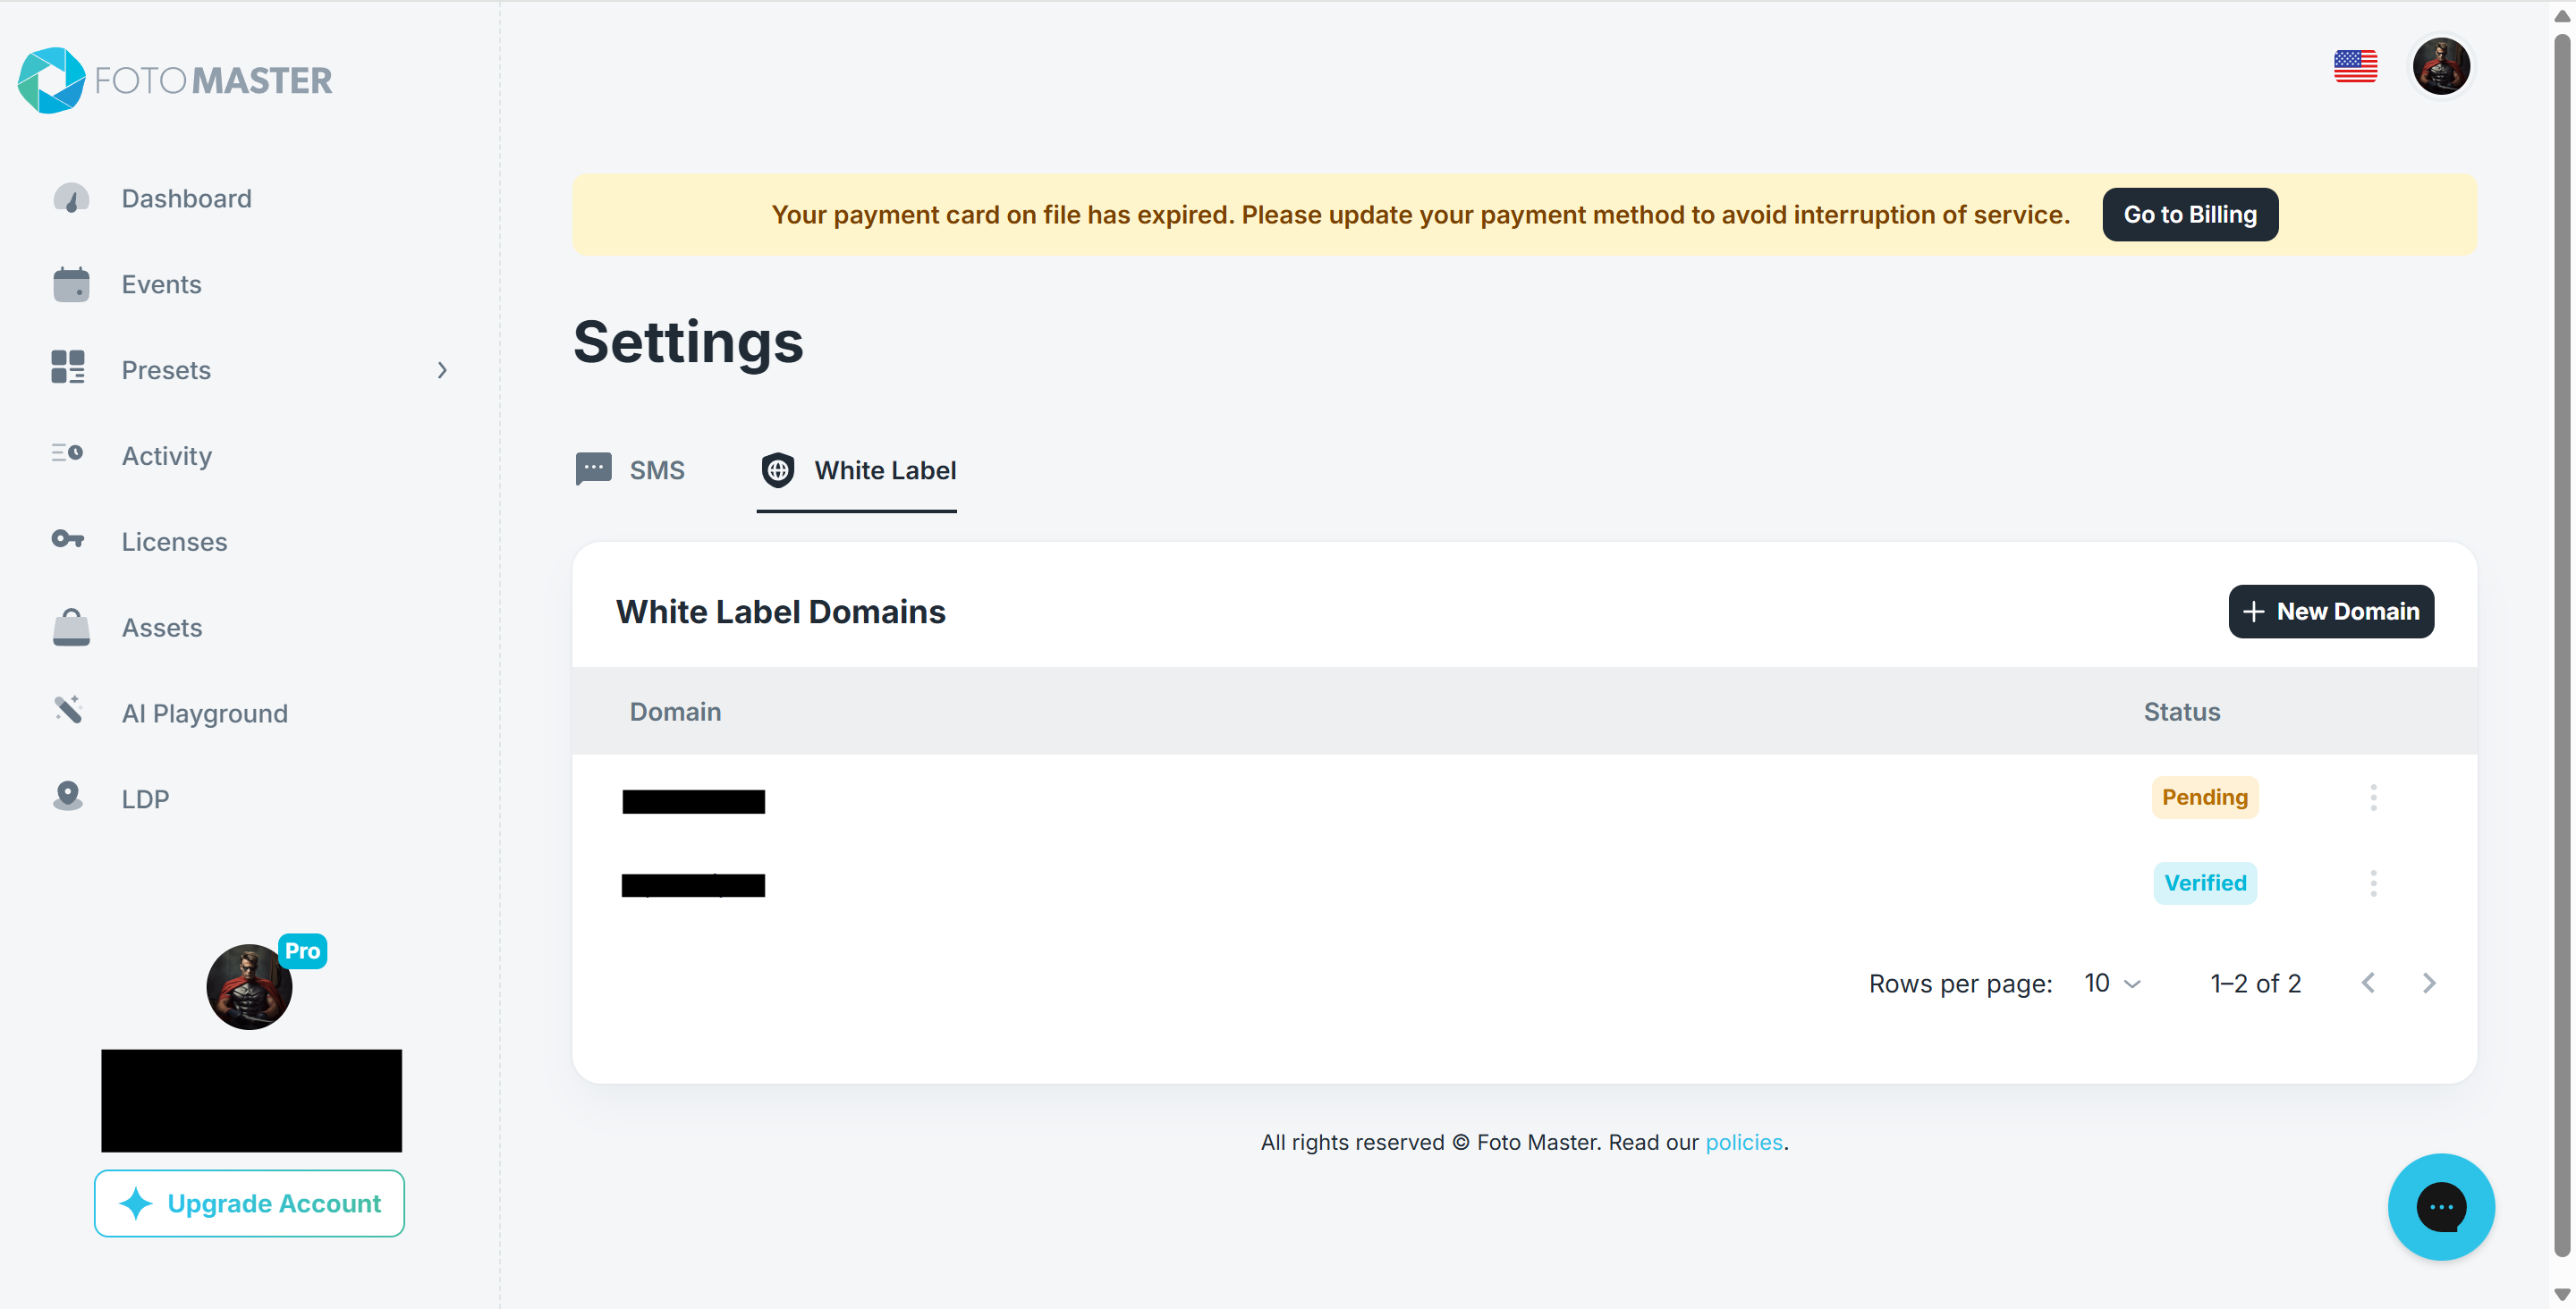
ℹ️ Note on Propagation: DNS changes can take anywhere from a few minutes up to 48 hours to fully apply across the internet. If the system fails verification immediately, wait a short while and click the Verify option again. Once successfully updated, the status indicator will flip to a green Verified badge.Note on Propagation: DNS changes can take anywhere from a few minutes up to 48 hours to fully apply across the internet. If the system fails verification immediately, wait a short while and click the Verify option again. Once successfully updated, the status indicator will flip to a green Verified badge.
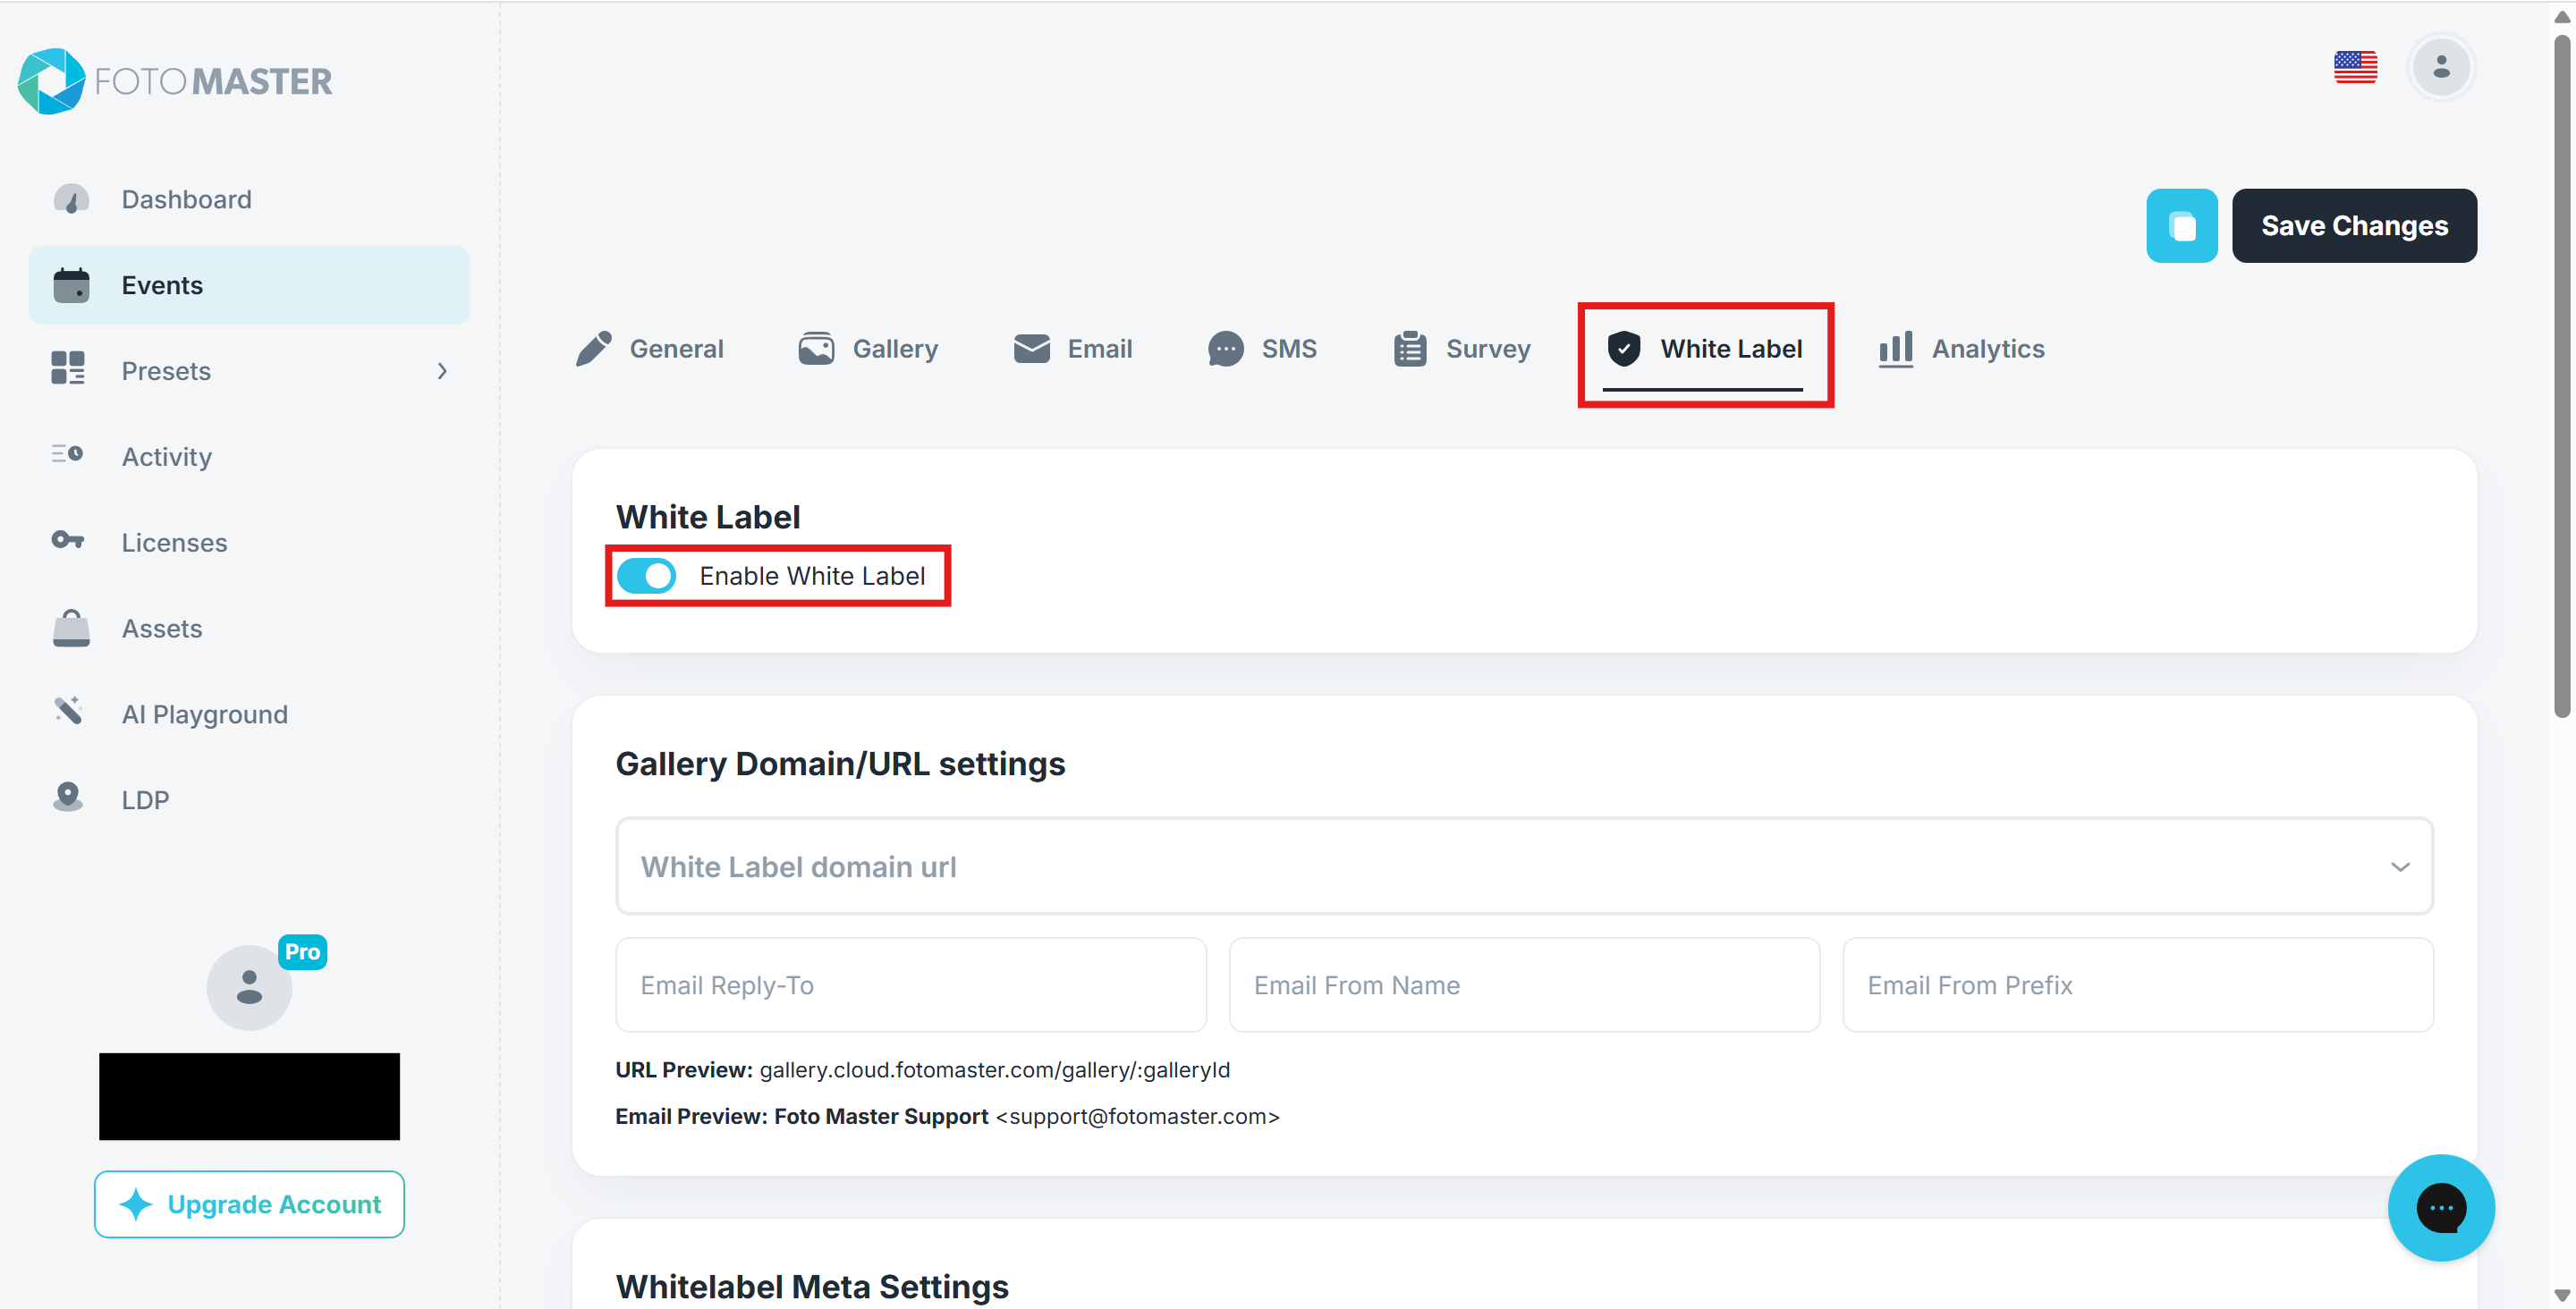
Use White Label On Events
Once your domain shows a green Verified status badge, you must manually turn it on and customize the settings for your specific event.
Navigate to the Events tab on the left sidebar menu.
Click directly on the specific event you wish to brand.
Click on the White Label tab from the horizontal menu choices located inside your event setup dashboard.
Switch the Enable White Label toggle switch to the On (right) position.
Troubleshooting
- Do not add extra
wwwunless the Cloud record specifically asks for it. - Make sure each DNS value is copied exactly.
- Some providers require a trailing dot at the end of CNAME values.
- If verification keeps failing, send support a screenshot of your DNS records and the Cloud verification screen.
Read Next
Was this helpful?
Related articles
Managing Your Cloud Plan: Upgrades, Downgrades, Grace Period, and Cancellation
You can manage your Foto Master Cloud subscription at any time from Cloud > Billing. This article explains how upgrades, downgrades, cancellations, and the grace period work. Vi
Event Settings
Every event in Foto Master Cloud has a comprehensive set of configurable settings that control how your booth operates, how photos are shared, and how the gallery is presented. Thi
Managing Your Event List
Managing Your Event List If you created an event with settings you would like to reuse, you can duplicate it instead of starting from scratch. This is useful when you want to keep
Privacy and Data Handling FAQ for IT, Legal, and Procurement Teams
This page is for the IT, legal, privacy, and procurement teams of organizations evaluating Foto Master products and services before purchase. It is not legal advice. Foto Master pr
Customizing Your Online Gallery
Your online gallery is often the first thing guests see after their booth experience, and it's a direct reflection of your brand. Foto Master Cloud gives you full control over the