Sony Camera to FMX (Windows): Connection GuideUpdated 2 months ago
Sony mirrorless cameras are powerhouses for professional photo booths, offering industry-leading autofocus and crisp image quality. To help you get the most out of your setup, this guide walks you through the essential steps to connect your Sony camera to the FMX app seamlessly. We’ll cover everything from menu settings and driver installation to the final connection test, ensuring your workflow is rock-solid before your first guest arrives.
1. Video Tutorial & Settings
You can start by watching this visual guide for menu settings and port locations:
Power: Switch the camera On.
Connecting the Camera: Once you plug the USB cable into your PC, many newer Sony models will display a menu on the camera screen. Select "Remote Shoot (PC Remote)" from that list.
Manual Menu Path (if the popup doesn't appear):
Newer Models:
Menu>Network>Cnct./PC Remote>PC Remote Function→ On.Older Models:
Menu>Setup>USB Connection→ PC Remote.
2. Physical Connection & Drivers
Connection: Plug your USB-C cable directly into a USB 3.0 or USB-C port on your Windows PC. If your PC requires it, use a high-quality adapter.
Install Sony Drivers: Ensure the latest Sony tethering drivers are installed on your Windows machine:
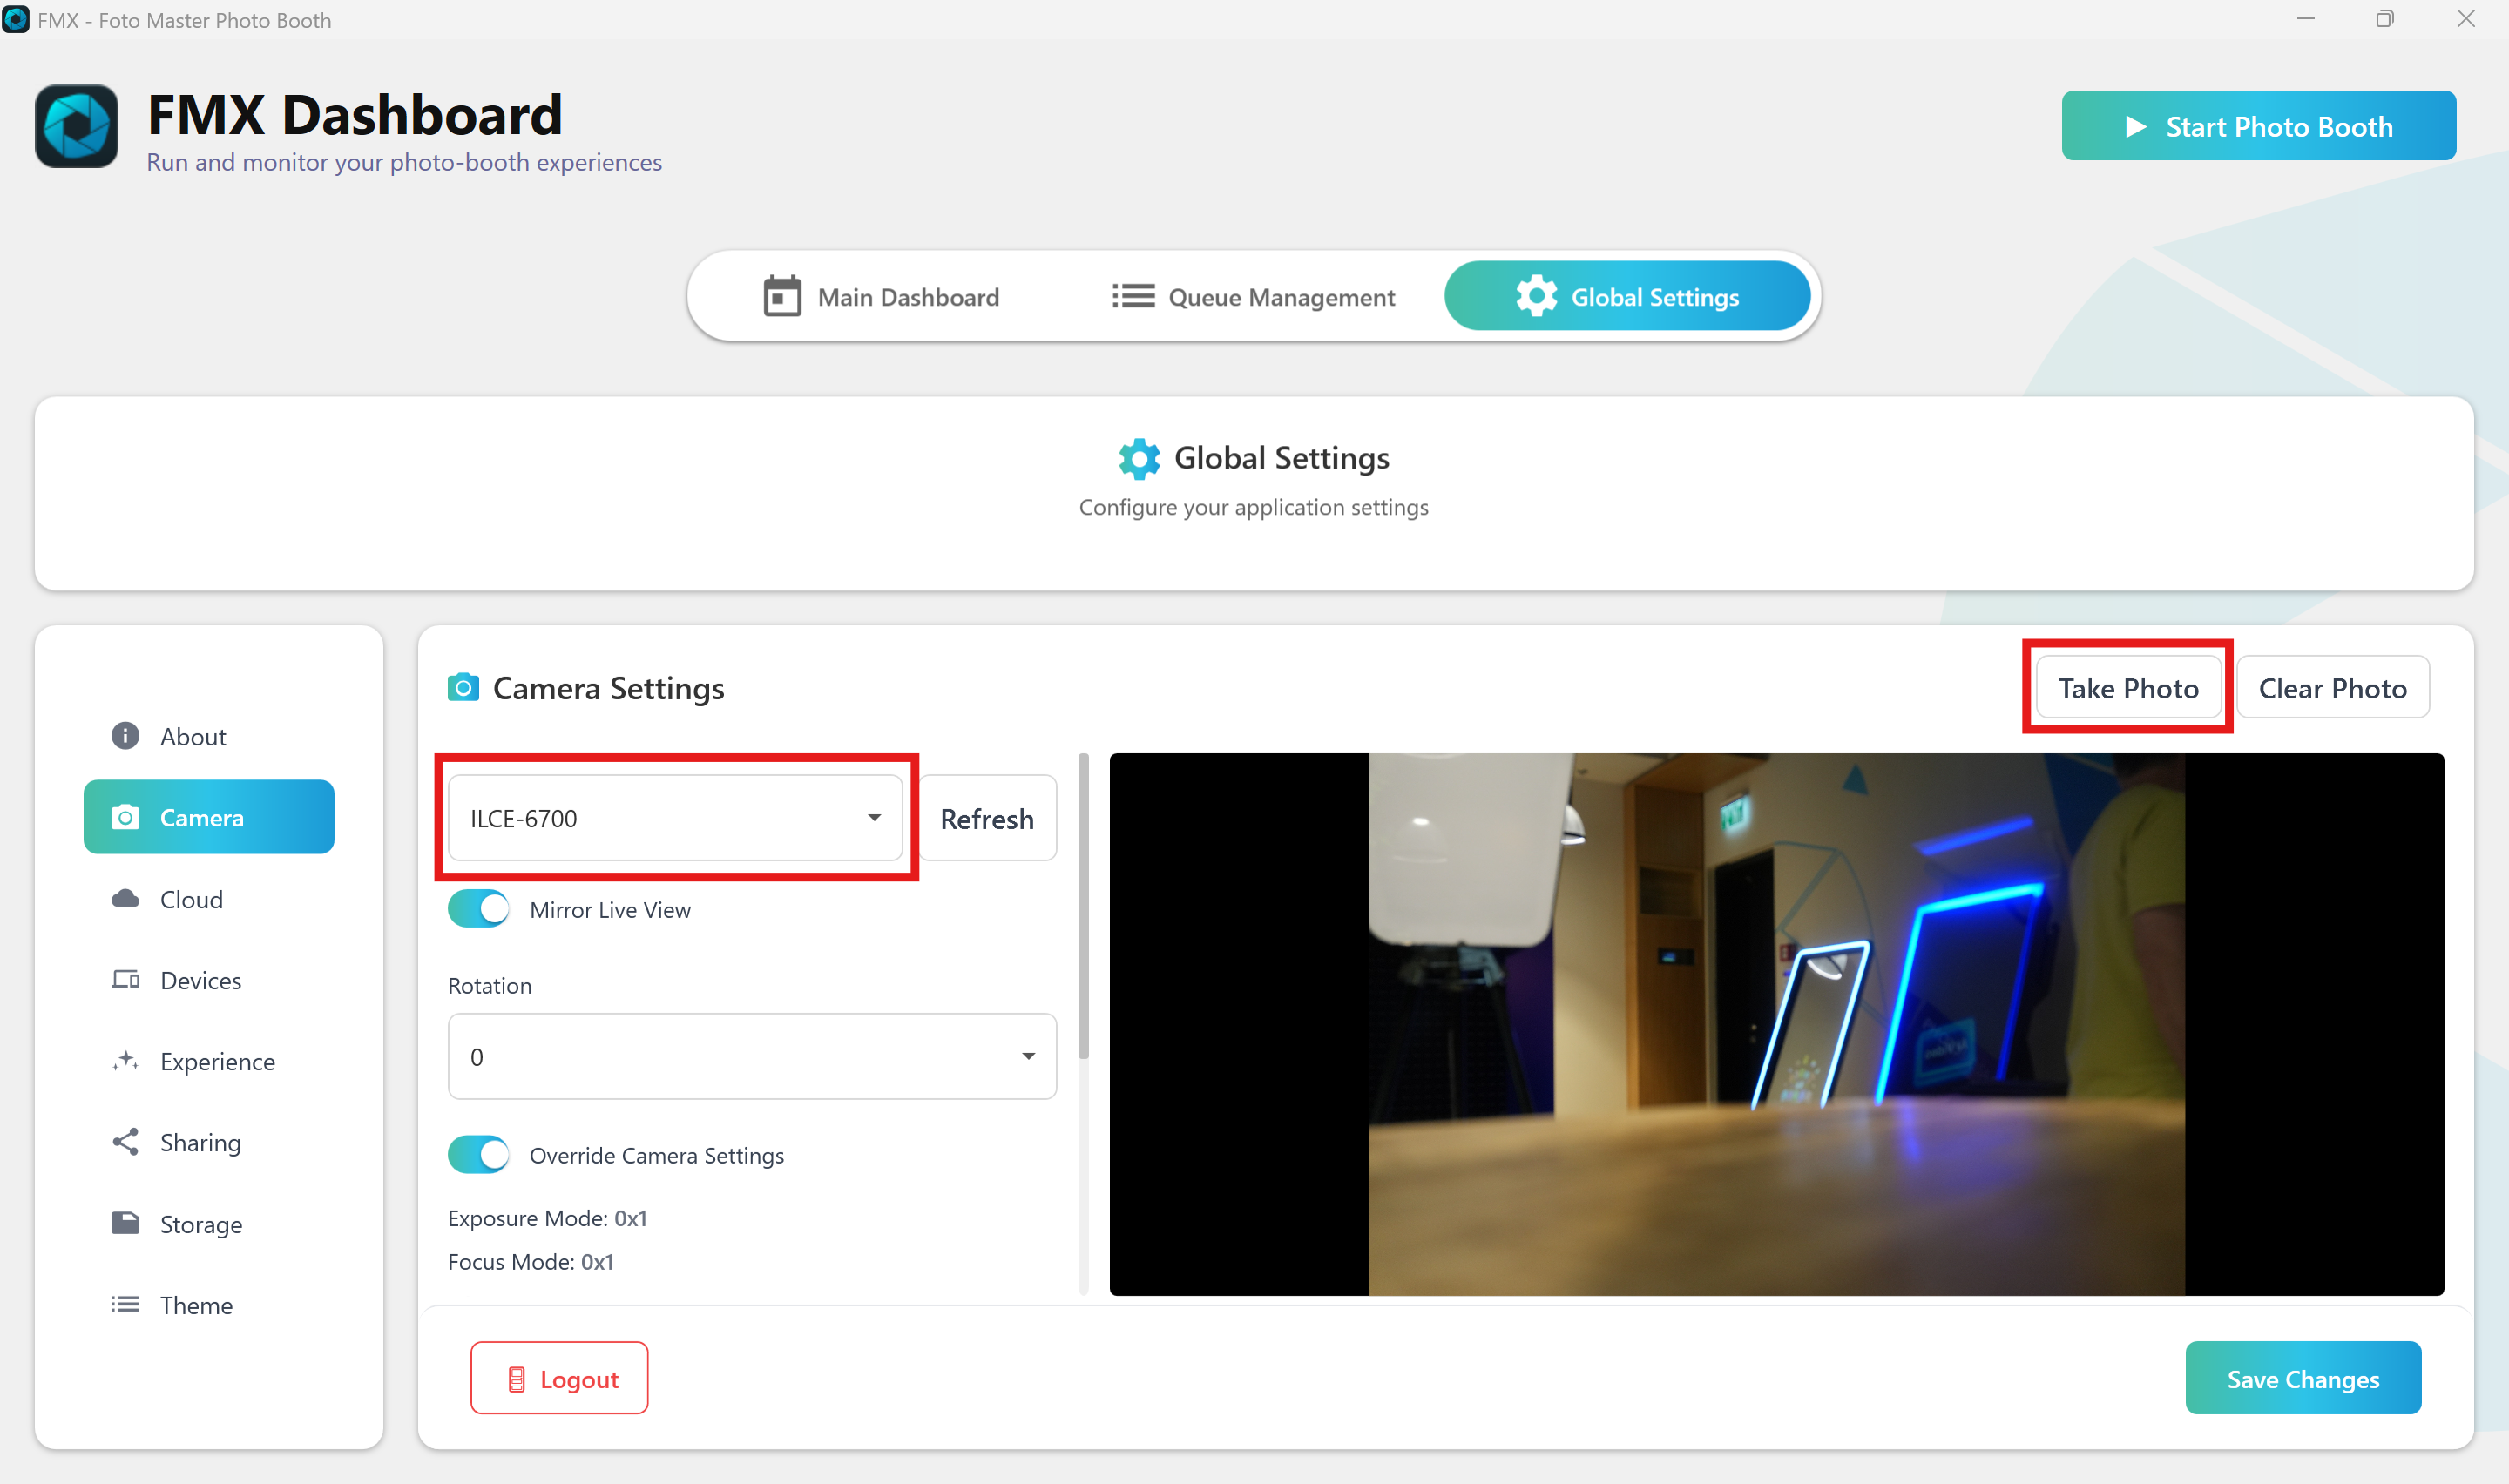
3. Final Result Test (FMX App)
Once the camera is connected, verify it within the FMX Dashboard:
Navigate to Global Settings > Camera.
Select your camera model (e.g., ILCE-6700, ILCE-7M4) from the dropdown menu.
Click Take Photo to verify the trigger and image transfer are working.
If the image appears in the preview window, your setup is complete.
Note: Before testing, make sure to close any other windows that may be using the camera (such as Sony Imaging Edge Desktop, Zoom, or Chrome), as they will prevent FMX from connecting to the device.