
Photo Mosaic Wall Printer Calibration: Epson C4000 (2x2" Tiles)
Legacy Article: This article covers the legacy Photo Mosaic Wall software. Photo Mosaic Wall has been replaced by PMWall. See PMWall documentation →
Hi owners!
In this article, we will teach you how to calibrate your Epson C4000 printer for 2X2 tiles.
1. Download the following:
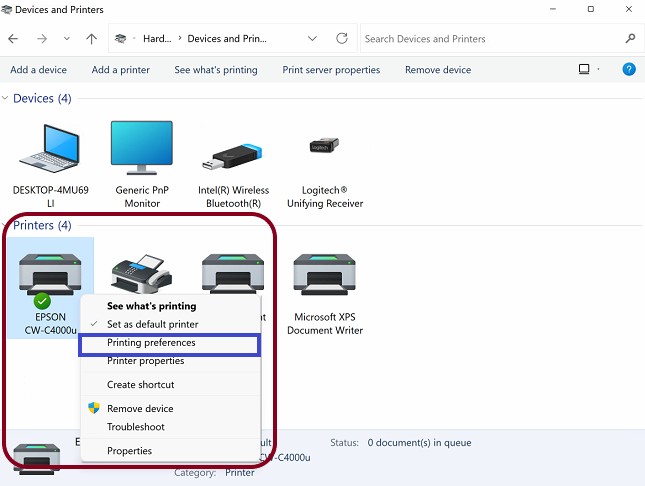
Set up the printer driver by opening “Devices and Printers” from the Windows Control Panel.
2. Right-click on the Epson C4000 printer driver and select “Printing Preferences”
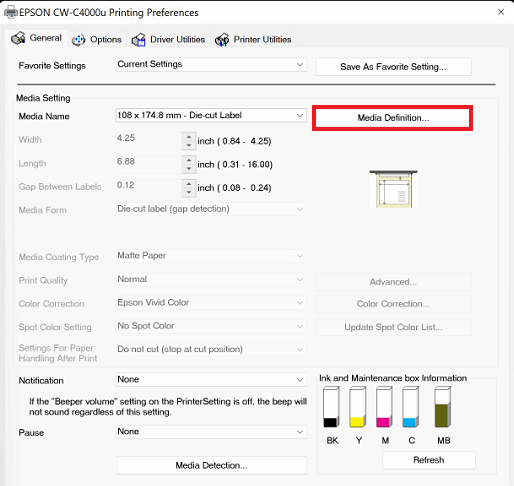
3. Click on “Media Definition”
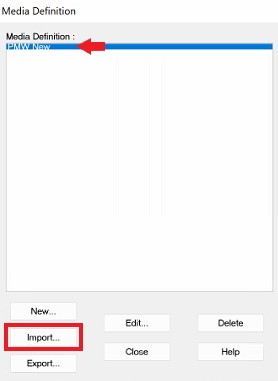
4. Import The “PMW_New”
5. After loading, click "Close". The Media name and definition should look like this:
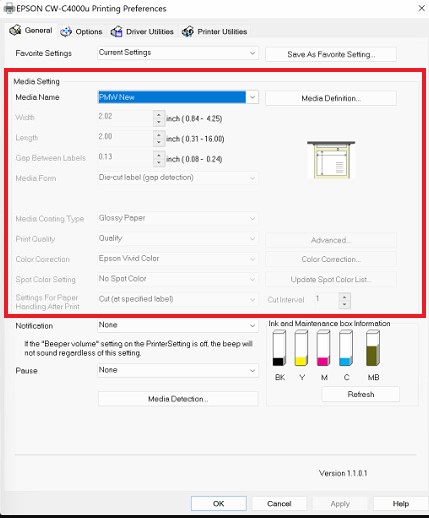
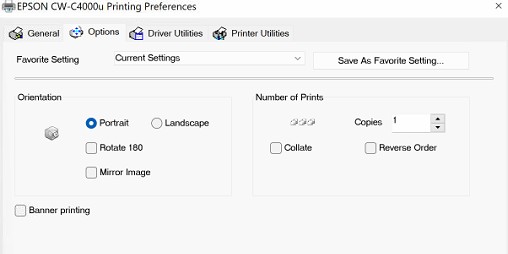
6. Go to the Options tab and uncheck the 'Rotate 180"
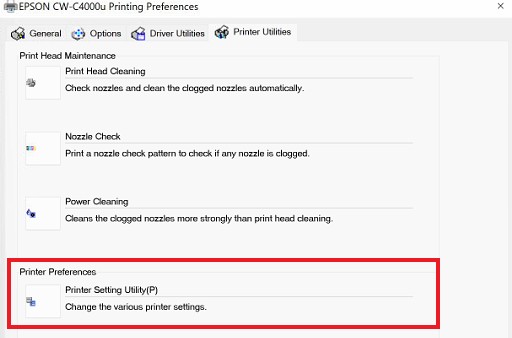
7. Click “Printer utilities” and select “Printer Settings Utility” > "Printer Settings Utility(P)"
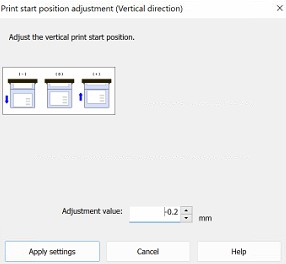
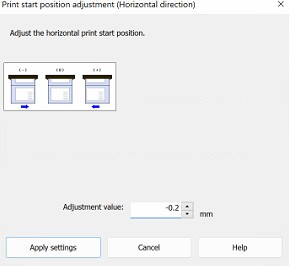
8. In “Position Adjustment”, click on “Print Start Position Adjustment (Vertical Direction) and set it to -0.2
Related articles
Photo Mosaic Wall Software Tutorial (Video)
Note: This article covers the legacy Photo Mosaic Wall software. For the new PMWall, see PMWall Overview and Getting Started. Overview The original tutorial article was video-only
Photo Mosaic Wall Board Stand Setup (Video)
> Note: This article covers the legacy Photo Mosaic Wall hardware. The board stand assembly applies to the physical hardware regardless of software version. Overview The origina
Photo Mosaic Wall Printer and TV Stand Setup (Video)
Note: This article covers the legacy Photo Mosaic Wall hardware. For the new PMWall software, see PMWall Overview. Overview The original article was video/image only with no detail
How to Choose Your Main Mosaic Photo
Note: This article covers the legacy Photo Mosaic Wall software. For the new PMWall, see PMWall Overview. Overview This guide explains the key factors to consider when selecting a
Mosaic Photo Quality
Note: This article covers the legacy Photo Mosaic Wall software. For the new PMWall, see PMWall Overview. Key Quality Metrics Photo mosaic quality depends on two factors: How the F