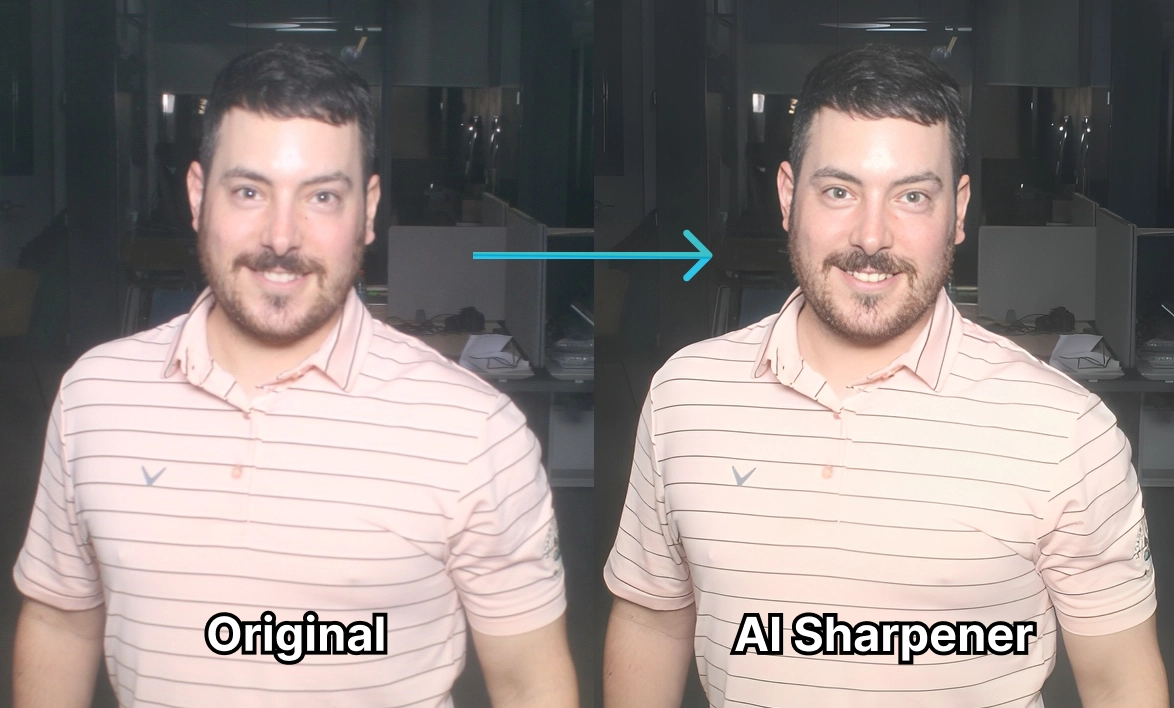
AI Sharpener

Updated Today · 4 min read

AI Sharpener uses artificial intelligence to enhance photo clarity and improve image quality. It goes beyond traditional sharpening tools by intelligently analyzing the image and applying targeted enhancements -- recovering detail from slightly blurry photos, improving low-light shots, and bringing out fine textures that standard sharpening filters cannot rescue.

This is a practical, quality-of-life AI feature that can improve the output of nearly any photo booth workflow.

  • Processing time: ~4 seconds
  • Wow factor: 4/10
  • Best for: Low-light venues, fast-moving subjects, improving overall print quality

What It Does

AI Sharpener analyzes photos and applies intelligent enhancements:

  • Recovers detail from soft or slightly blurry images -- motion blur, slight focus misses, and general softness are reduced
  • Enhances fine textures -- hair, fabric patterns, skin detail, and other textures become clearer and more defined
  • Improves low-light photos -- images shot in dim lighting gain better clarity without amplifying noise
  • Preserves natural appearance -- unlike aggressive traditional sharpening that creates halos and artifacts, AI Sharpener enhances without introducing unnatural visual issues
  • Reduces noise -- low-light photos often have visible grain or noise; the AI reduces this while preserving real detail

When to Use AI Sharpener

AI Sharpener is most valuable in these situations:

Low-Light Conditions

Event venues are often dimly lit -- ballrooms, clubs, outdoor evening events, and conference halls frequently have challenging lighting. AI Sharpener can salvage photos that would otherwise look soft or noisy.

Slightly Blurry Shots

Guests who move during capture, minor focus issues, or camera shake can all produce slightly soft images. AI Sharpener can recover meaningful detail from these situations (though it cannot fix severe motion blur or completely out-of-focus images).

Print-Quality Enhancement

If you are printing photos at the booth, sharpness matters more than for digital-only sharing. AI Sharpener ensures that printed output looks crisp and detailed, especially at larger print sizes where softness becomes more visible.

Pre-Processing for Other AI Features

Running photos through AI Sharpener before applying other AI features (like AI Headshots or AI Cartoons) can improve the final result by giving the downstream AI a cleaner, more detailed input image.

Tip: If you are working in a low-light venue, consider adding AI Sharpener as a default step in your workflow. The improvement is subtle but consistently noticeable, especially in prints.

Automatic vs. Manual Sharpening

AI Sharpener offers two approaches:

Automatic Mode

  • The AI analyzes each image and applies the appropriate level of sharpening based on what it detects
  • No operator intervention needed
  • Best for hands-off, high-volume workflows
  • Produces consistently good results across a variety of image conditions

Manual Mode

  • The operator can adjust sharpening intensity and parameters
  • Fine-tune the enhancement for specific situations
  • Useful when you know your conditions are consistent (e.g., same lighting all day) and want to dial in a specific level
  • Allows you to increase or decrease the AI's enhancement aggressiveness

Tip: Start with Automatic mode. Only switch to Manual if you find the automatic results consistently too strong or too subtle for your specific setup.

Processing Details

  • Processing time is approximately 4 seconds per image
  • Speed mode processes in roughly 2-3 seconds with slightly less refinement
  • Quality and Ultra modes apply more sophisticated enhancement, taking slightly longer but producing more polished results
  • Credit cost is the same regardless of how much sharpening the AI applies
  • Works on all image sizes -- from small social media outputs to high-resolution print files

Tips for Best Results

  • AI Sharpener enhances, it does not fix. It can recover subtle softness and improve clarity, but it cannot turn a severely blurry or out-of-focus photo into a sharp one. Always aim for the best possible capture quality first.
  • Combine with proper lighting. AI Sharpener helps in low light, but better lighting at the source will always produce better final results.
  • Watch for over-sharpening. In Manual mode, pushing the intensity too high can introduce artifacts. If skin starts to look overly textured or edges appear unnaturally crisp, reduce the setting.
  • Best results on faces. The AI is particularly good at enhancing facial detail -- eyes, hair, and skin texture all benefit noticeably.
  • Works well in chains. Place AI Sharpener early in your workflow pipeline so downstream features benefit from the improved image quality.


Was this helpful?

Related articles