
How to Set Up AI Background Removal for PMWall
AI features for PMWall are available through AI Hot Folder. Setting up AI Background Removal takes two parts: set up AI Hot Folder to process guest photos, then set up PMWall to place the processed photos on the mosaic.
Note: This process is the same whether you are doing a mass upload of images or a single file upload.
Part 1: Set Up AI Hot Folder
- In your Foto Master Cloud account, open the event you are working on and enable AI Hot Folder for that event. This makes the event appear in AI Hot Folder.
- Launch AI Hot Folder and sign in with your Foto Master Cloud account.
- On the Dashboard tab, select the event you enabled in step 1.
- Choose the folder AI Hot Folder should watch. This is the folder where your booth saves guest photos. If you are doing a mass upload, this is the folder where you placed all of the photos you want to use for the mosaic.
- Open the AI Config tab and select Background Removal.
Note: Do not click Start yet. You will start AI Hot Folder after completing Part 2.
Part 2: Set Up PMWall
- Open PMWall and sign in with your Foto Master Cloud account.
- Select the name of the event you are working on and sync the event to your computer.
- Make sure the event name in PMWall matches the event you selected in AI Hot Folder.
- Click the Settings tab at the top of the PMWall Dashboard.
- In the left menu, click Cloud.
- Under Download, turn off Download Raw Photos. This keeps the original photos, with their backgrounds, off the mosaic.
- Turn on Download Final Photos. This sends the Background Removal photos from AI Hot Folder to the mosaic.
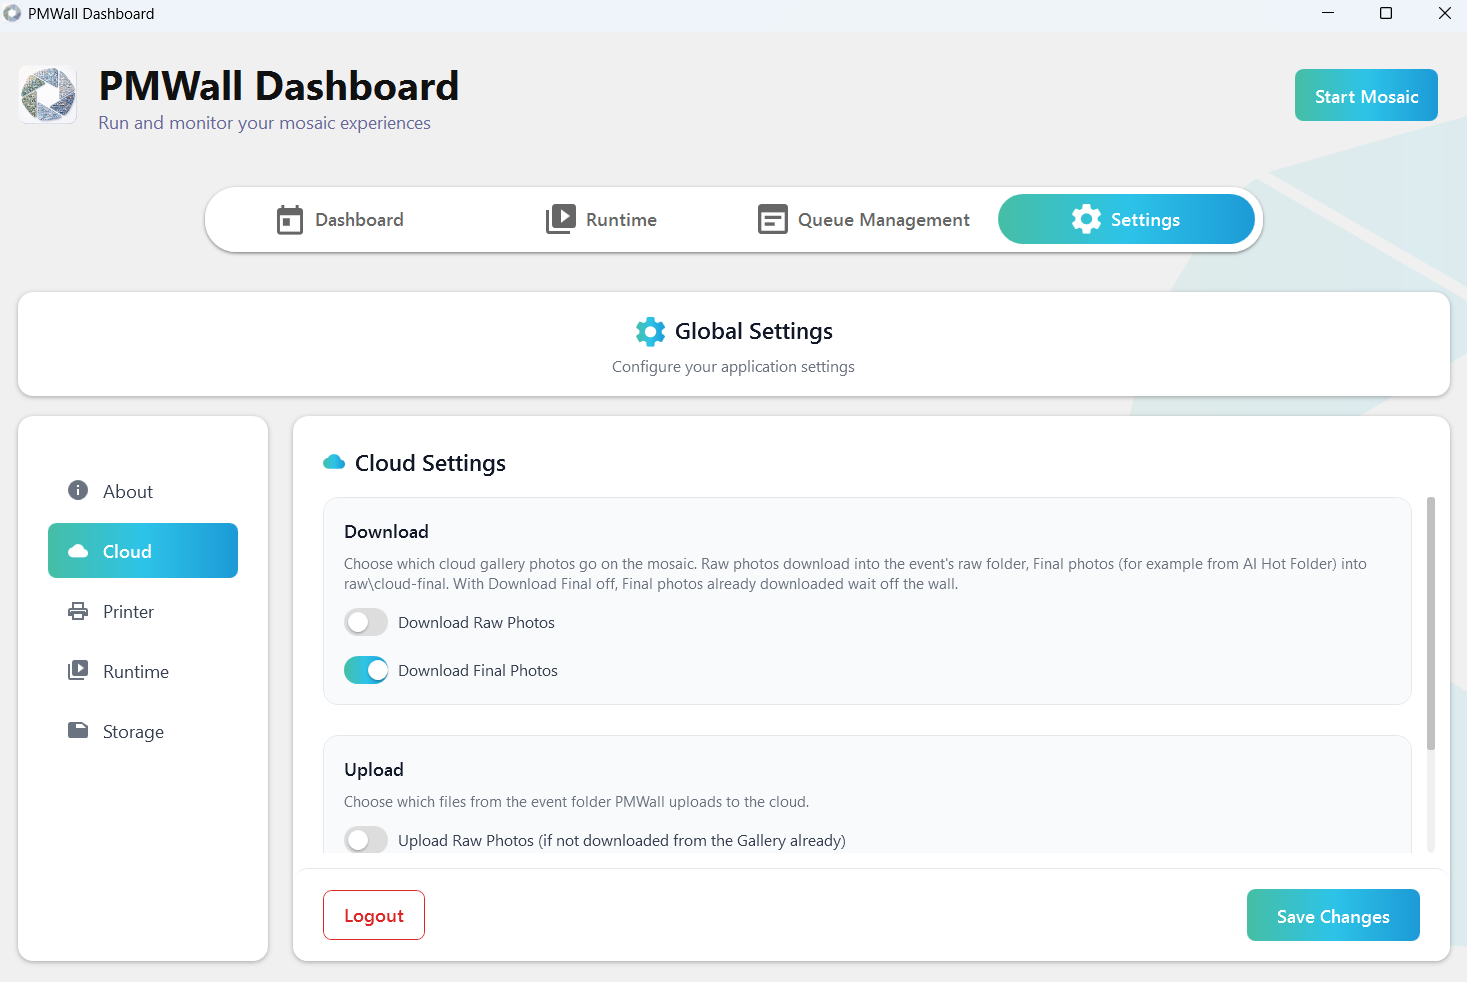
- Click Save Changes.
- Click Start Mosaic.
- Go back to AI Hot Folder and click Start to begin monitoring.
Test the setup by taking a photo at the booth and confirming it appears on the mosaic with the background removed.
Note: Once this setup is complete, open the PMWall Events folder and then the event's Raw folder. You will see a new folder called cloud-final, which contains the Background Removal photos downloaded from AI Hot Folder.
Possible issues:
- The event does not appear in AI Hot Folder: Make sure AI Hot Folder is enabled for that event in your Foto Master Cloud account.
- Photos appear with their original background: Make sure Download Raw Photos is turned off in PMWall.
- Processed photos do not appear on the mosaic: Make sure Download Final Photos is turned on and that you clicked Save Changes. With Download Final Photos off, Final photos that were already downloaded wait off the wall.
- Photos show as Failed in AI Hot Folder: Check the internet connection, then retry the failed items from the Queue tab.
- No photos arrive at all: Confirm that the event name in PMWall matches the event selected in AI Hot Folder.
And you're good to go!
Was this helpful?
Related articles
Creating a PMWall Print Board File for Your Print House
Use the PMWall Print Board generator when your event needs a physical board with printed tile cells. The board PDF is created from the same grid settings used by the PMWall templat
PMWall (Photo Mosaic Wall) Overview
PMWall is Foto Master's next-generation Photo Mosaic Wall software for Windows. It transforms individual guest photos into tiles that are intelligently placed into a large-scale mo
PMWall Licensing and Activation
PMWall licenses are managed in Foto Master Cloud and activated on a specific computer. This article covers signing in, activating, and checking license status. Sign In PMWall opens
Migrating from Legacy Photo Mosaic Wall to PMWall
PMWall replaces the legacy Photo Mosaic Wall software. If you have run mosaic activations before, most of your experience carries over -- the same main image, grid, blending, and m
Syncing Cloud Gallery Photos to a PMWall Mosaic Event
PMWall can pull media from a Foto Master Cloud event gallery into the selected mosaic event. Use this when photos already exist in the Cloud gallery and you want them to appear in