
Photo Mosaic Wall Printer Calibration: Epson C3500 (2x2" Tiles)
Overview
Required Downloads
- TM-C3500 Firmware Updater -- Essential update that must be installed first
- Epson C3500 Driver V2.3 -- Printer driver software
- PMW_2 Media Definition -- Media configuration file for proper tile printing
Calibration steps:
- Download and install the latest Firmware: TM-C3500 Firmware Updater
- Open up the Color Cartridges chamber and remove the rubber protector of the DSW
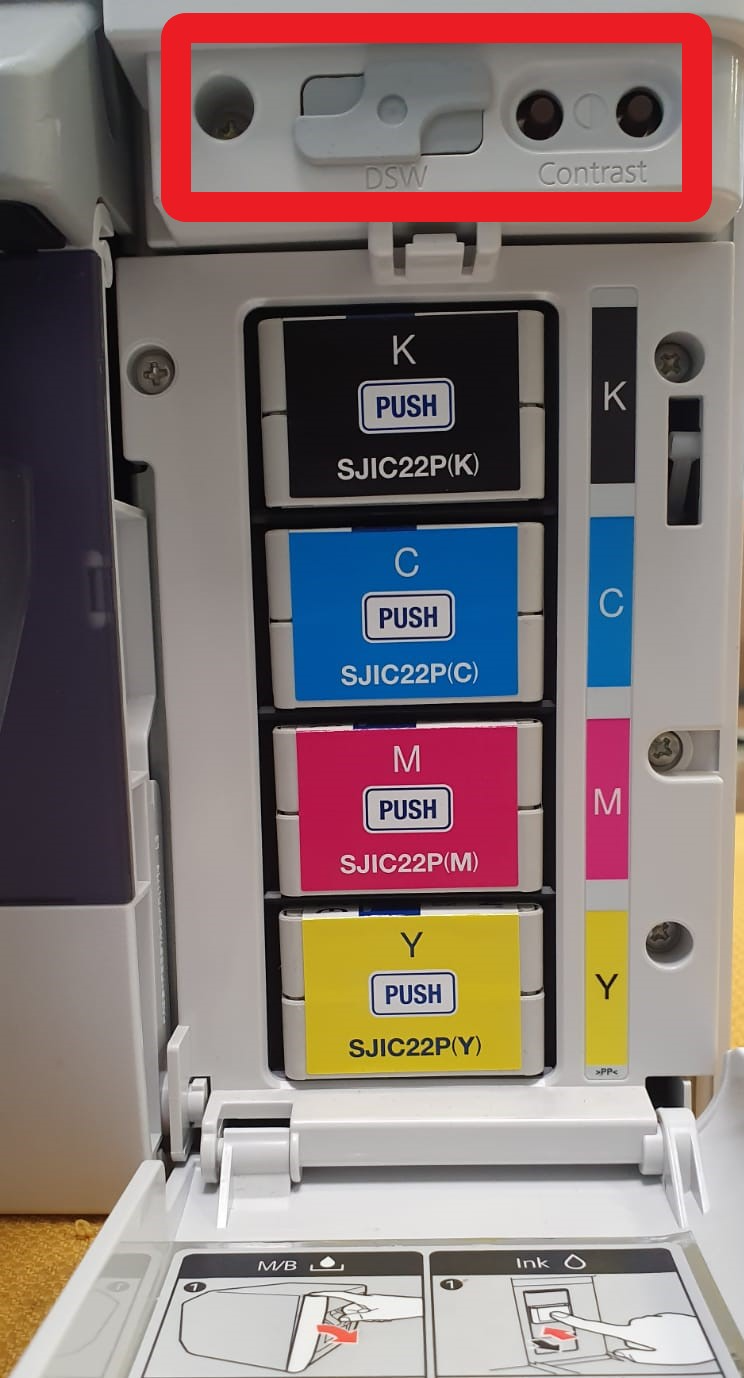
- Download and install: Epson C3500 Driver V2.3
- Download PMW_2 Media Definition
Set up the printer's driver by opening “Devices and Printers” from the Windows Control Panel.
- Right-click on the Epson C3500 printer driver and select “Printing Preferences”
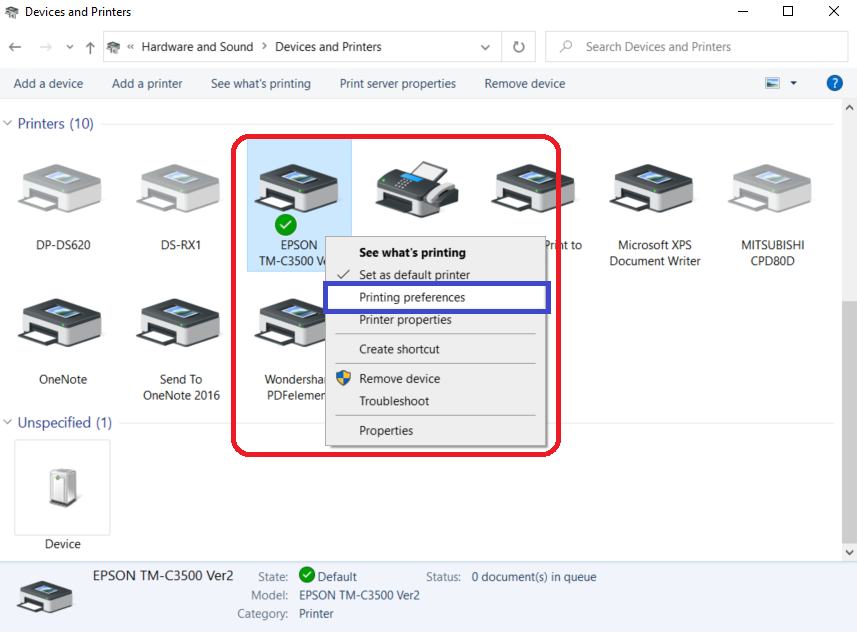
- go to the Driver Utilities tab -> Driver Preferences and change the measurement unit from mm to inch.
- go back to General tab and Click on “Media Definition”
- Import The “PMW_2.xml”
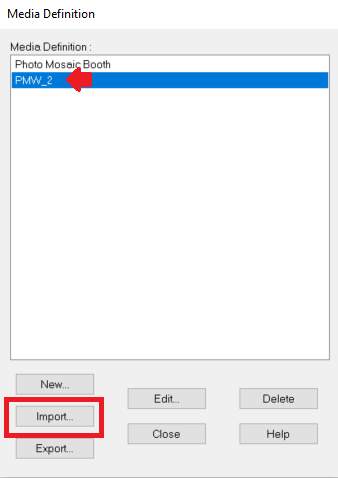
- After Loading click "Close". The Media name and definition should look like this:
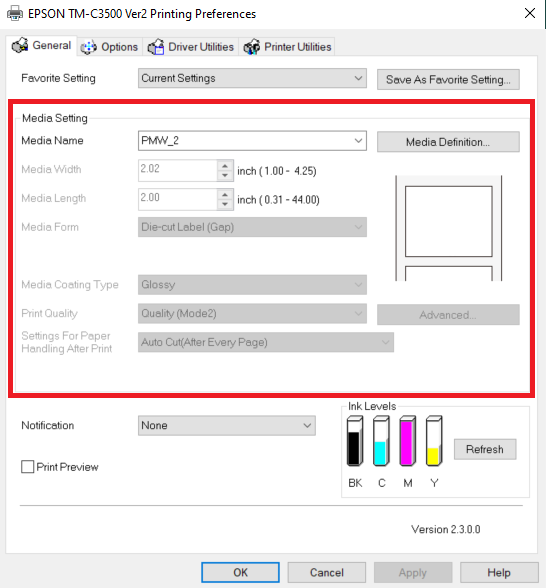
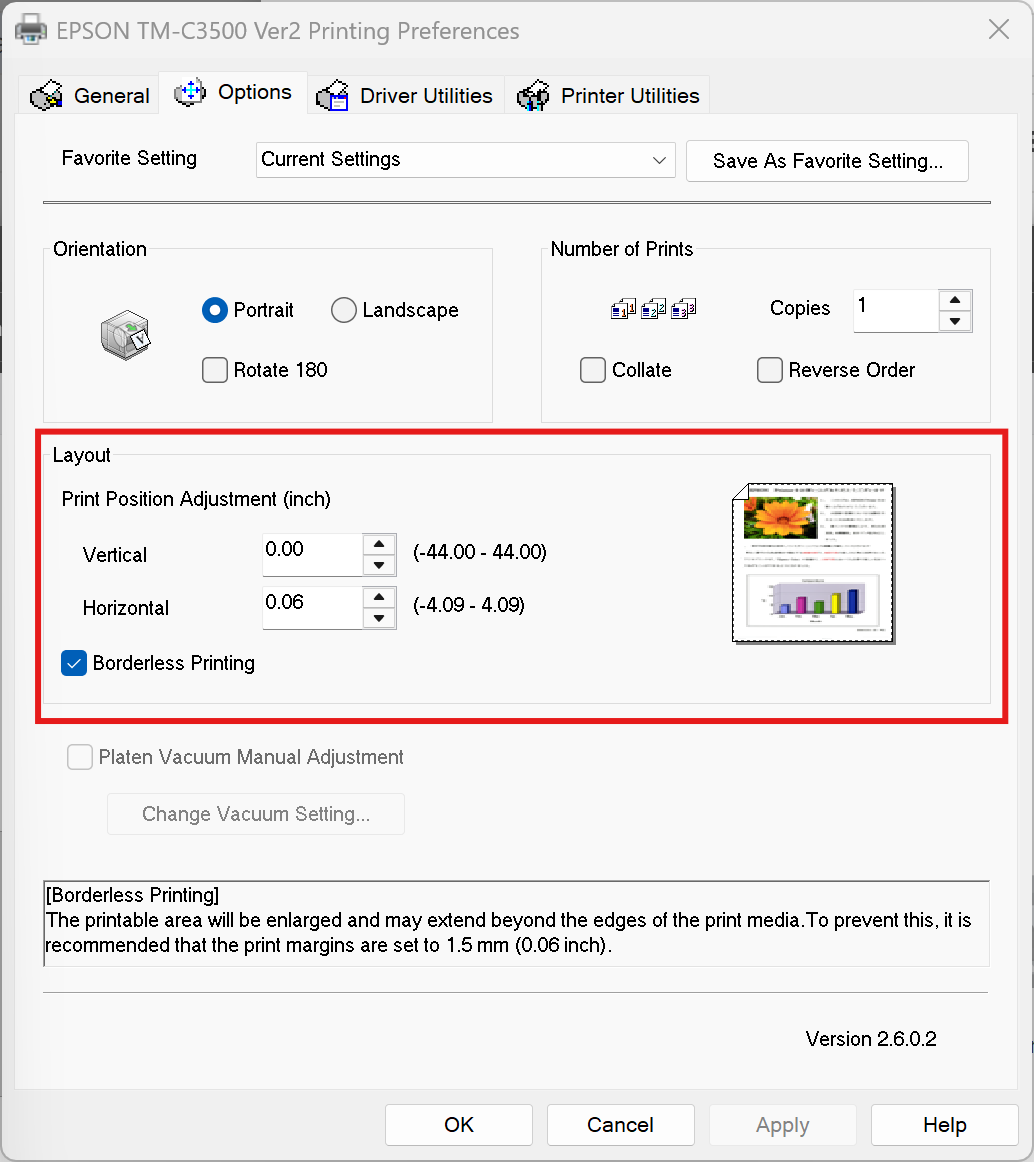
- Go to the Options tab and adjust the print position “Horizontal 0.06”. Make sure the "Borderless Printing" box is checked.
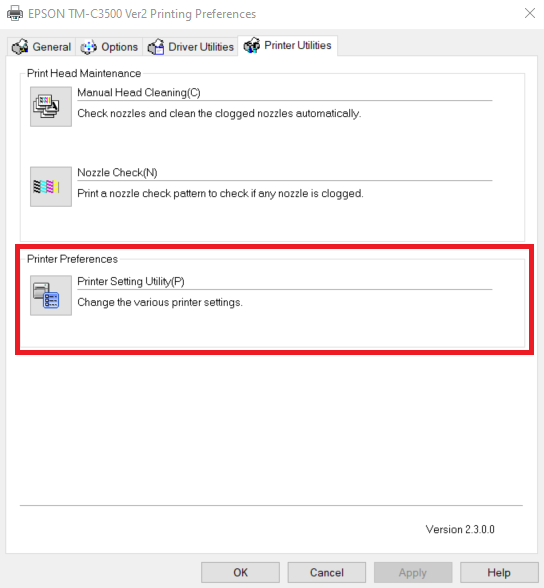
- Click “Printer utilities” and select “Printer Setting Utility” > "Printer Settings Utility(P)"
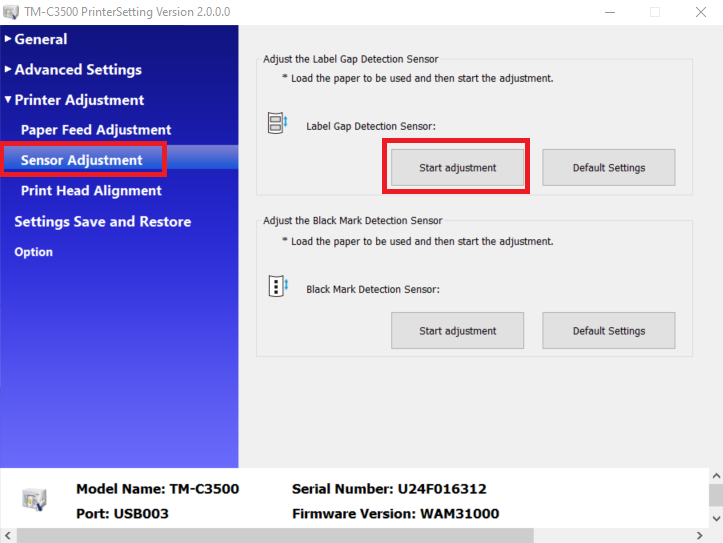
- Run Label Gap detection adjustment:
- Click “Paper Feed Adjustment
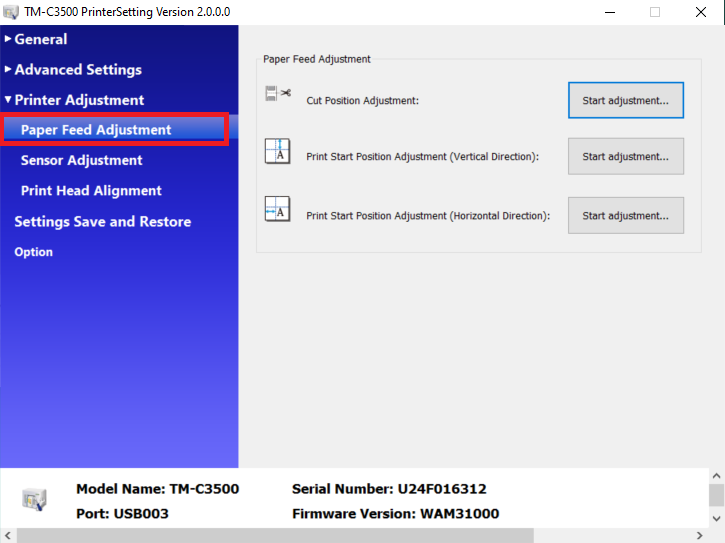
- Click “Print Start Position Adjustment (Vertical Direction) and set to -2
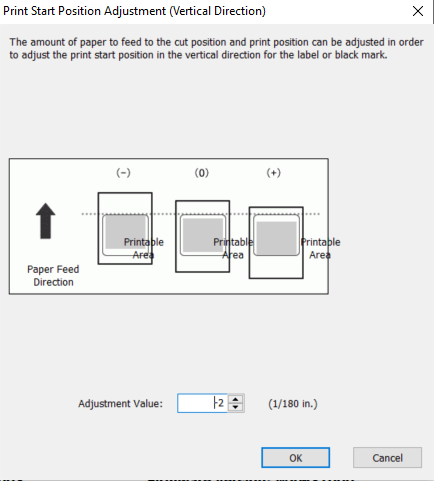
- Open “Print Start Position Adjustment (Horizontal Direction) and set to -4
Was this helpful?
Related articles
PMWall (Photo Mosaic Wall) Overview
PMWall is Foto Master's next-generation Photo Mosaic Wall software for Windows. It transforms individual guest photos into tiles that are intelligently placed into a large-scale mo
PMWall Licensing and Activation
PMWall licenses are managed in Foto Master Cloud and activated on a specific computer. This article covers signing in, activating, and checking license status. Sign In PMWall opens
Migrating from Legacy Photo Mosaic Wall to PMWall
PMWall replaces the legacy Photo Mosaic Wall software. If you have run mosaic activations before, most of your experience carries over -- the same main image, grid, blending, and m
PMWall Dashboard & Runtime
PMWall has four tabs: Dashboard, Runtime, Queue Management, and Settings. This article covers the first two, which is where you spend an event. Start Mosaic sits in the window head
PMWall Queue Management and Moderation
The Queue Management tab monitors upload, download, and moderation activity for the selected event. It is where you go when photos are not appearing on the wall, and where you appr