
How to Set Up AI Background Removal, Face Cut Out, and AI Modify for PMWall
AI Background Removal, Cut Out, and AI Modify are built directly into PMWall. Set up the AI feature in the PMWall Cloud settings, and PMWall applies it to every new photo before placing it on the mosaic.
Set Up PMWall
- Open PMWall and sign in with your Foto Master Cloud account.
- Select the name of the event you are working on and sync the event to your computer.
- Click the Settings tab at the top of the PMWall Dashboard.
- In the left menu, click Cloud.
- Under AI Filtering (global), turn on Apply AI Filters.
- Open the AI Service dropdown and select the AI feature you want to use: Background Removal, Cut Out, or AI Modify.
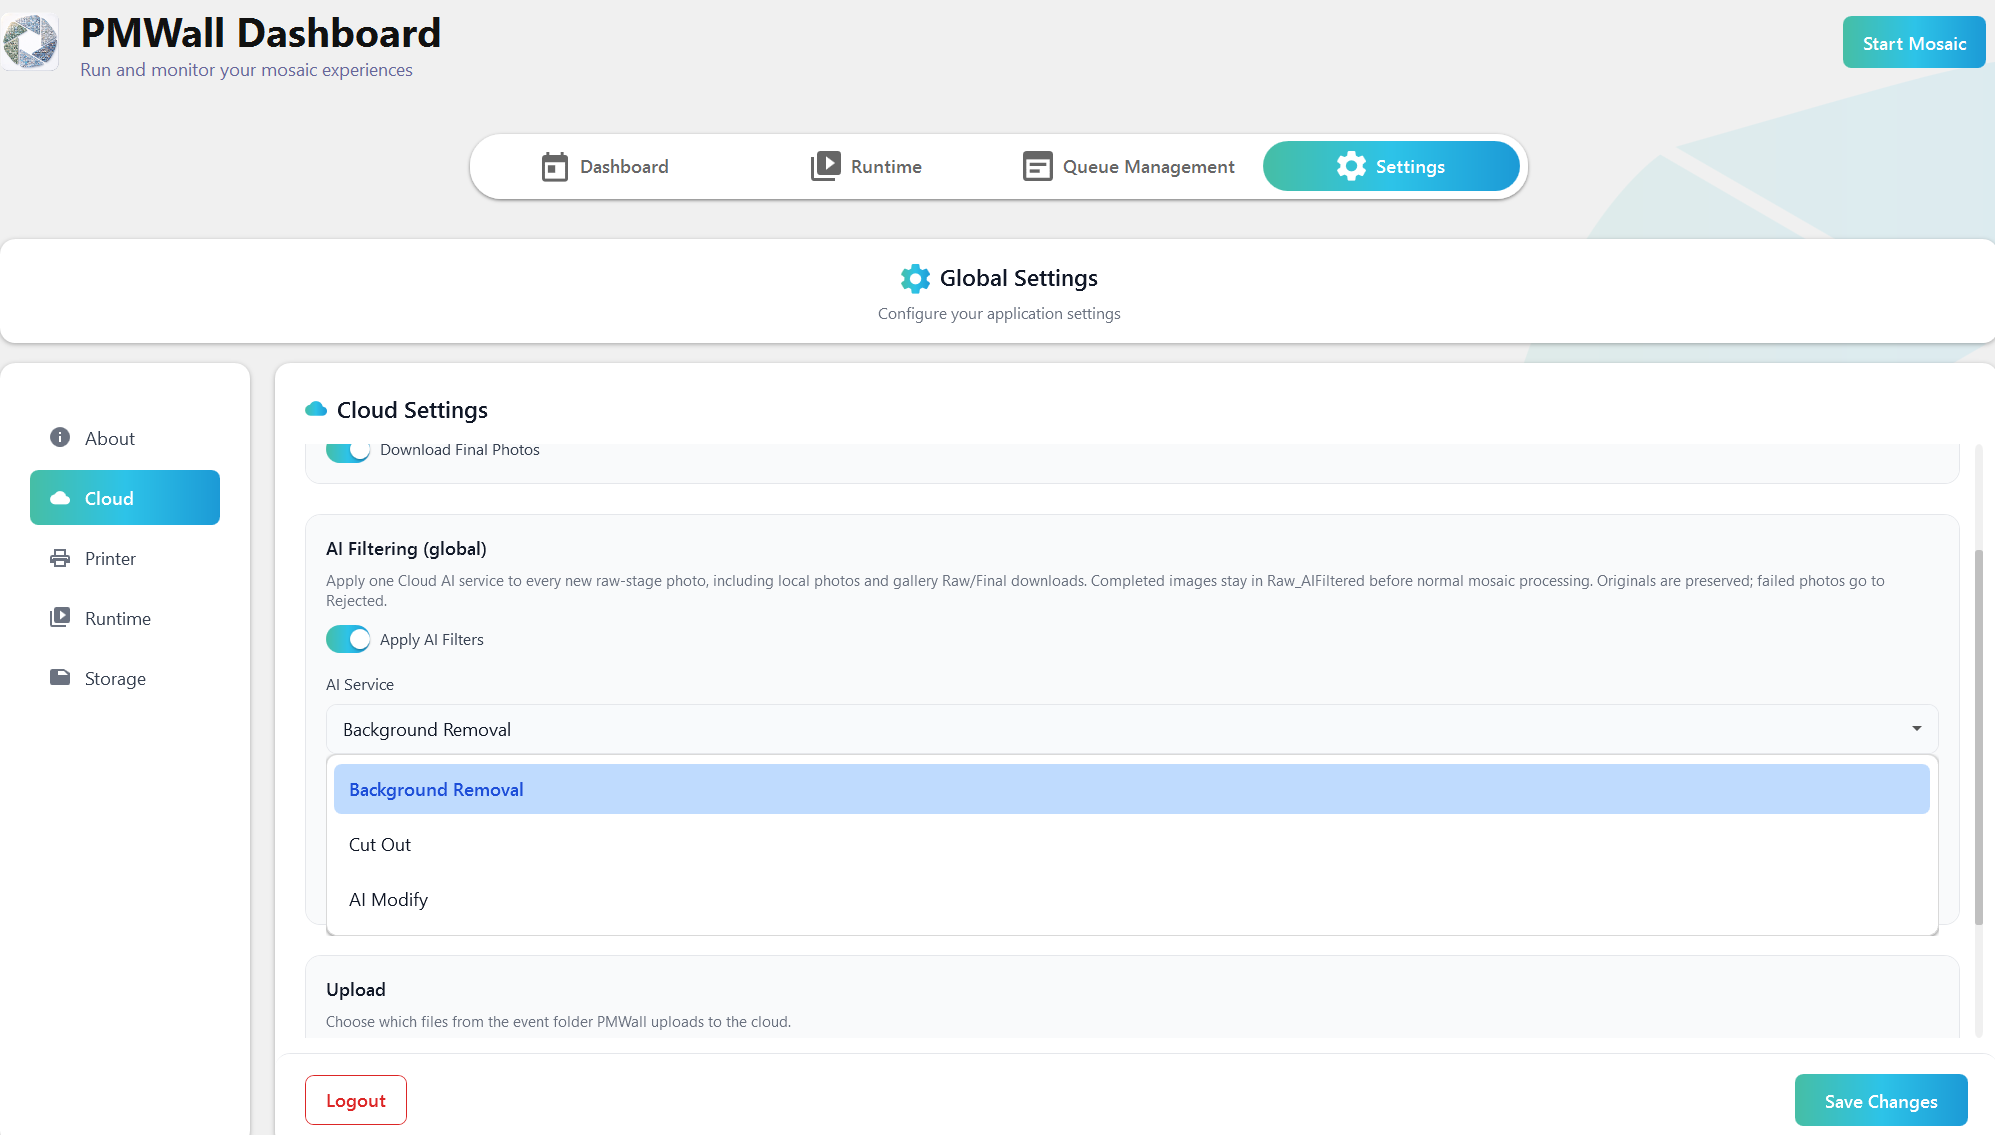
Note: PMWall applies one AI service at a time to every new photo, including local photos and photos downloaded from the gallery.
- Click Save Changes.
- Click Start Mosaic.
Test the setup by taking a photo at the booth and confirming it appears on the mosaic with the AI feature applied.
Note: Completed AI images are kept in the Raw_AIFiltered folder before they are placed on the mosaic. Your original photos are preserved, and any photos that fail AI processing are moved to Rejected.
Possible issues:
- Photos appear without the AI feature applied: Make sure Apply AI Filters is turned on, the correct AI Service is selected, and that you clicked Save Changes.
- Photos do not appear on the mosaic: Photos that fail AI processing are moved to Rejected. Check the internet connection, then open the Queue Management tab to see the status of the photo.
Branding with Virtual Mosaic
Virtual Mosaic is the online, interactive version of a PMWall mosaic. Virtual Mosaic branding supports two options: the Mosaic Tile Popup and the new Original Image Popup.
Mosaic Tile Popup:
If you plan on showing the mosaic tile popup, the default settings are all you need. No changes are required in PMWall.
Original Image Popup:
For the Original Image Popup to work, the following settings must be turned on in PMWall under Settings > Cloud:
- Download Raw Photos.
- Download Final Photos.
- Upload Raw Photos (if not downloaded from the Gallery already).
- Upload Mosaic Tiles (Virtual Mosaic).


After turning on these settings, click Save Changes.
And you’re good to go!
Was this helpful?
Related articles
PMWall (Photo Mosaic Wall) Overview
PMWall is Foto Master's next-generation Photo Mosaic Wall software for Windows. It transforms individual guest photos into tiles that are intelligently placed into a large-scale mo
PMWall Licensing and Activation
PMWall licenses are managed in Foto Master Cloud and activated on a specific computer. This article covers signing in, activating, and checking license status. Sign In PMWall opens
Migrating from Legacy Photo Mosaic Wall to PMWall
PMWall replaces the legacy Photo Mosaic Wall software. If you have run mosaic activations before, most of your experience carries over -- the same main image, grid, blending, and m
PMWall Dashboard & Runtime
PMWall has four tabs: Dashboard, Runtime, Queue Management, and Settings. This article covers the first two, which is where you spend an event. Start Mosaic sits in the window head
PMWall Queue Management and Moderation
The Queue Management tab monitors upload, download, and moderation activity for the selected event. It is where you go when photos are not appearing on the wall, and where you appr