
Selfie Wi-Fi: Getting Started
This guide walks you through setting up Selfie Wi-Fi for your first event, from Cloud configuration to having guests snap photos on their phones.
Prerequisites
- Foto Master Cloud account (Basic or Pro recommended for galleries)
- AI credits (if using AI services)
- A display screen or printed QR code for the venue
- The Selfie Wi-Fi companion app is installed on a Windows PC (for slideshow and printing)
- Wi-Fi network at the venue (guests need internet access)
Step 1: Create Your Event
- Log in to cloud.fotomaster.com
- Navigate to Events and click Create Event
- Set the event name, date, time, and duration
- Save the event
Step 2: Enable Selfie Wi-Fi
- Open your event and go to the Selfie-Wifi tab
- Toggle Enable Selfie Wi-Fi to on
- Configure the key settings:
Step 3: Configure Selfie Wi-Fi Template
Use this article to learn how to create a Selfie Wifi template. In the template itself, you can:
Choose AI Services
Select which experiences guests can choose from:
- Regular Photo -- Standard upload with optional overlay
- AI Headshot -- AI-generated professional portraits
- AI Style Pop -- Character-driven stylized artwork
- AI Draw Me -- AI sketch from photo
- AI Line2Life -- Line art to full-color
- AI Face Switch -- Face replacement
- AI Combine -- Multi-element composition
Tip: Start with 2-3 services rather than enabling all of them. Too many choices can slow down the guest experience. AI Headshot and Style Pop are the most popular.
Configure Upload Settings
- Upload Button Mode -- Choose "Both" to let guests use their camera or browse their gallery
- View Button -- Choose whether guests see "View Online Gallery", and/or "View My Last Upload", and/or "Upload Another Photo" after success
Post-Upload Guest Flow
You can customize the guest's journey after they capture their photo using the toggles in the Landing Page tab.
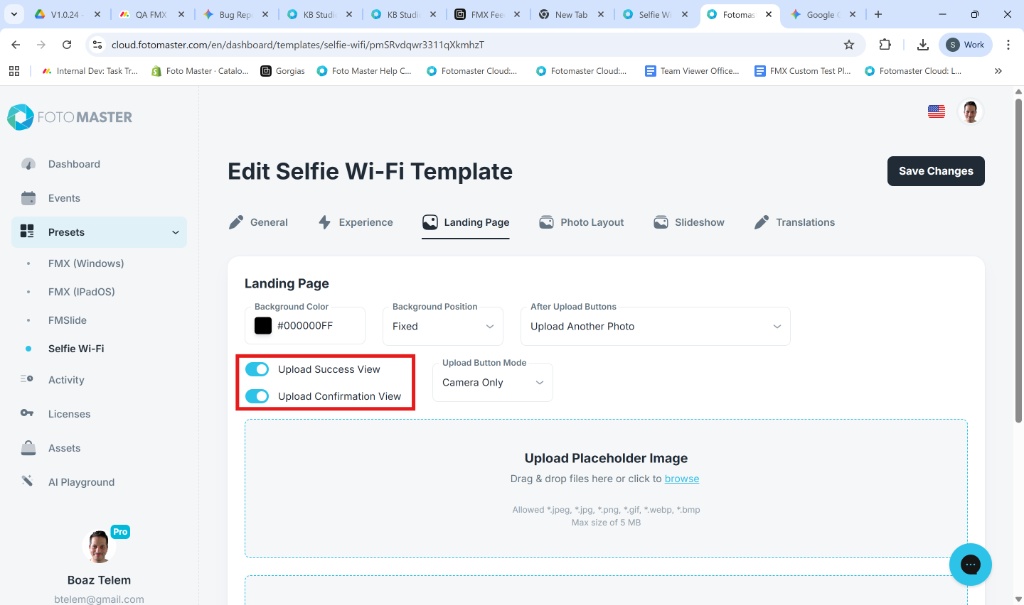
Configuration Toggles
-
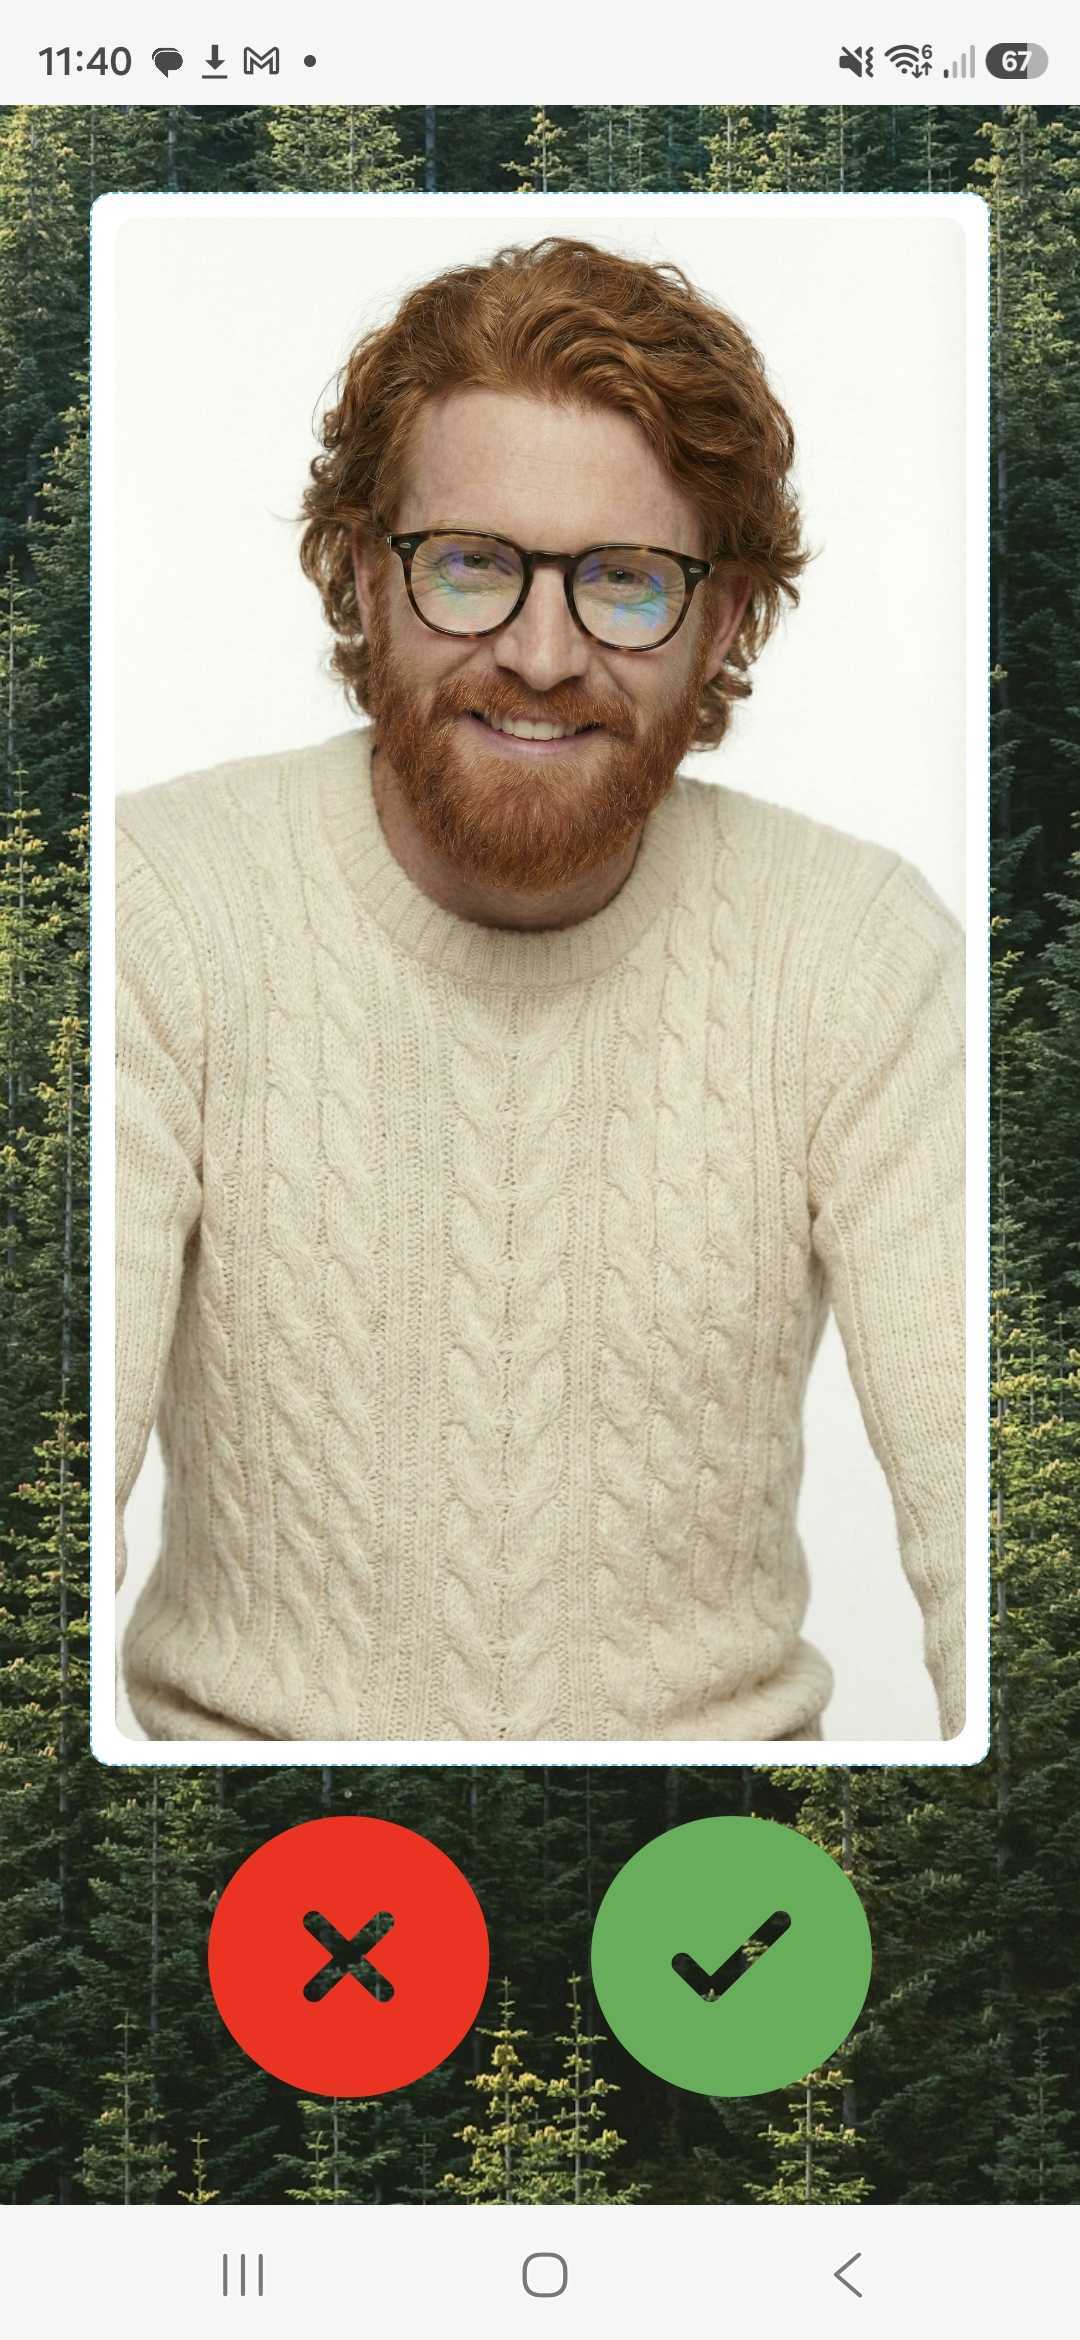
Upload Confirmation View: Shows the guest their photo before it is sent. The Allow button proceeds, while the Retake button restarts the entire experience, routing the guest back to the AI service selection screen
-
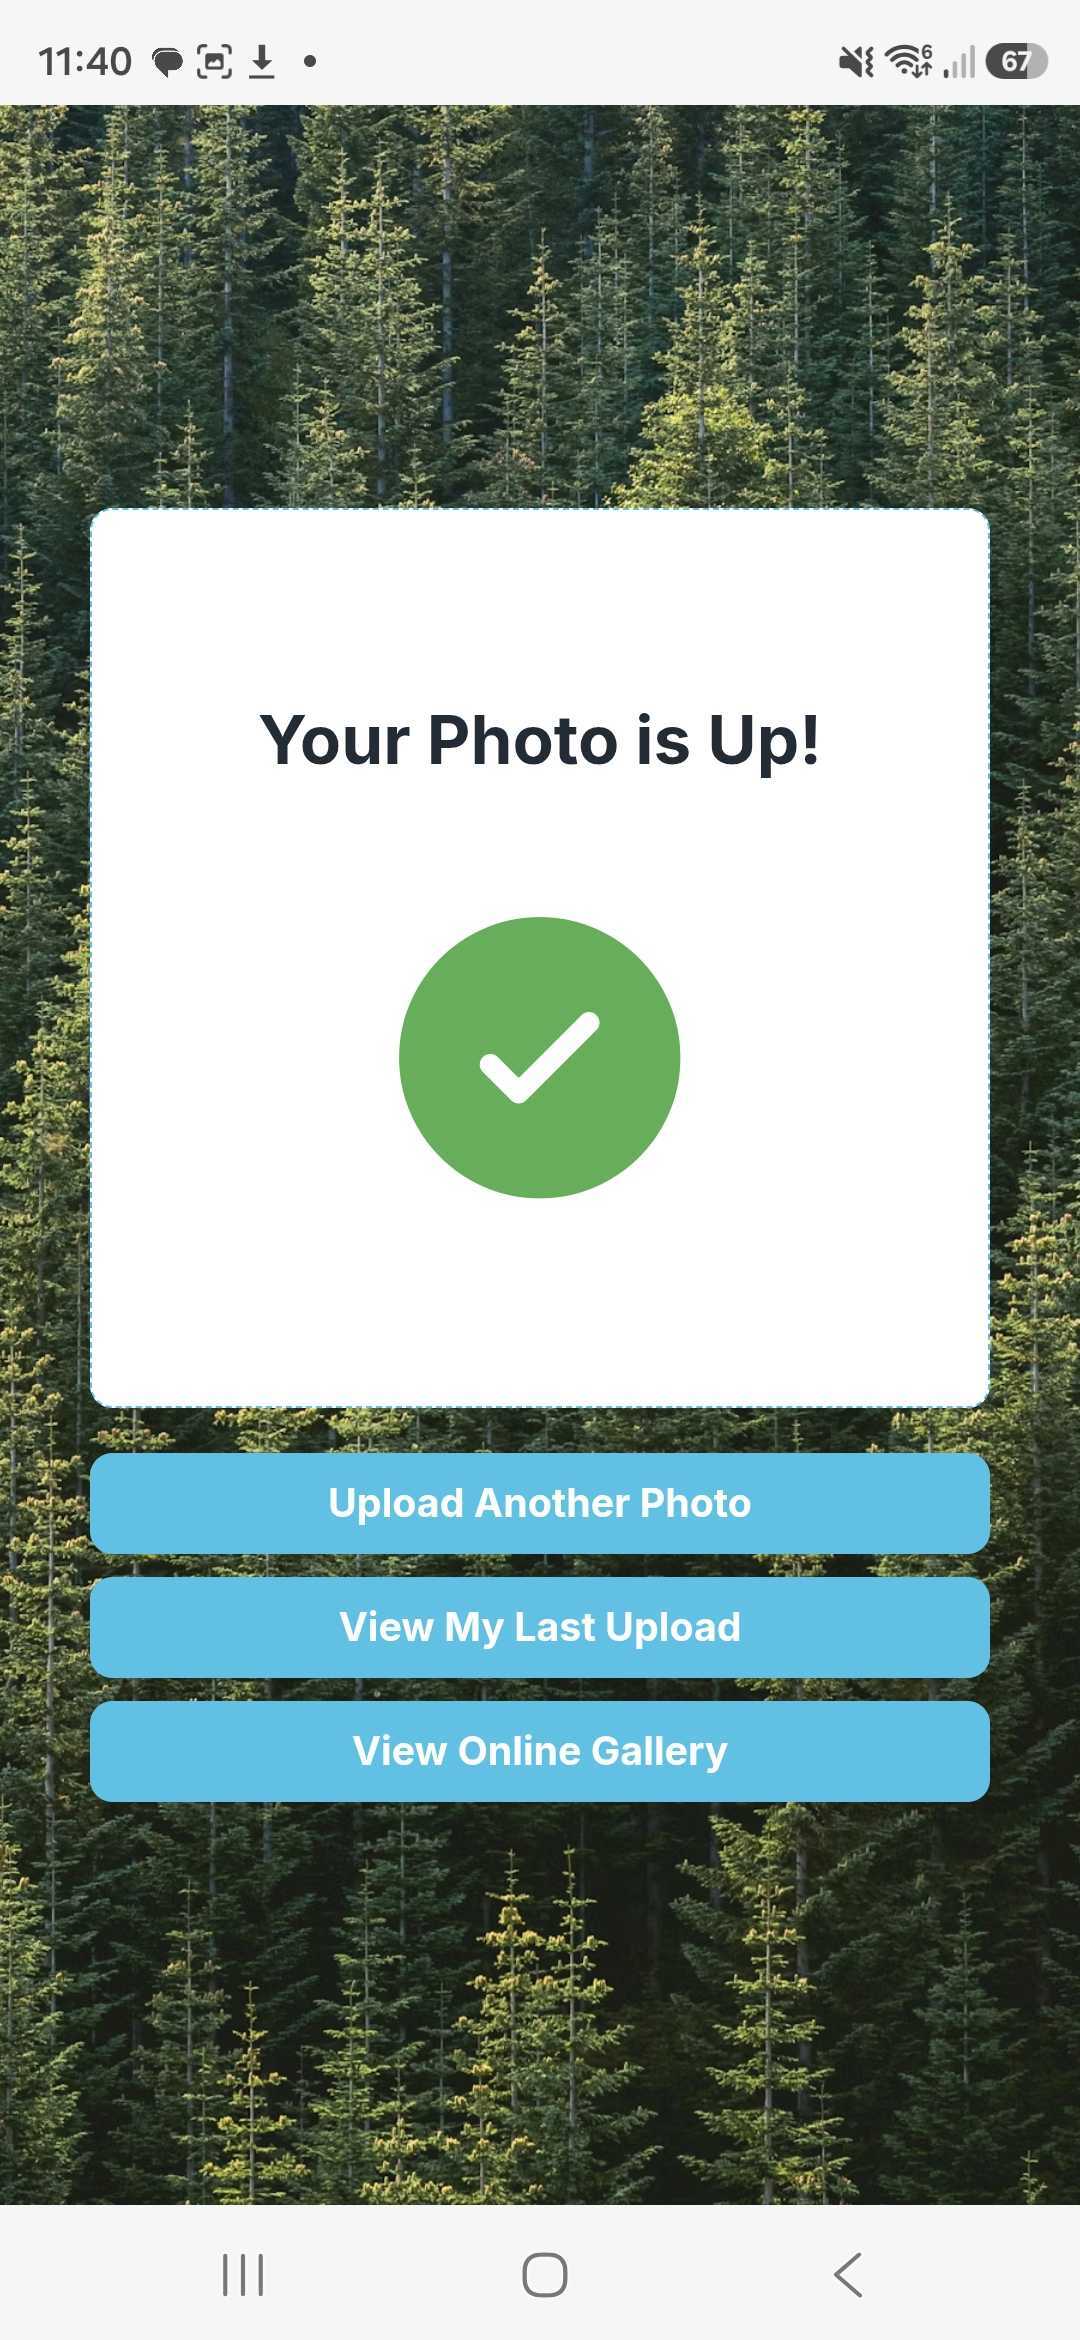
Upload Success View: Displays a "Success" screen (e.g., "Your Photo is Up!") after the upload is complete, showing the specific After Upload Buttons you’ve configured.
💡 PRO TIP: Speed up your event! If you want the fastest flow possible for high-traffic events, turn BOTH toggles off. This skips the confirmation and success screens, uploading the photo instantly.
⚠️ NOTE: These toggles are context-sensitive. You will only see these options if you have None or only 1 "After Upload Button" selected. If multiple buttons are selected, these toggles will be hidden to maintain layout consistency.
Set Up Moderation (Optional)
- Moderation -- Turn on if you want to approve photos before they appear in the gallery or print
- Auto-Print -- Enable to automatically print approved photos
- Display -- Control whether photos appear in the online gallery
Add Branding
- Background Image -- Upload a branded background for the guest interface
- Background Color -- Set a fallback color
- Overlay -- Upload an overlay image (PNG with transparency) that will be composited onto every photo
- Custom Translations -- Override default button text and labels with your own wording
Step 3: Get Your QR Code
- In the Selfie-Wifi tab, find the Link & QR Code section
- Download the QR code as an image file
- Copy the direct link to share digitally
- Print the QR code and display it prominently at your venue
The link format is: https://cloud.fotomaster.com/selfie-wifi/{event_id}
Step 4: Set Up the Selfie Wi-Fi Companion App (Slideshow & Print)
- Install the Selfie Wi-Fi companion app on a Windows PC or Mac at the venue
- Launch it and log in with your Cloud credentials
- Select your event from the event list
- Configure settings:
- Media folder -- Where downloaded photos will be stored locally
- Transitions -- Choose from 8 effects (slide, zoom, flip, etc.)
- Timer -- How long each photo displays
- Download monitoring -- Enable auto-pull approved photos from Cloud
- Moderation -- Match your Cloud moderation setting
- Printing -- Enable and verify your printer is connected
- Connect a display screen (TV, projector, or monitor)
- Start the slideshow
Step 5: Test Before the Event
- Scan the QR code with your own phone
- Select an AI service and take a test photo
- Upload and verify the photo appears in the Cloud gallery
- If moderation is on, approve the photo in the dashboard
- Verify the photo appears in the Selfie Wi-Fi companion app's slideshow
- If printing is enabled, verify that the test print comes out correctly
Tip: Test with the exact Wi-Fi network guests will use. If the venue has a captive portal (hotel/conference Wi-Fi that requires login), make sure guests can access the Selfie Wi-Fi URL after connecting.
Step 6: Go Live
On event day:
- Display the QR code prominently (printed signage, table cards, or on a screen)
- Ensure the Selfie Wi-Fi companion app is running with the slideshow active
- Monitor the moderation dashboard if moderation is enabled
- Keep an eye on AI credit usage
Troubleshooting
Guests can't access the QR code link
- Verify the venue Wi-Fi has internet access (not just local network)
- Check if a captive portal is blocking the URL
- Try the direct link instead of the QR code
Photos not appearing in slideshow
- Check if moderation is enabled (photos may be waiting for approval)
- Verify the Selfie Wi-Fi companion app's download monitoring is enabled
- Confirm the event is selected in the Selfie Wi-Fi companion app
AI processing fails
- Check your AI credit balance
- Verify internet connectivity
- Ensure the uploaded image meets requirements (JPEG/PNG, max 9000x9000)
Prints not coming out
- Verify the printer is connected and has media loaded
- Check that printing is enabled in the Selfie Wi-Fi companion app settings
- Check that auto-print is enabled in Cloud settings
Was this helpful?
Related articles
How to Use the AI StylePop Feature in Selfie Wifi
The AI StylePop feature lets you transform photos into fun, creative, and fully stylized scenes. Guests can enjoy a variety of pre-made looks or even create their own custom styles
How to Use the Selection Screen in Selfie Wifi
The Selection Screen in Selfie Wifi allows you to offer multiple AI options within a single activation. Guests can choose their own experience (whether through AI Line2Life, AI Sty
Selfie Wi-Fi Overview
Selfie Wi-Fi is Foto Master's self-service photo experience that lets guests use their own smartphones to capture, enhance, and share photos -- no dedicated booth hardware required
Selfie Wi-Fi: Moderation Guide
Content moderation in Selfie Wi-Fi lets you review and approve guest photos before they appear in galleries, on slideshow displays, or in print. This is essential for public-facing
How to Use the Selfie Wi-Fi Software
Hi Foto Master Family, This guide walks through the Selfie Wi-Fi software, from initial setup to running a live activation. Note: This guide covers the Selfie WiFi Software, which