
Enabling 2-inch Cut Printer Setting
This article will show you how to enable the 2-inch cut option on your printer to print two 2x6 strips.
You can enable the 2-inch cut option for your printer, as is, but you can also create a virtual copy of your printer and enable the 2-inch cut to it. The latter will allow you to have two separate printer settings while using the same printer.
Enabling a 2-inch cut for the recognized printer:
1. First, make sure that your printer is installed and prints from the control panel. The steps below use a DNP DS-RX1 as the example.
Go to the Control Panel > Devices and Printers.
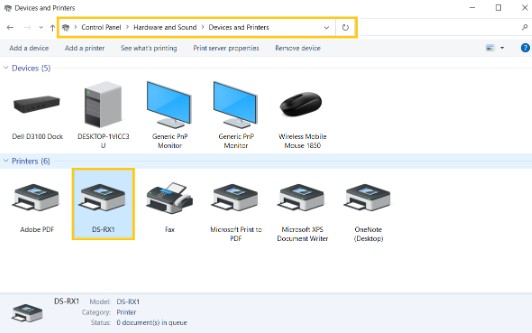
2. Right-click on the printer icon and select Printer Preferences.
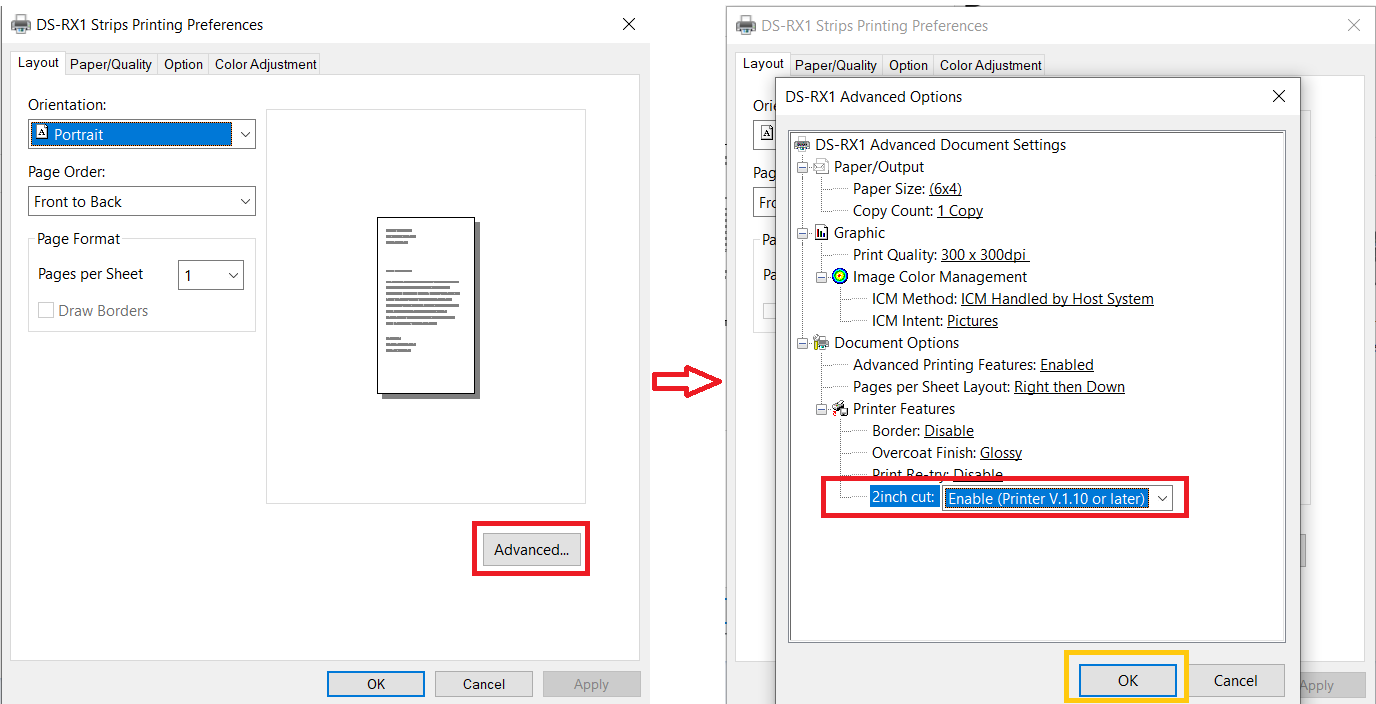
3. Select "Advanced" and enable the 2inch cut in the Strips printer:
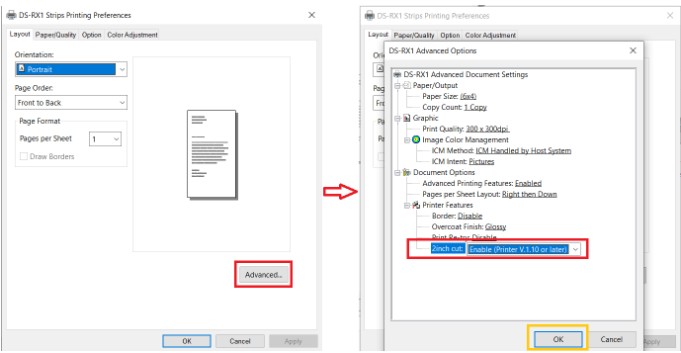
Enabling a 2-inch cut for a virtual copy of your printer:
If you want to print 2x6 alongside 4x6 with the same printer, check the Using Strips Presets alongside 4x6 Presets in the Multi Presets Selection article.
Creating a virtual Copy:
1. First, make sure that your printer is installed and prints from the control panel. The steps below use a DNP DS-RX1 as the example.
Go to the Control Panel > Devices and Printers.
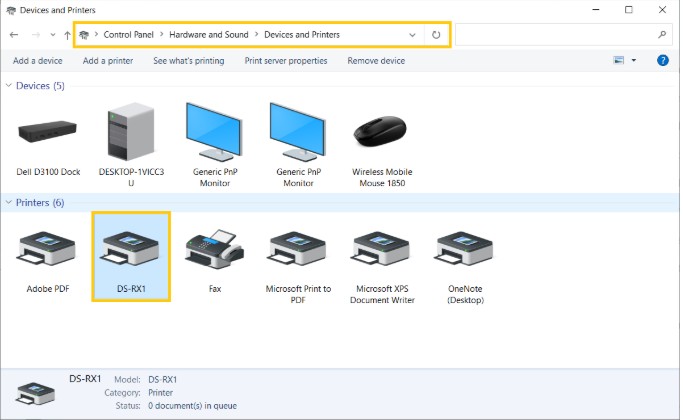
2. Click on Add a printer, and on the new window that opens, click on The printer
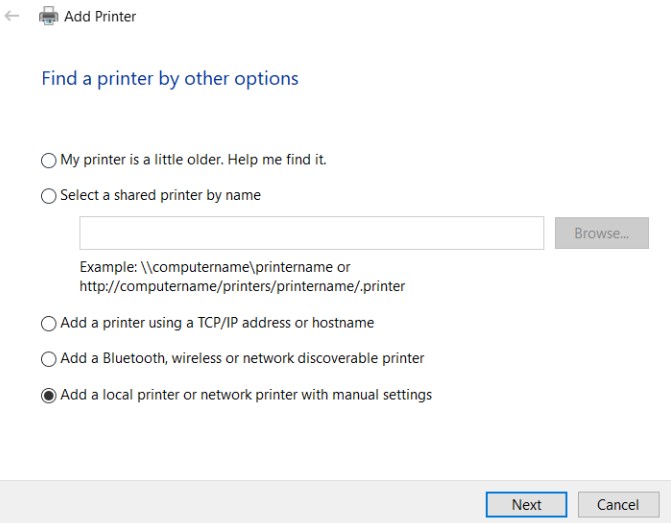
3. On the Find a Printer by Other options window that will open, select Add a local printer or network printer with manual settings, and click Next.
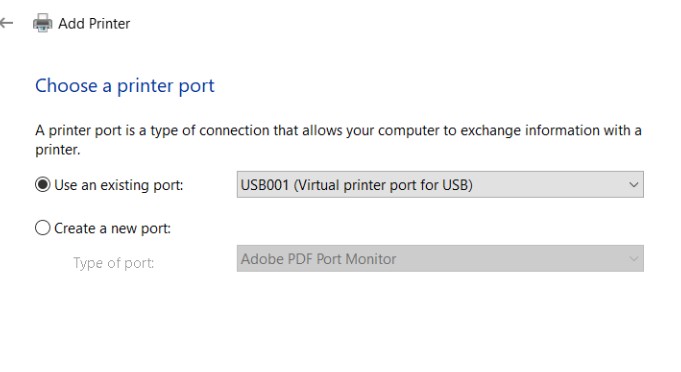
4. Select the existing USB Virtual printer port:
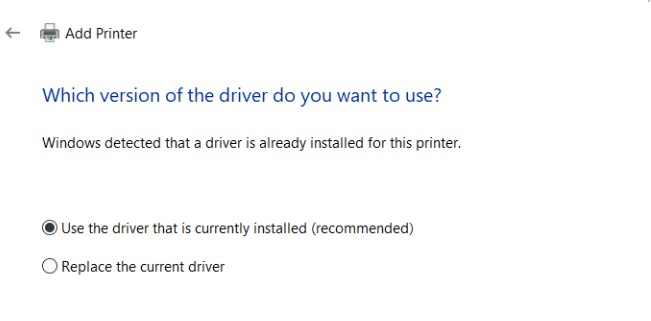
5. Select Use the driver that is currently installed:
6. Name your printer (it can be any name that you want; we named it DS-RX1 (Photostrips)) and click Next.
Enabling 2-inch Cut:
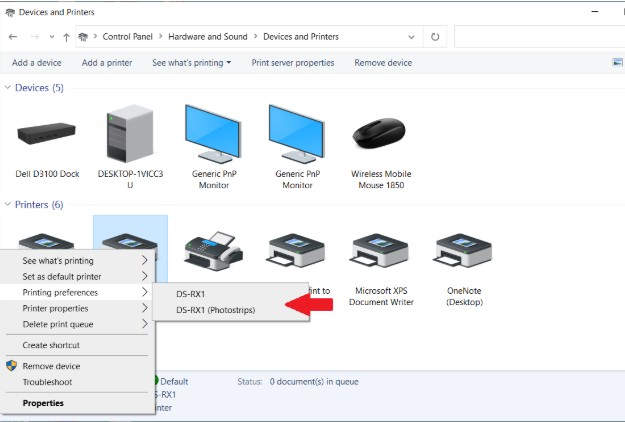
1. Once the process above is complete, right-click on the existing printer in the Control Panel, and you will see that you have two virtual printer copies you can work with:
2. Go to Printer Preferences > select your photo strips printer (or the virtual copy you'd like to enable the 2-inch cut to)
3. Select "Advanced" and Enable the 2inch cut in the Strips printer:
Was this helpful?
Related articles
Printer Comparison: DNP Models for Photo Booths
Overview DNP photo printers are widely used by photo booth operators because they are dependable, event-ready, and produce professional dye-sublimation prints. FMX supports printin
Choosing the Right Camera for Your Photo Booth
Your camera is the single most important component affecting photo quality in your booth. FMX supports Canon, Nikon, Sony, and GoPro cameras. FMX for Windows also supports USB webc
Camera Basics for Photo Booth Operators
You do not need to be a professional photographer to run a great photo booth, but understanding a few camera fundamentals will help you deliver consistently high-quality photos acr
FMX Supported Camera List
FMX supports Canon, Nikon, Sony, and GoPro cameras. FMX for Windows also supports UVC-compliant USB webcams, while FMX for iPadOS can use the iPad's built-in cameras. Support and s
Camera Basics: The Exposure Triangle
This video explains the exposure triangle (aperture, shutter speed, and ISO) and how each setting interacts to control the final look of your photo. Recommended for operators who w