
Photo\Printing Orientation
This guide covers common photo and print orientation issues (sideways previews, upside-down photos, and stretched prints) and how to fix them.
Photos Are Sideways on the Final Preview
The FMX software coordinates with the camera's physical rotation. If the photos appear sideways on the preview, you need to either change how your camera is mounted or select a preset with a layout that matches your camera's orientation.
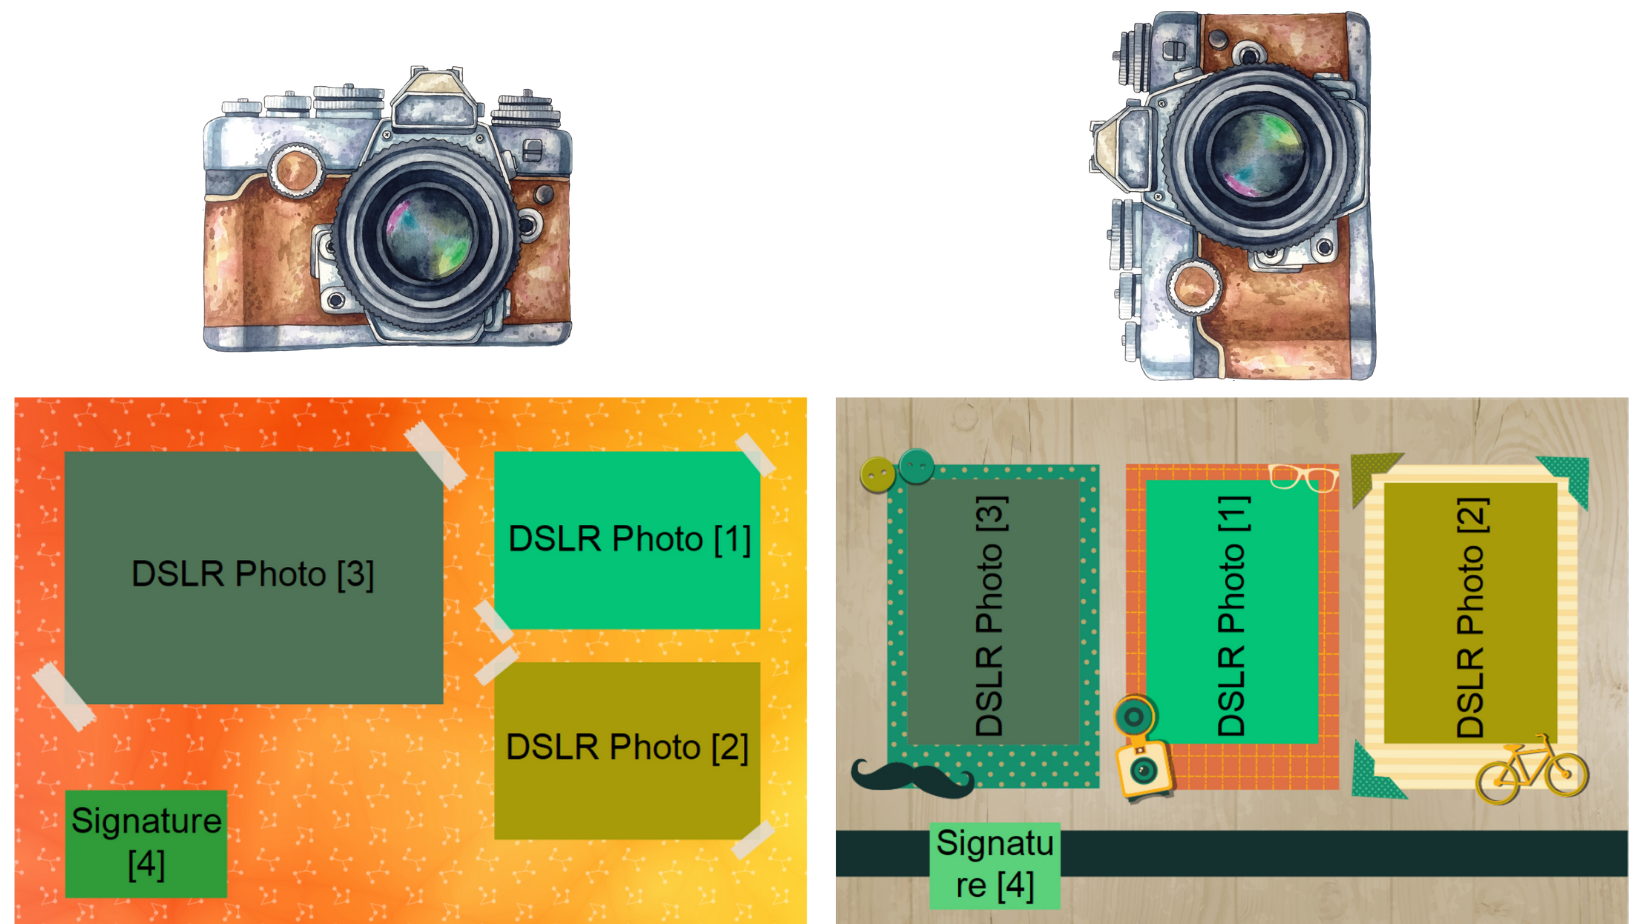
Check your DSLR values and see if the DSLR elements in the layout tab are mounted correctly.
The Camera's Mount Corresponds to the Layout, But the Photos Are Upside Down
- Open the options menu (Ctrl+O).
- Go to the Layout tab.
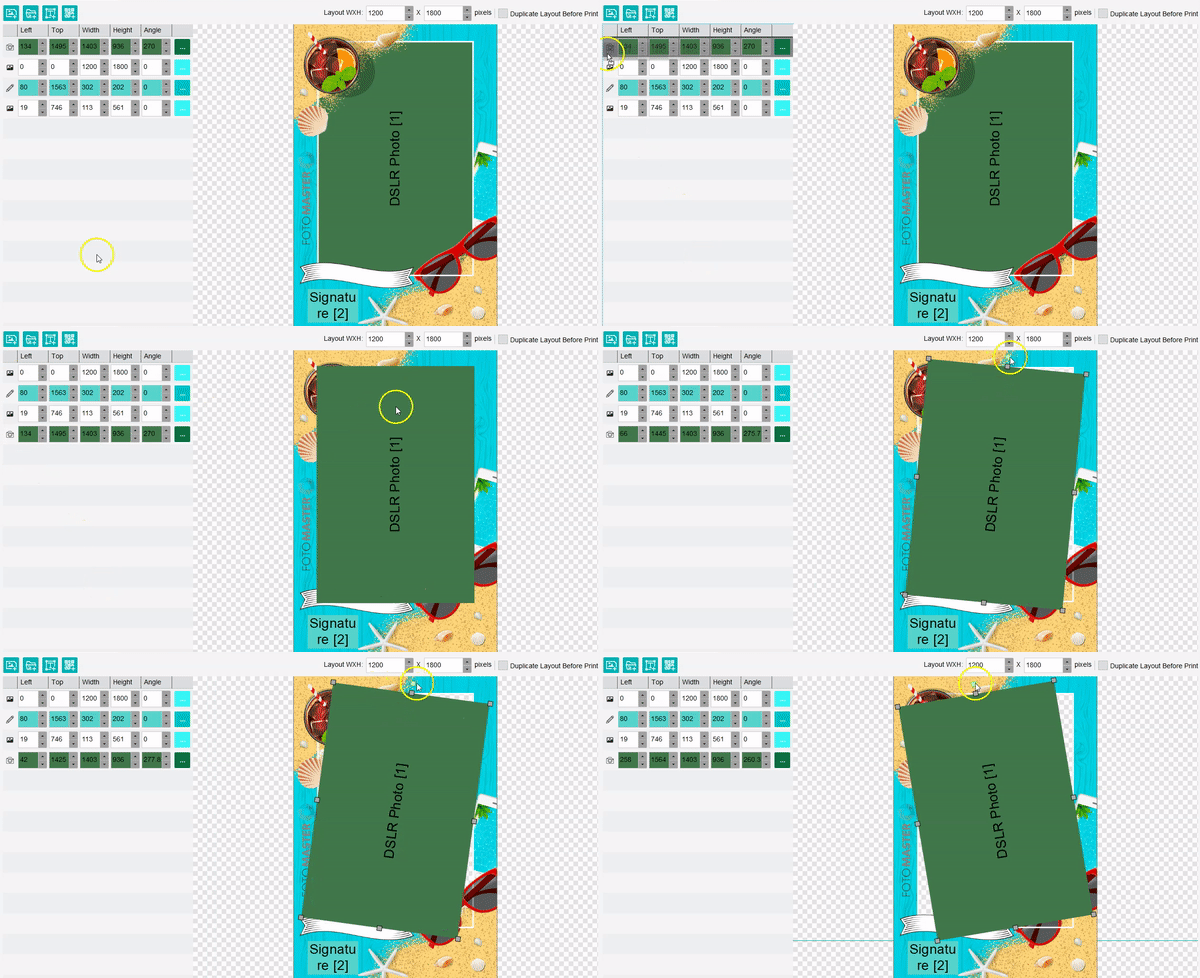
- Rotate your DSLR element manually (drag the DSLR state to the bottom of the list on the left side to scale the element). You can either use the top square and the mouse, or change the Angle value of the DSLR photo element:
The Raw Preview of the Photo Is Sideways
- Open the options menu (Ctrl+O).
- Go to the Features tab.
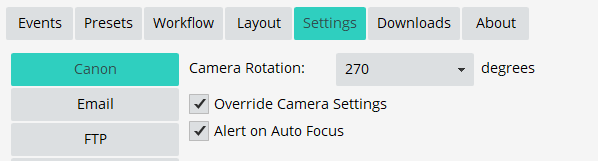
- Change the camera's orientation in the Settings tab → Canon (0 for horizontal photo and 270/90 for sideways photo):
The Photos Are Printed in the Wrong Orientation / Stretched
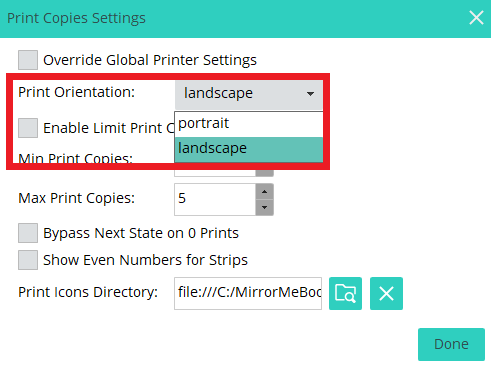
If the printed photo doesn't come out in the right orientation and seems distorted, changing the print orientation will fix that.
- Open the options menu (Ctrl+O).
- Go to the Workflow tab.
- Go to the Print Copies feature state.
- Change the Print Orientation from landscape to portrait or the other way around.
Was this helpful?
Related articles
Printer Comparison: DNP Models for Photo Booths
Overview DNP photo printers are widely used by photo booth operators because they are dependable, event-ready, and produce professional dye-sublimation prints. FMX supports printin
Choosing the Right Camera for Your Photo Booth
Your camera is the single most important component affecting photo quality in your booth. FMX supports Canon, Nikon, Sony, and GoPro cameras. FMX for Windows also supports USB webc
Camera Basics for Photo Booth Operators
You do not need to be a professional photographer to run a great photo booth, but understanding a few camera fundamentals will help you deliver consistently high-quality photos acr
FMX Supported Camera List
FMX supports Canon, Nikon, Sony, and GoPro cameras. FMX for Windows also supports UVC-compliant USB webcams, while FMX for iPadOS can use the iPad's built-in cameras. Support and s
Camera Basics: The Exposure Triangle
This video explains the exposure triangle (aperture, shutter speed, and ISO) and how each setting interacts to control the final look of your photo. Recommended for operators who w