
Working With the KeyFob Feature (Remote Control) and Pairing
The Key Fob is an accessory that allows you to perform selected actions remotely, without having to open the software's options menu, such as: re-print, restart the workflow, skip a state, and more. The Key Fob functions are customizable, and you can choose a function for each button separately.
Here's a short video demonstrating what the key-fob can do:
[Can't see the video? Click here to watch on YouTube]
Setup Instructions:
1. Connect the Key-Fob to your computer.
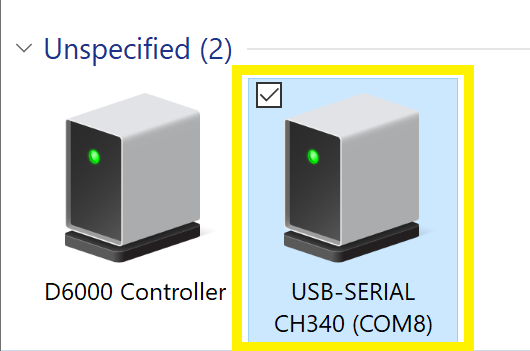
2. Make sure it's Connected By opening Control Panel -> Devices and Printers:
3. In the software, go to the Globals tab > Key Fob and check the "Enable Key Fob" box.
4. Make sure that the "Auto Detect Com Port" box is checked for the software to automatically detect the COM port that the device is connected to.
5. Select the function that you would like each key to perform when clicked.
Don't have a Key Fob yet? Order one today!
In the package:
- Remote Control
- Receiver
- World Wide Shipping
Pairing Your KeyFob:
Items needed:
- KeyFob device + Remote
- Micro USB cable
- Pin
Instructions (video below)*:
1. Connect the KeyFob to the computer using a micro USB cable (it can be connected either directly to the computer or to a USB hub).
2. Once the KeyFob is connected and receives power from the USB port, you will see the red LED light blink once.
3. To pair\re-pair the remote and the sensor, press once on the sensor's reset button using a pin.
4. Right after pressing the reset button, press on any button on the remote for two seconds (you will see the red LED light flashing rapidly) and release.
Please note: After pressing the reset button, the sensor scans for a remote for 5 seconds.
5. Wait until you see the red LED light blink 3 times again.
Your KeyFob is now paired!
[Can't see the video? Click here to watch on YouTube]
*If the remote is not working during normal use, and the red LED light is flashing rapidly, it means that the remote and sensor are not fully paired. Please repeat the pairing process.
Was this helpful?
Related articles
Printer Comparison: DNP Models for Photo Booths
Overview DNP photo printers are widely used by photo booth operators because they are dependable, event-ready, and produce professional dye-sublimation prints. FMX supports printin
Choosing the Right Camera for Your Photo Booth
Your camera is the single most important component affecting photo quality in your booth. FMX supports Canon, Nikon, Sony, and GoPro cameras. FMX for Windows also supports USB webc
Camera Basics for Photo Booth Operators
You do not need to be a professional photographer to run a great photo booth, but understanding a few camera fundamentals will help you deliver consistently high-quality photos acr
FMX Supported Camera List
FMX supports Canon, Nikon, Sony, and GoPro cameras. FMX for Windows also supports UVC-compliant USB webcams, while FMX for iPadOS can use the iPad's built-in cameras. Support and s
Camera Basics: The Exposure Triangle
This video explains the exposure triangle (aperture, shutter speed, and ISO) and how each setting interacts to control the final look of your photo. Recommended for operators who w