
Foto Master Air Graffiti Sensor V2 - Calibration (from January 2022)
This guide covers setting up the Air Graffiti projector and calibrating the V2 sensor laser spray cans. There are two calibration methods, follow the one that matches your setup.
Setup
1. The first thing you need to do is to set up the Air Graffiti Wall enclosure
2. Once the enclosure is ready, screw the V2 sensor to a tripod and then connect it via USB cable to the laptop.
3. Place the sensor so that it will point towards the screen.
4. Make sure that you have the correct display settings on your computer: Right-click on your desktop -> Display settings and make sure that the scale is 100% and the display resolution is 1920x1080.
* To make sure your changes are applied, sign out and back into your computer or restart it
5. Open the calibration tool -> Install and Debugging -> Adjust Sensor -> Camera mode (can be downloaded here)
6. Adjust the sensor so that the reflection we see is set in the middle of the square.
Now you can calibrate!
There are 2 methods to calibrate: Auto Calibration and Manual Calibration.
Auto Calibration
1. Open the calibration tool and in the menu at the bottom right corner of the screen choose the "Auto Calibrate" option.
2. Now just wait for the tool to do the work for you! Once the process is done, the laser spray cans are calibrated.
* We recommend testing once done to make sure everything is working properly
Manual Calibration
1. Open the calibration tool and in the menu at the bottom right corner of the screen choose the "Calibrate" option.
2. Choose how many points you would like to calibrate with. The more points you use, the more accurate the calibration is.
* We recommend using 15 points
3. Targets will appear on the screen, one at a time, starting on the top left corner. Point the laser spray can towards the target and press the spray can nozzle until the target turns green.
4. Move to the next target and repeat this process until all targets are green.
5. The spray can is now calibrated.
Video Instructions
Software Settings:
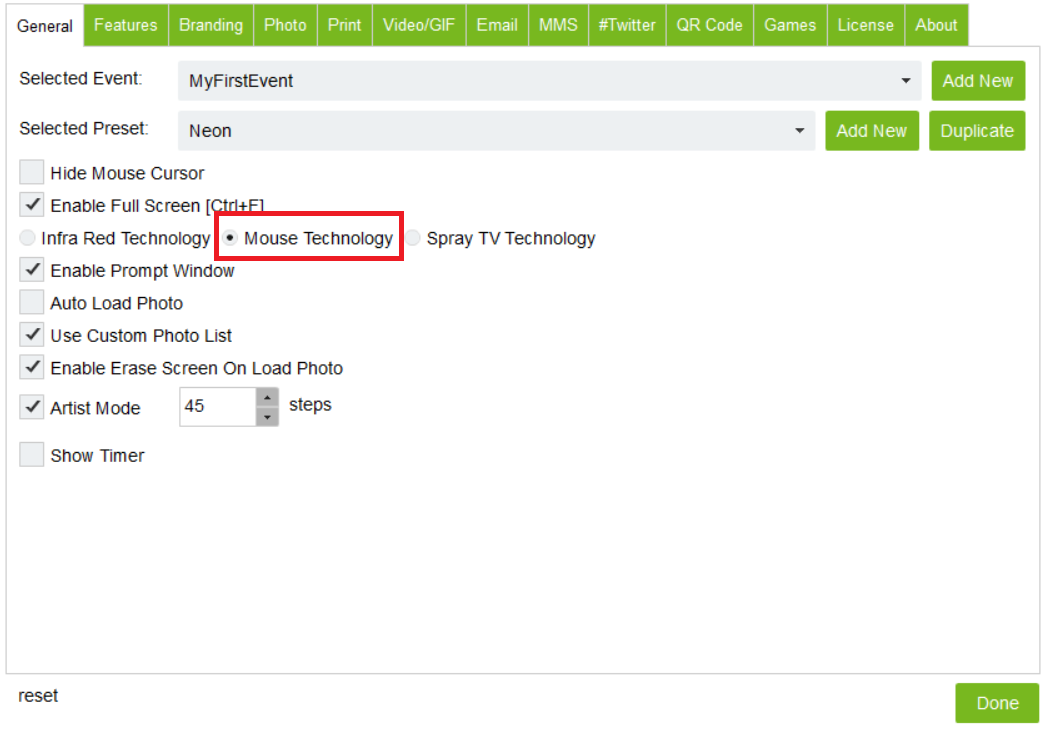
Open your AIR Graffiti software > Open the settings menu (CTRL+S) > select Mouse Technology.
Troubleshooting
- Make sure that your Display Resolution is 1920x1080 and that the scale is 100%
- If the Auto Calibration doesn't succeed, it can be due to light conditions. Open the "Install and Debugging" and the "System settings" together and choose Camera Mode in "Install and Debugging":
- If too much light hits the screen, an orange stain will indicate the area where it interferes.
* If you can, change the surrounding light interferences.
* If not, go to the "System Settings" and under the "Auto Calibrate" settings, reduce the brightness until you see your screen highlights and lowlights distinctively: the bright areas looking bright and the dark looking dark.
And try to calibrate again.
- If the screen in "Install and Debugging" is too dark and the brightness is at its maximum, reduce the gray value threshold.
- Make sure that nothing is blocking the sensor and/or projector.
- Check the batteries for the spray cans, as they might need replacing
Was this helpful?
Related articles
Printer Comparison: DNP Models for Photo Booths
Overview DNP photo printers are widely used by photo booth operators because they are dependable, event-ready, and produce professional dye-sublimation prints. FMX supports printin
Choosing the Right Camera for Your Photo Booth
Your camera is the single most important component affecting photo quality in your booth. FMX supports Canon, Nikon, Sony, and GoPro cameras. FMX for Windows also supports USB webc
Camera Basics for Photo Booth Operators
You do not need to be a professional photographer to run a great photo booth, but understanding a few camera fundamentals will help you deliver consistently high-quality photos acr
FMX Supported Camera List
FMX supports Canon, Nikon, Sony, and GoPro cameras. FMX for Windows also supports UVC-compliant USB webcams, while FMX for iPadOS can use the iPad's built-in cameras. Support and s
Camera Basics: The Exposure Triangle
This video explains the exposure triangle (aperture, shutter speed, and ISO) and how each setting interacts to control the final look of your photo. Recommended for operators who w