
How to Connect AirCastPro to FMX on iPad
This guide covers connecting an AirCastPro printer to FMX for iPad, syncing your event if needed, and adding the printer in Global Settings.
While your iPad is connected to the AirCastPro network, syncing will not work, since that network does not provide internet access.
Connect Your iPad to AirCastPro
- Connect the AirCastPro device to your printer, then to a power supply.
- On your iPad, open Settings > Wi-Fi and connect to the network named AirCastPro using the password aircastpro. In some cases, you can scan the QR code on the Quick Start Guide included with your AirCastPro device instead of entering the password manually.
- Open the FMX app on your iPad.
Sync Your Event (If Not Already Synced)
If your event is already synced, skip ahead to Add the Printer to Your Event.
- Open a new browser window on your iPad and navigate to aircastpro.local.
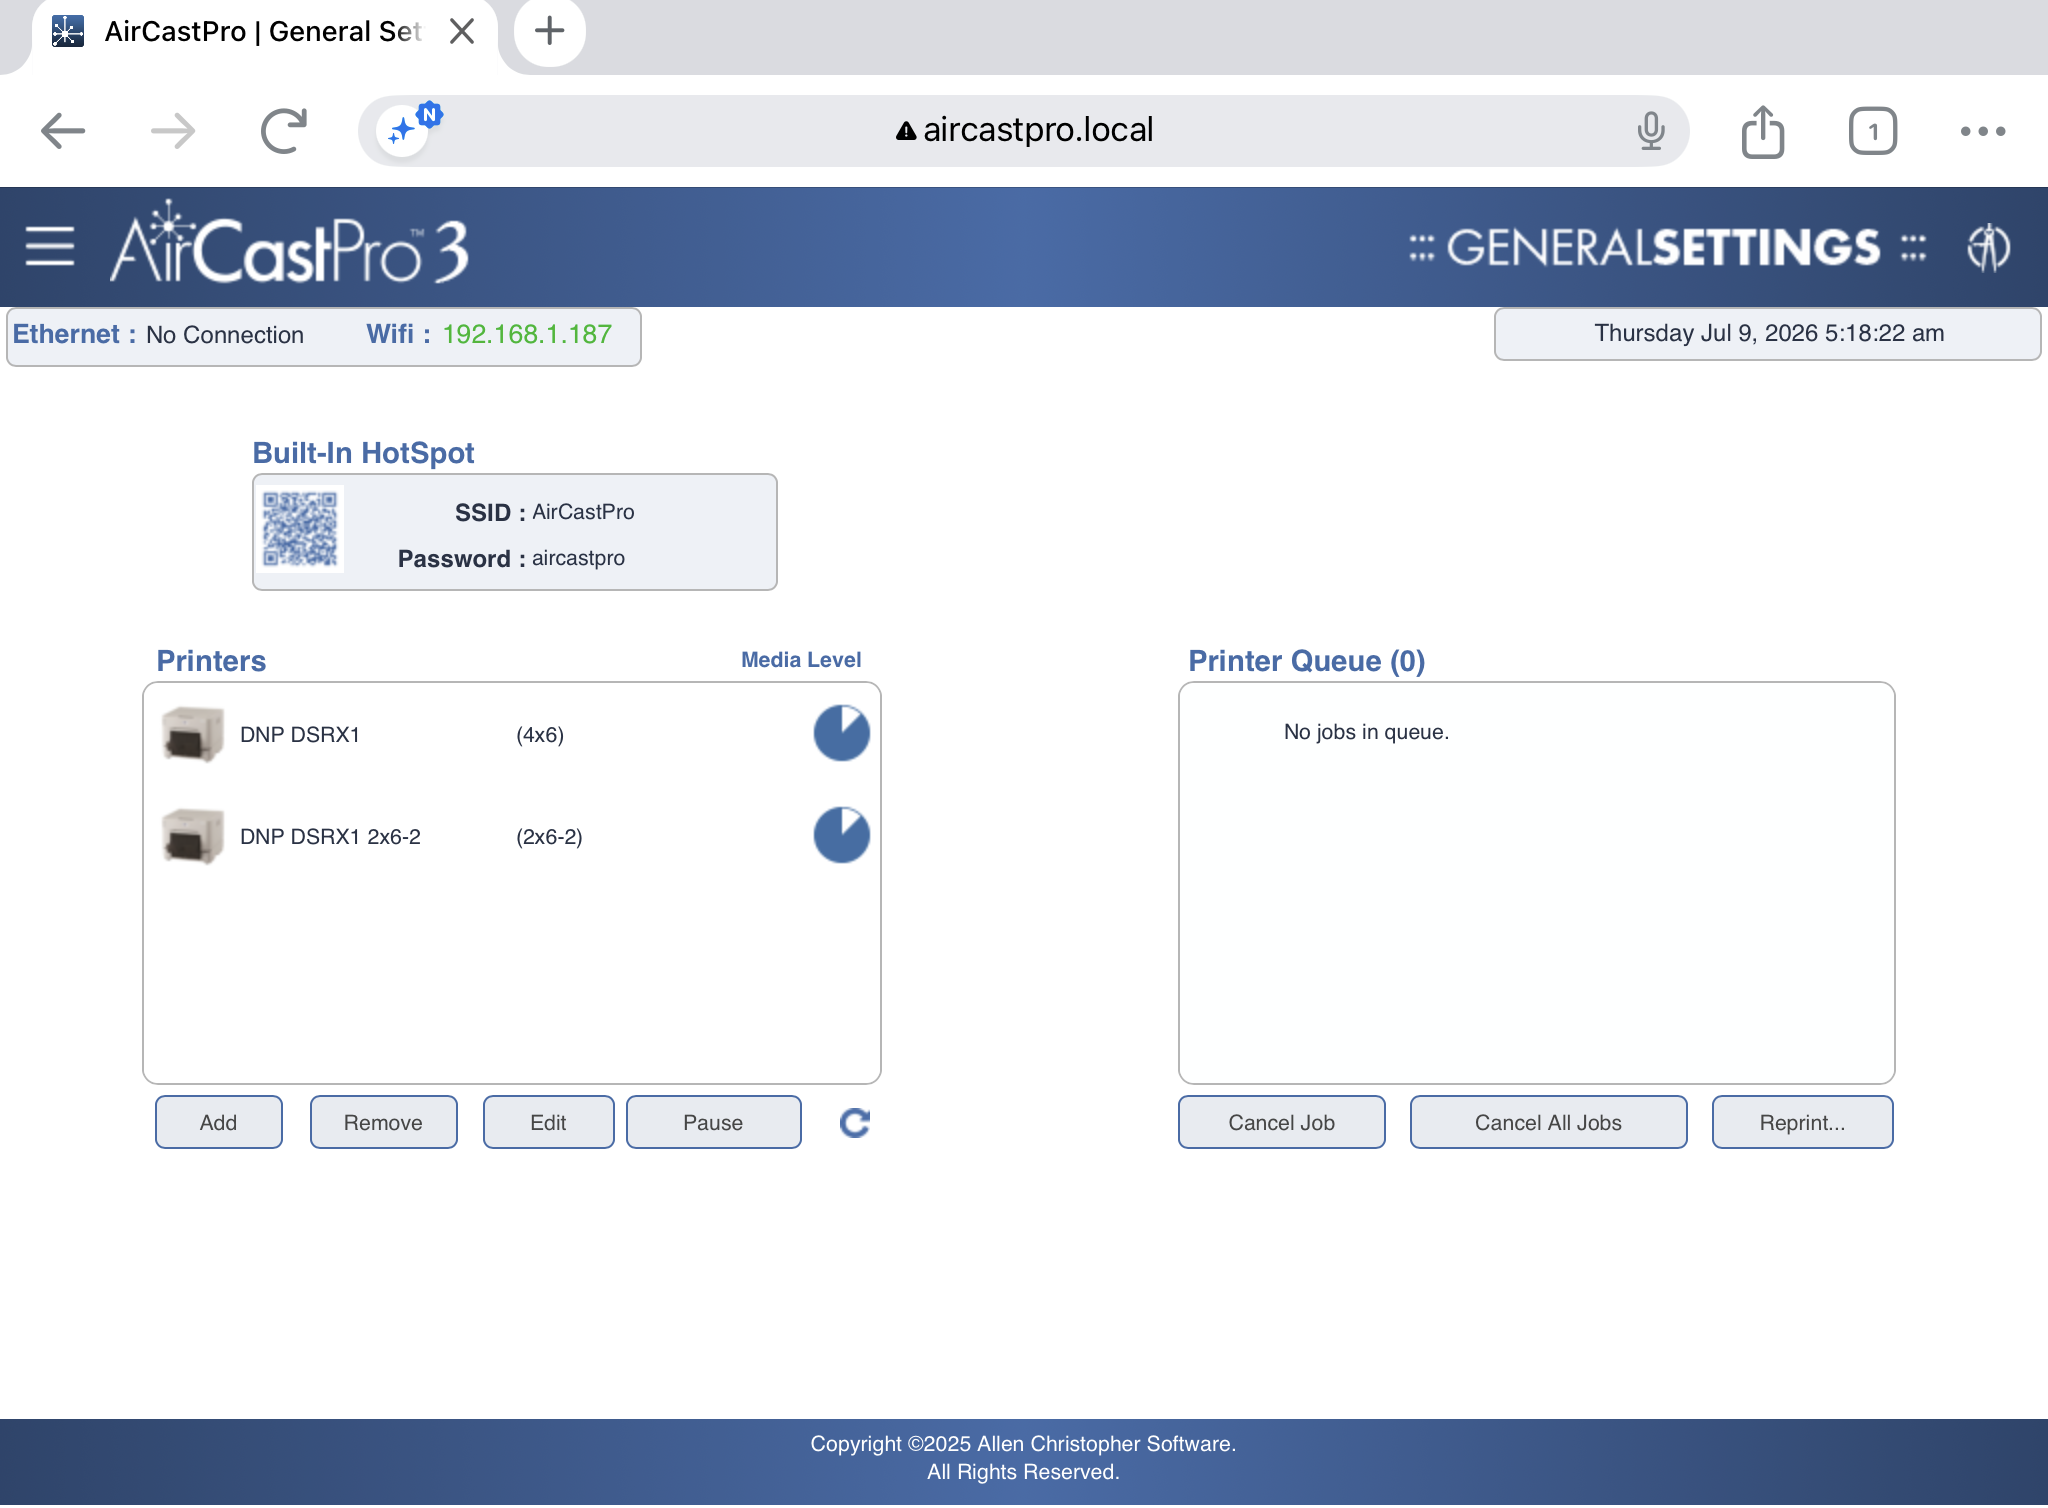
2. From this page, connect your iPad back to a working hotspot or the Wi-Fi network available at your venue.
3. Tap the menu icon the three horizontal lines in the corner of the page.
4. Select Network Settings > Wifi. A new window opens showing all available hotspots and Wi-Fi networks.
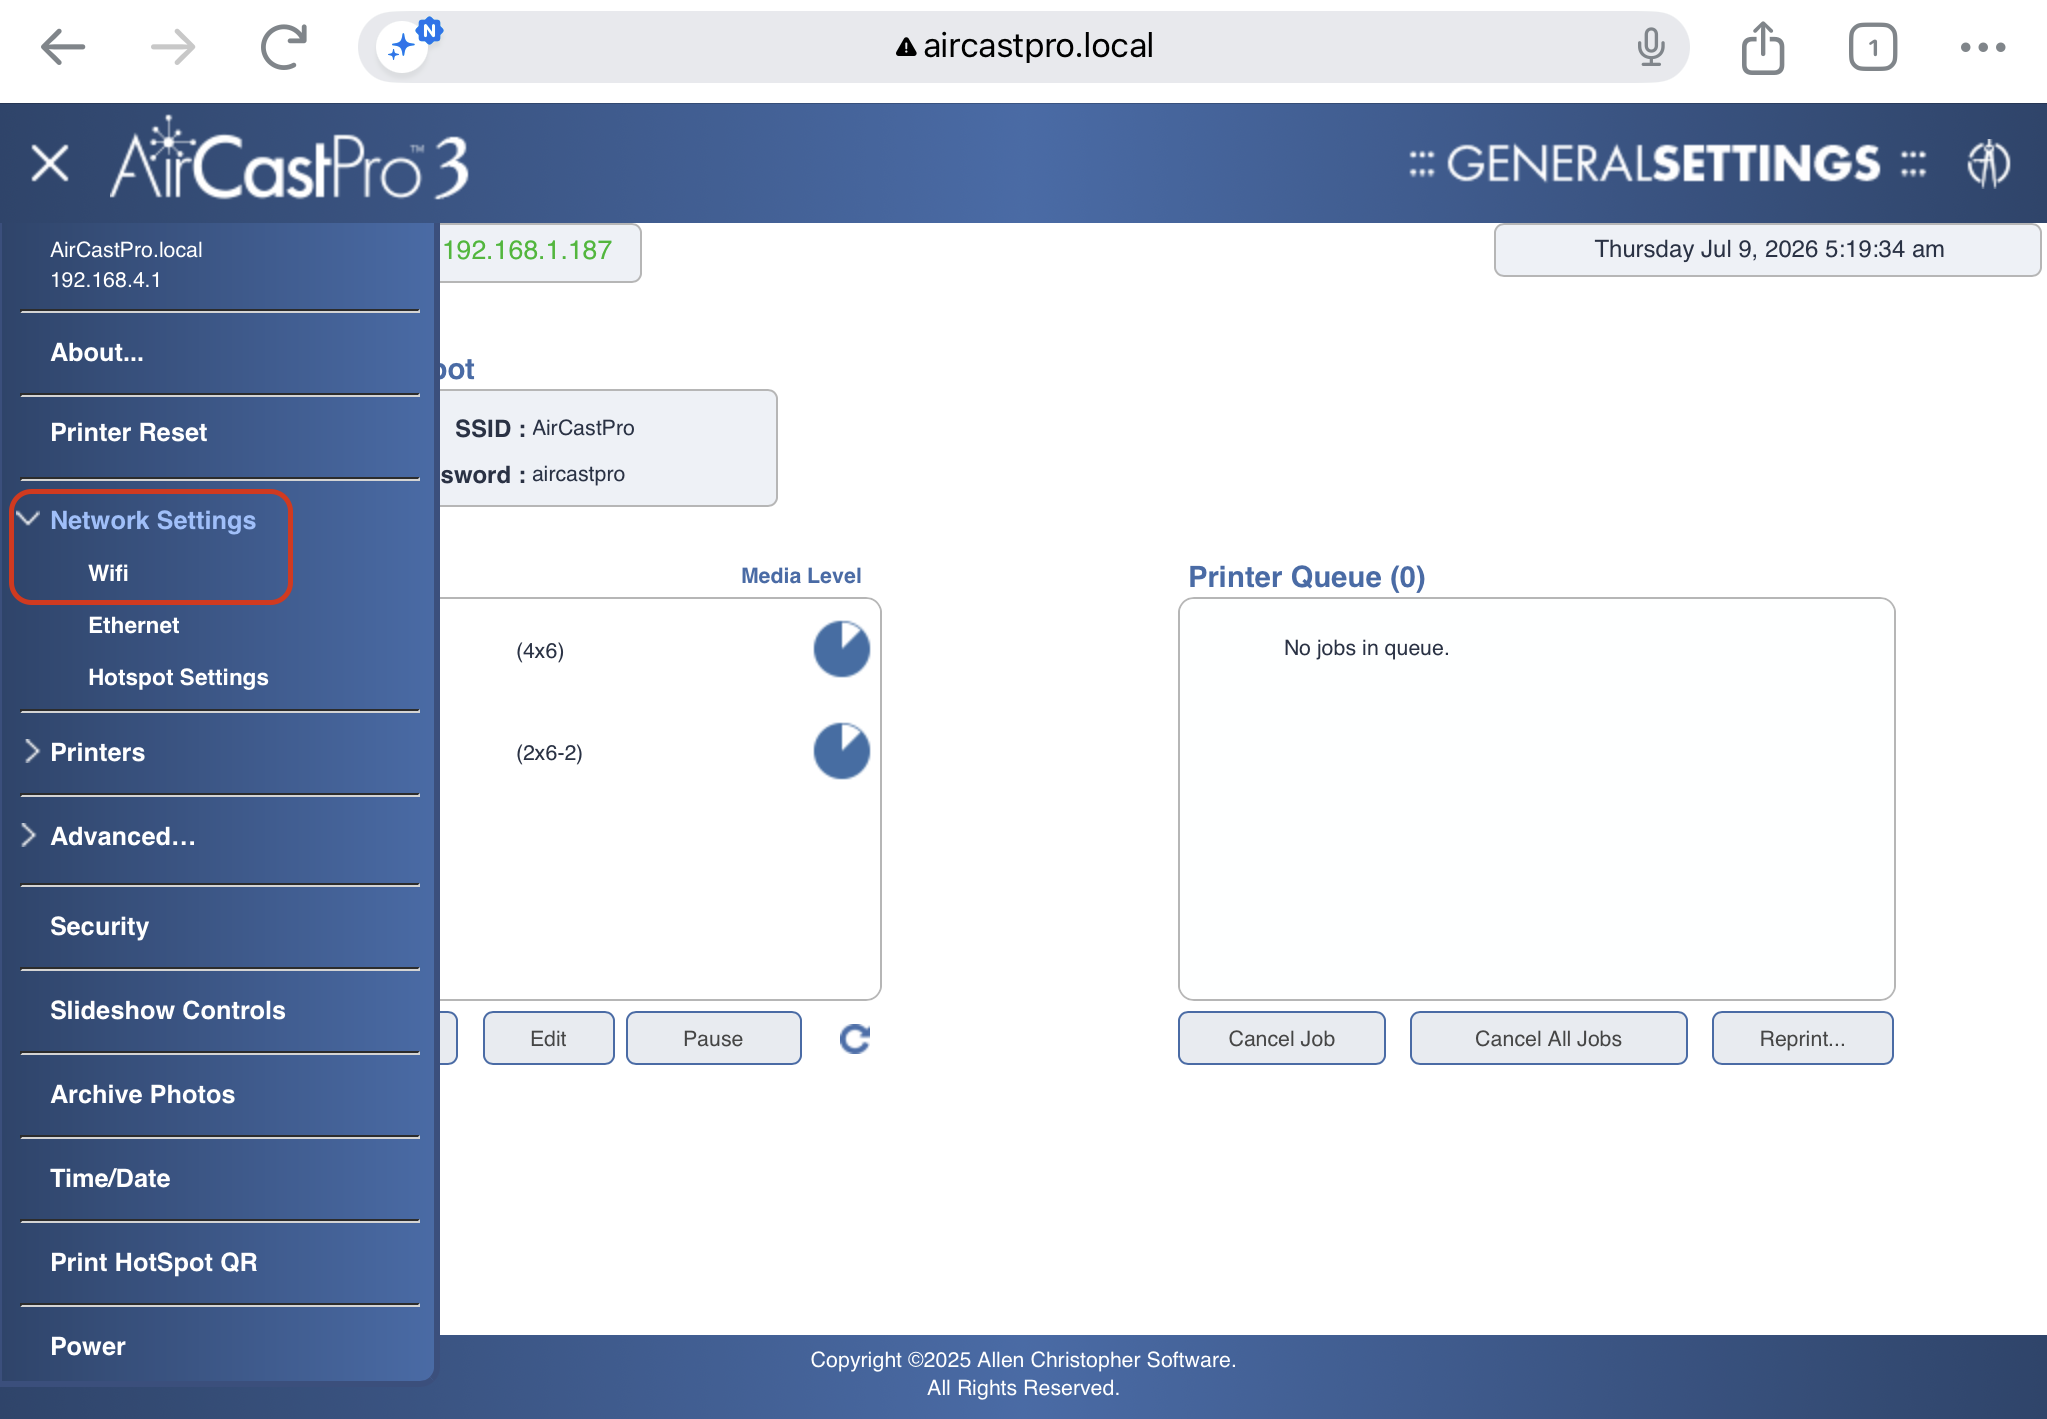
5. Select the network you want to connect to and tap Save.
6. Return to the FMX app and sync your event.
Add the Printer to Your Event
- In FMX, go to Global Settings.
- Scroll down to Printer > Printer Service and select AirPrint.
- The Printer field will show None.
- Tap Printer, then Add Printer, choose your printer, set the print size, and select Add.
At this point, your AirCastPro printer is added to FMX.
To add a second printer, repeat step 13 and select the other printer along with its print size. Once added, both printers are available to the event, each printing photos at its assigned size.
Printers cannot share the same name in the AirCastPro interface: If you are using multiple printers, we suggest giving them distinct names - perhaps based on paper size.
Reconfigure the printer interface when switching hardware or media: The AirCastPro interface may retain your old settings, which will prevent anything from printing (even items unrelated to FMX). Make sure to completely remove the old printer and re-add it.
Video Instructions
Was this helpful?
Related articles
Printer Comparison: DNP Models for Photo Booths
Overview DNP photo printers are widely used by photo booth operators because they are dependable, event-ready, and produce professional dye-sublimation prints. FMX supports printin
Choosing the Right Camera for Your Photo Booth
Your camera is the single most important component affecting photo quality in your booth. FMX supports Canon, Nikon, Sony, and GoPro cameras. FMX for Windows also supports USB webc
Camera Basics for Photo Booth Operators
You do not need to be a professional photographer to run a great photo booth, but understanding a few camera fundamentals will help you deliver consistently high-quality photos acr
FMX Supported Camera List
FMX supports Canon, Nikon, Sony, and GoPro cameras. FMX for Windows also supports UVC-compliant USB webcams, while FMX for iPadOS can use the iPad's built-in cameras. Support and s
Camera Basics: The Exposure Triangle
This video explains the exposure triangle (aperture, shutter speed, and ISO) and how each setting interacts to control the final look of your photo. Recommended for operators who w