
PrintPal Troubleshooting Guide
This guide helps you resolve printing issues during an event with the Foto Master PrintPal device.
Important Steps Before Troubleshooting
1. Supported Printers
Make sure you're using a printer that is supported by Foto Master's PrintPal:
DNP:
- RX1HS
- DS620
- DS40
Mitsubishi:
- CP-D70DW
- CP-D80DW
2. Allow Access Permissions
If this is your first time using the Foto Master Booth app and/or the PrintPal, follow the quick start guide to set up your iPad. When opening the app for the first time, allow permissions to every pop-up it shows (access to camera roll, Bluetooth, Local network, etc.).
3. Allow Access to Local Network
The PrintPal will work only if the app has permission to connect to your Local Network. To check if this permission is enabled, open the iPad Settings and scroll down to select Foto Master app (in order for the software to operate properly, enable all permissions).
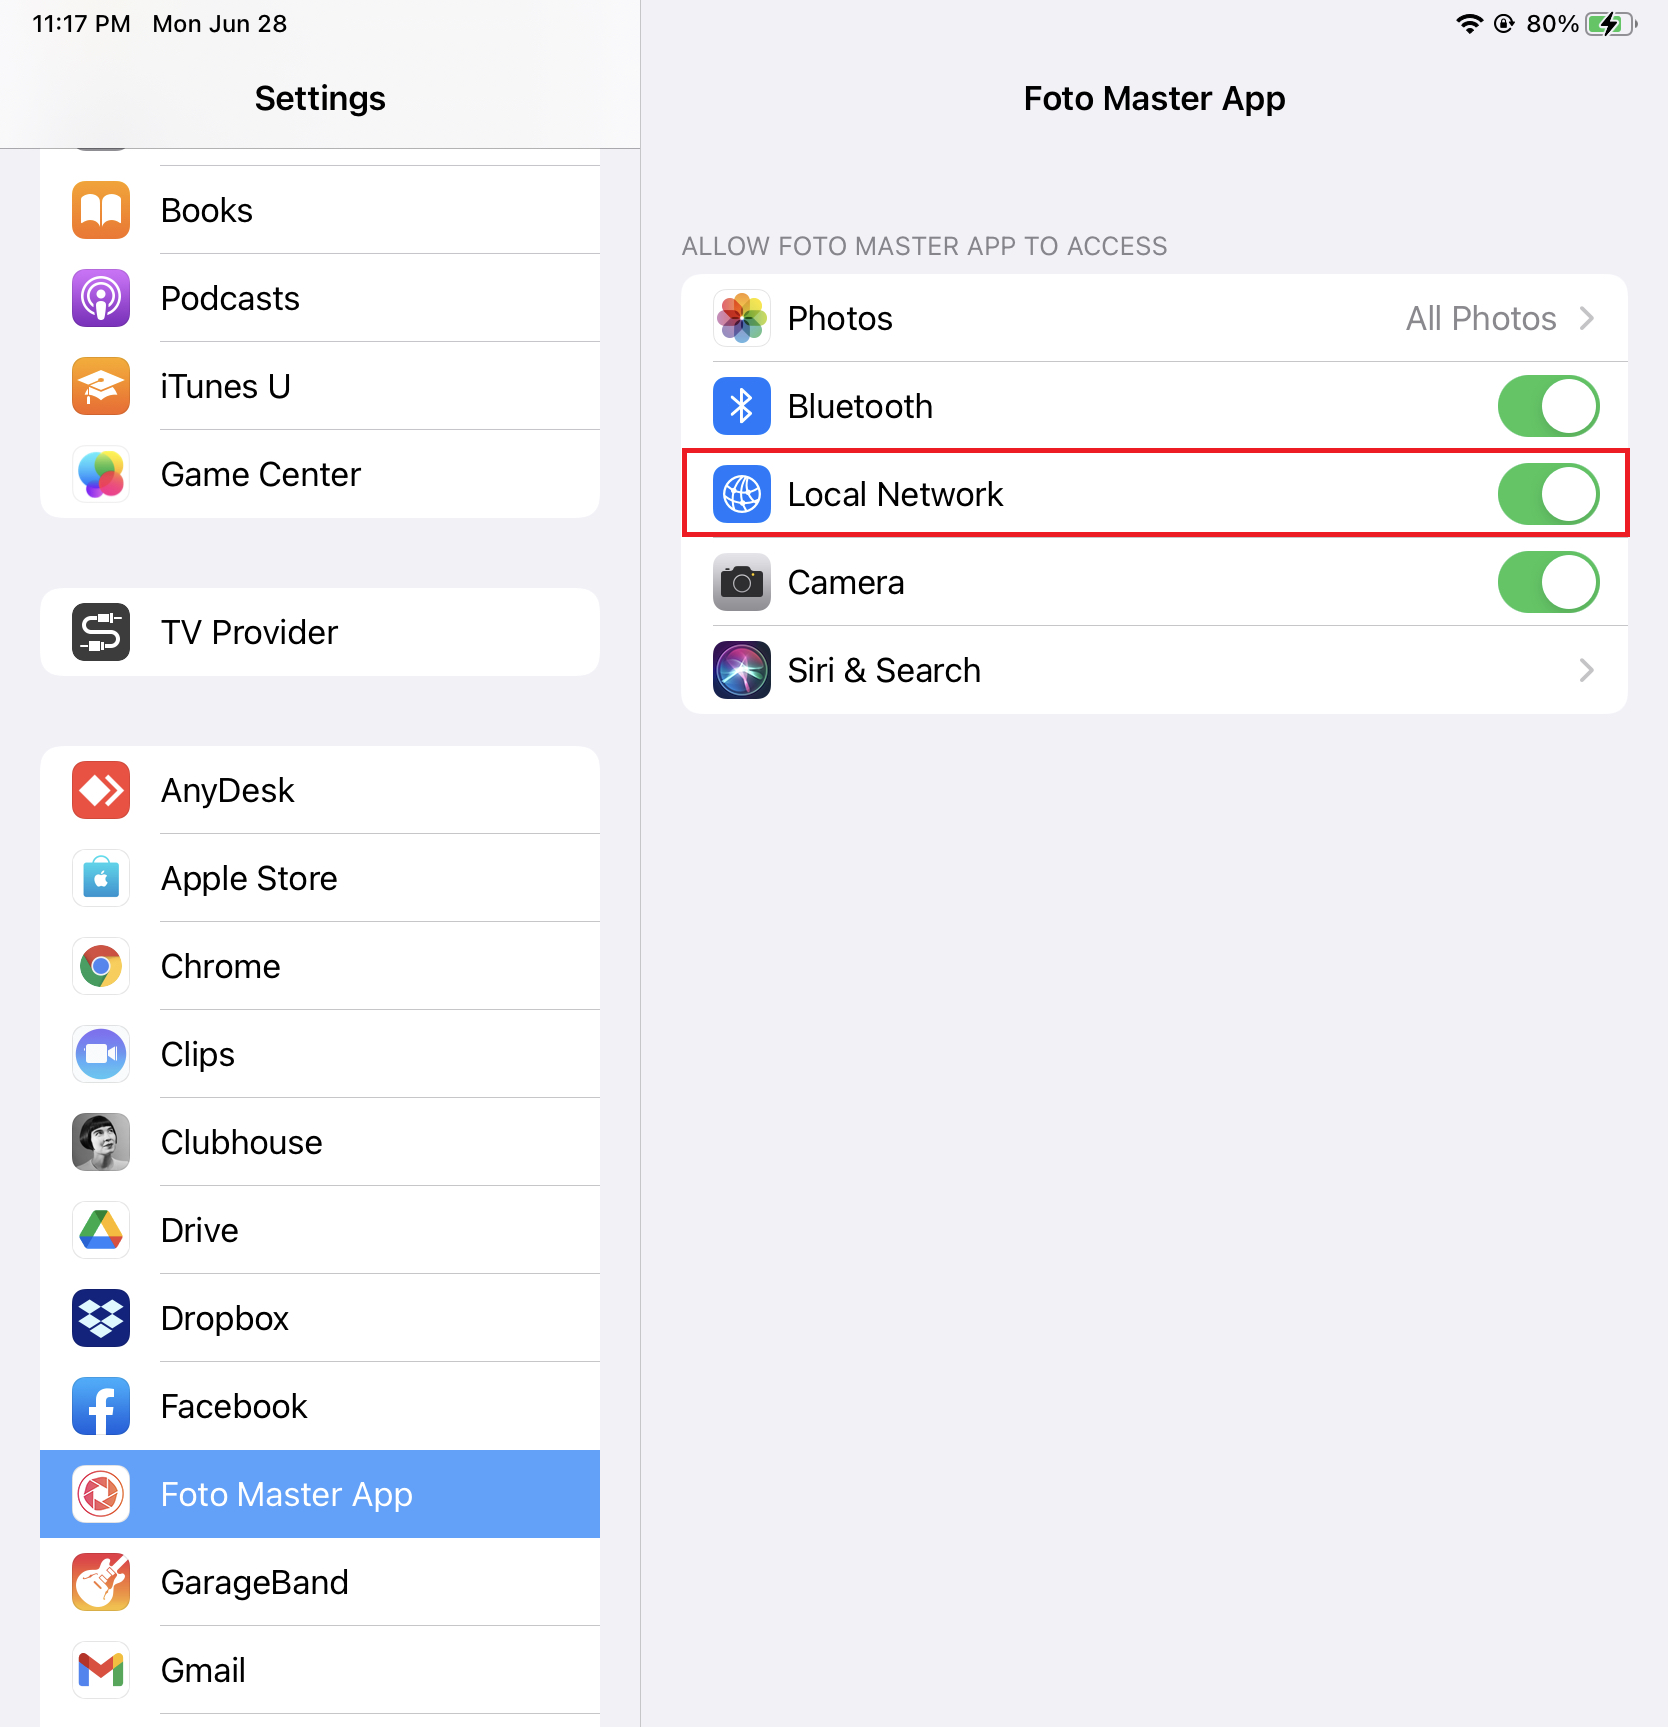
If you can't see the Local Network option in this menu, reset your iPad settings: open iPad Settings → General → Reset → Reset All Settings.
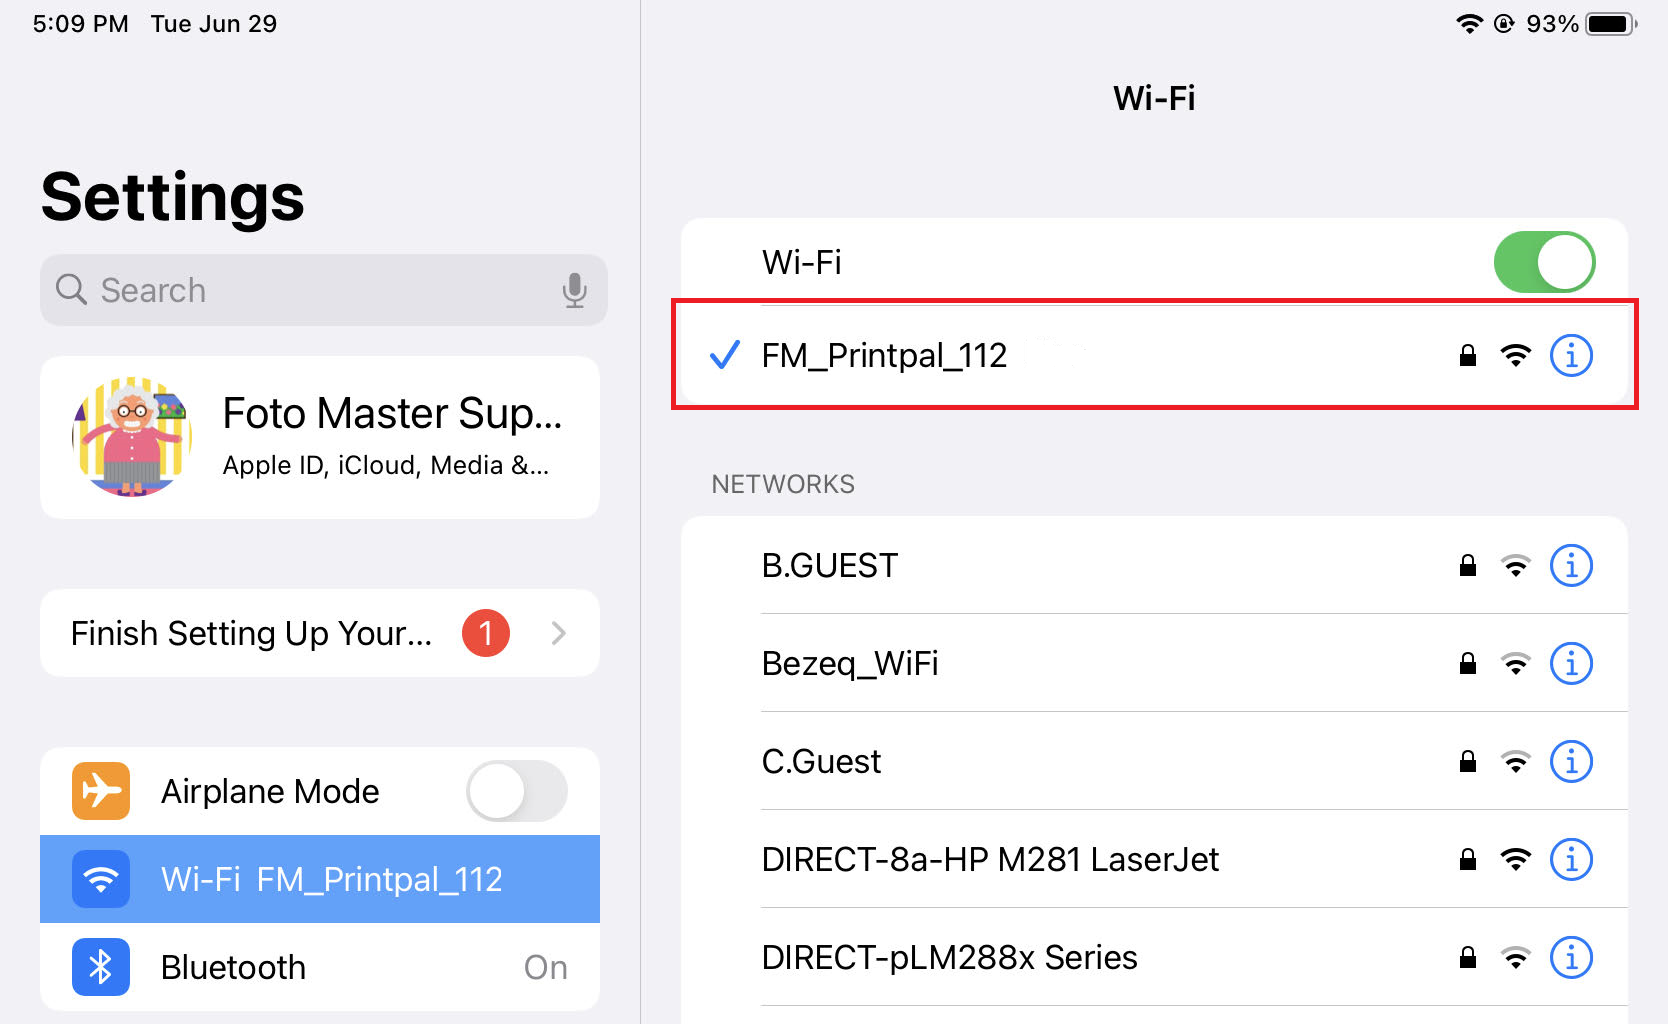
Then, connect to the FM_PrintPal_112 network and open the Foto Master Booth app. Allow permissions to every pop-up it shows, especially the Local Network:
Make sure to re-set your iPad according to the quick start guide.
WiFi PrintPal Troubleshooting
-
Make sure you're using a supported printer.
-
Make sure the printer is connected to the PrintPal device and turned on. The PrintPal should be powered on last.
-
Make sure you're connected to the FM_PrintPal_112 network in the iPad WiFi settings.
-
Open the Foto Master Booth app → Settings → PrintPal and make sure that WiFi PrintPal is selected. Then print a test page.
-
If it doesn't work, click on Refresh Printer. Confirm the process and wait for the notification that the process has completed:
-
If it doesn't work, press the Photo Layout menu (this will create a new preview file in the preset pack), and try to print a test page again.
-
If that doesn't work, redo the Refresh Printer process as shown above.
-
If you still can't print, restart the PrintPal device and repeat steps 3–5.
-
If that doesn't work, reset your iPad settings: open iPad Settings → General → Reset → Reset All Settings. Then allow permissions to every pop-up (camera roll, Bluetooth, Local network, etc.).
-
If you still can't print, test Wired PrintPal.
Wired PrintPal Troubleshooting
- Make sure you're using a supported printer.
- Make sure the printer is connected to the PrintPal device and turned on. The PrintPal should be powered on last.
- When connecting the USB-C to Ethernet adapter to the iPad, make sure you see the Ethernet indication and that an IP address is generated automatically.
- If you can't see an Ethernet indication, flip the adapter.
- If you see the Ethernet indication but no IP is generated, disconnect and reconnect the Ethernet cord.
- If an IP address is still not generated, replace the Ethernet cable.
It is recommended to have the iPad's WiFi off as well for best results.
If you can't make it work, skip and test WiFi PrintPal.
-
Open the Foto Master Booth app → Settings → PrintPal and make sure that Wired PrintPal is selected. Then print a test page.
-
If it doesn't work, click on Refresh Printer. Confirm the process and wait for the notification:
-
If it doesn't work, press the Photo Layout menu (this will create a new preview file in the preset pack), and try to print a test page again.
-
If that doesn't work, redo the Refresh Printer process as shown above.
-
If you still can't print, restart the PrintPal device and repeat steps 3–5.
-
If that doesn't work, reset your iPad settings: open iPad Settings → General → Reset → Reset All Settings. Then allow permissions to every pop-up (camera roll, Bluetooth, Local network, etc.).
-
If you still can't print, test WiFi PrintPal.
Wired and WiFi PrintPal Both Fail
If neither method works, the printer may not be recognized due to its USB cable. Test by:
- Replacing the printer's USB cable, restarting the PrintPal device, and testing Wired/WiFi PrintPal again.
- Testing AirPrint: from the Foto Master Booth app, click Select Printer and choose the PRINTER raspberrypi device. This is the dye-sub printer that has the PrintPal connected to it.
AirPrint Troubleshooting
- Make sure you're connected to FM_PrintPal_112 in the iPad WiFi settings.
- If the printer doesn't show up in the Select Printer menu, click Refresh Printer and try again.
- If the printer is still not showing, replace the printer's USB cable, restart the PrintPal device, and try again.
- Repeat steps 1–2.
- If AirPrint does not print, slide up to see the apps running in the background and look for Print Center. If it's there, there are documents pending in the queue. Delete those documents and try to reprint via AirPrint.
PrintPal Network Connection Is Unstable
If you're very far from the PrintPal device (roaming mode) or if there are reception interruptions due to structural issues, the connection to the PrintPal network may become unstable. When the iPad gets disconnected from the PrintPal network, it can auto-connect to another WiFi network.
To prevent this, tap Forget Network for the other WiFi networks in the area, so the iPad reconnects to the PrintPal network automatically rather than to other networks.
Alternative Solutions
If you can't troubleshoot your PrintPal and need an immediate alternative solution, you can use the Online Sharing features. MMS and Email. For details, contact support.
Hot Spot via PrintPal Troubleshooting
First, make sure that the Edimax dongle is connected to the PrintPal.
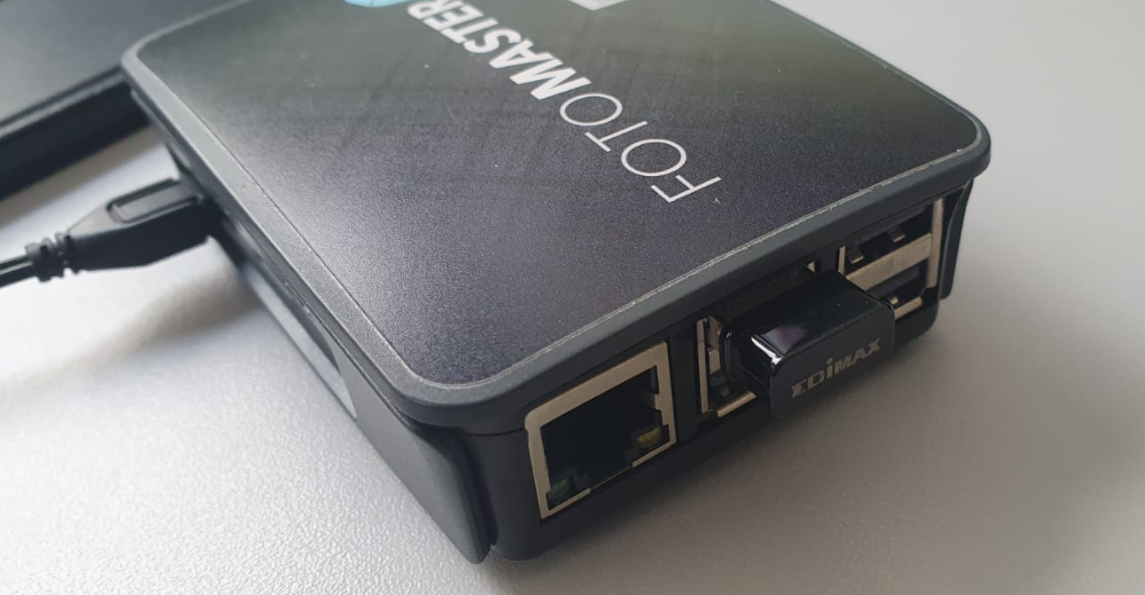
If you don't see any networks:
- Click on Refresh Networks.
- Connect the Edimax dongle to a different port on the PrintPal device and try again.
- Restart the PrintPal device.
- Replace the Edimax dongle.
If you're at an event and can't get a new dongle, you can use the printing option only and/or use the MMS and Email features offline; the documents will stay pending in the system's queue until you get internet connection.
If you see different networks but not the one you want:
- Click on Refresh Networks.
- Check if your network's name has any special characters. If it does, change the network's name and click Refresh Networks. With certain characters, the name of the network may appear changed.
Was this helpful?
Related articles
Printer Comparison: DNP Models for Photo Booths
Overview DNP photo printers are widely used by photo booth operators because they are dependable, event-ready, and produce professional dye-sublimation prints. FMX supports printin
Choosing the Right Camera for Your Photo Booth
Your camera is the single most important component affecting photo quality in your booth. FMX supports Canon, Nikon, Sony, and GoPro cameras. FMX for Windows also supports USB webc
Camera Basics for Photo Booth Operators
You do not need to be a professional photographer to run a great photo booth, but understanding a few camera fundamentals will help you deliver consistently high-quality photos acr
FMX Supported Camera List
FMX supports Canon, Nikon, Sony, and GoPro cameras. FMX for Windows also supports UVC-compliant USB webcams, while FMX for iPadOS can use the iPad's built-in cameras. Support and s
Camera Basics: The Exposure Triangle
This video explains the exposure triangle (aperture, shutter speed, and ISO) and how each setting interacts to control the final look of your photo. Recommended for operators who w