
How to Create A Miniature Me
Legacy Article: This article covers the legacy FMBooth (Windows + iPadOS) software. FMBooth (Windows + iPadOS) has been replaced by FMX. See FMX documentation →
Overview
This guide explains how to use the Miniature Me feature in FMBooth for Windows software to create custom miniature cutouts.
Required Equipment and Software
- FMBooth for Windows software
- Silhouette Cameo 5 or Cameo 4 cutting machine
- 0.4mm magnetic sheet (optional, for magnet mounting)
- 2mm blade for the Silhouette cutter
- Windows-based computer
- Silhouette Studio software (Link)
FMBooth Setup
- Download the "Miniature.zip" preset from the Downloads tab
- Access the new Miniature preset in your Presets tab
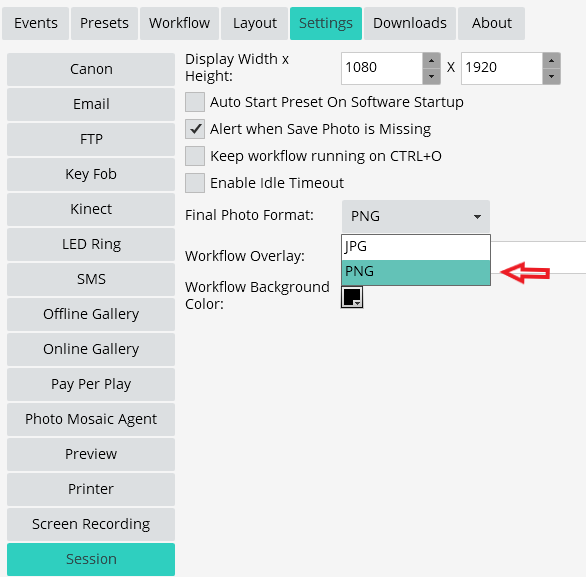
- Navigate to Settings > Session and change "Final Photo Format" from JPG to PNG
- Click Save
How the Preset Works
The preset is configured to:
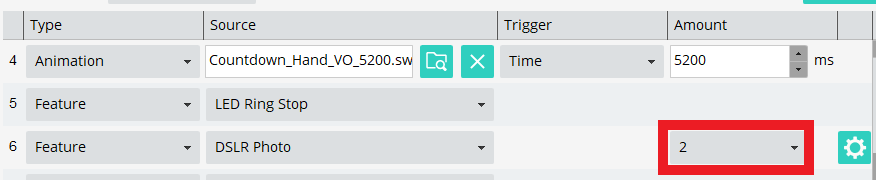
- Capture a photo with your DSLR camera (set to appear twice in layout)
- Apply AI background removal automatically
- Create an outline effect on one photo element
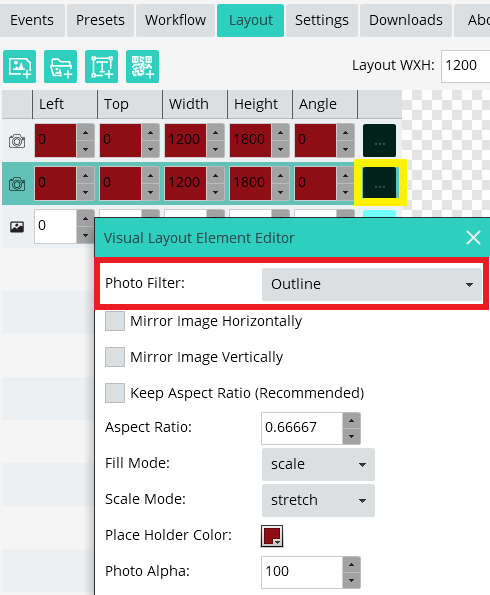
- Save as PNG format to preserve the outlined cutout appearance

Silhouette Studio Configuration
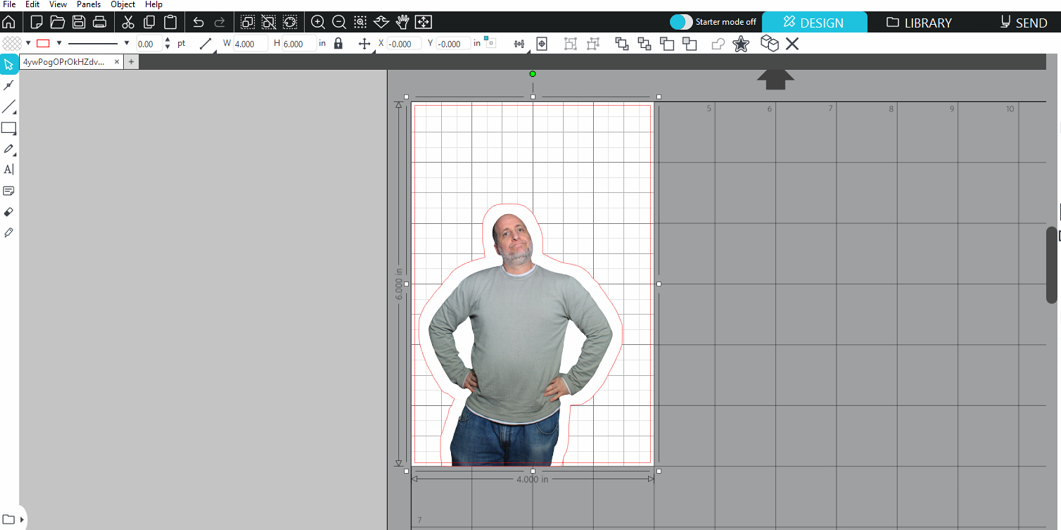
- Open Silhouette Studio and import your photo (File > Open)
- Verify page settings: Media Size 4x6, Portrait orientation
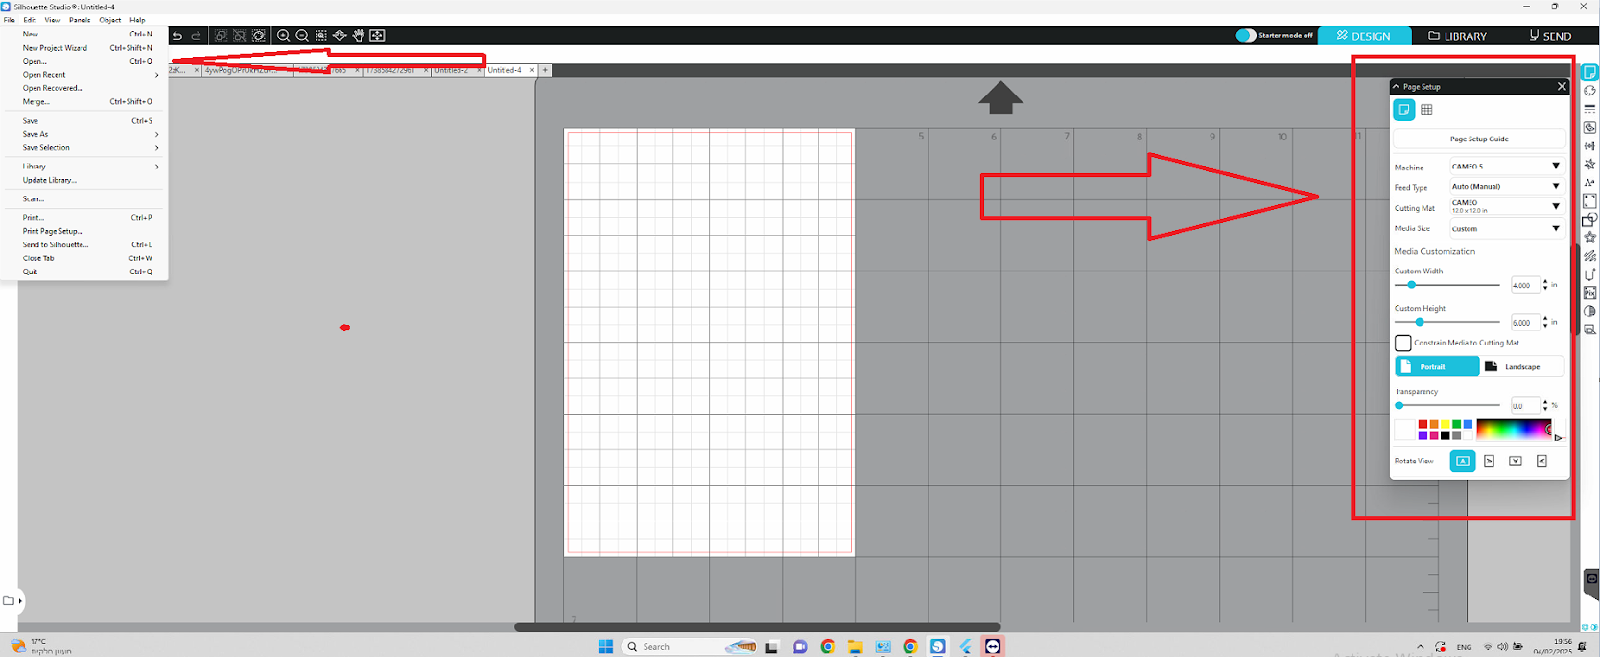
- Resize the image to 4x6 dimensions

- Center the image using the center button
Cutting Settings
For optimal results with Silhouette Cameo 5:
- Force: 15
- Passes: 2
- Speed: 10
Cutting Process
- Place the printed photo on the Silhouette mat
- Feed the mat into the cutter using the Up arrow
- Confirm "Ready" status appears in software
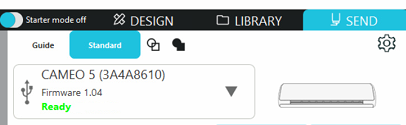
- Press "Send" to initiate cutting
- Remove the finished mat using the Down button
Related articles
Custom Assets Specifications
Do you want to create customized assets for your software? No problem! As long as your custom assets are on your computer, you can load them into the software. Display Resolution:
FMBooth for iPad Video Tutorial
This video tutorial provides a getting-started walkthrough for the FMBooth for iPadOS app. Note: FMBooth for iPad has been replaced by FMX for iPad: see the FMX for iPad documentat
How To Create Trading Cards - 4x6 Media
Overview This guide explains how to create trading cards using FMBooth software for Windows and a Silhouette Cameo cutting machine. Requirements - FMBooth For Windows software - Si
How To Create Your Own Workflow
Navigating the Screens Before creating a workflow, you need to access the workflow tab. Press the back button in the top left corner to view all available screens, then select the
Software Video Tutorial
This article provides video tutorials for FMBooth for Windows (Foto Master Photo Booth Software). Video Tutorials FMBooth Software Tutorial: https://youtu.be/6X14QKXUL-I FMBooth V1