
Screen Recording: Overview
The Screen Recording step captures what happens on the screen during your FMX experience. Instead of recording guests with the camera, it records the on-screen journey itself: animations, previews, games, effects, and anything else the guest sees on the display. Screen Recording is ideal when you want to create experience videos that show the full visual flow on the booth screen.
What Is the Screen Recording Step?
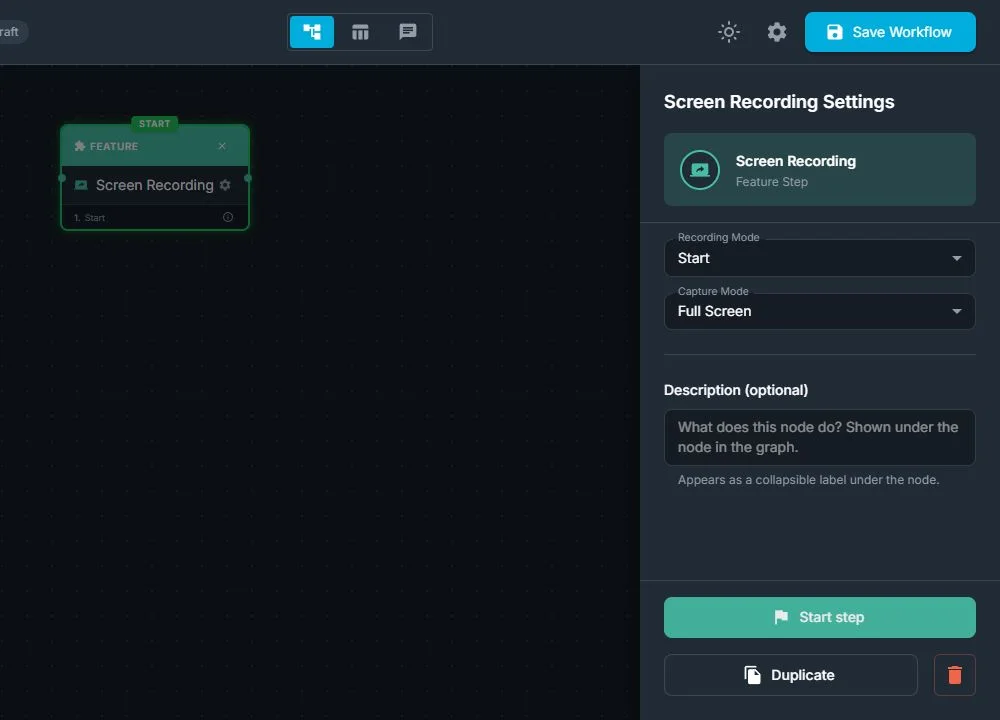
From the operator's perspective, Screen Recording:
- Starts recording whatever is shown on screen when the workflow reaches a Screen Recording (Start) step
- Keeps recording while the workflow moves through the steps between Start and Stop
- Stops recording and saves a video clip when the workflow reaches a Screen Recording (Stop) step
- Allows you to choose whether to record the entire screen or only a specific area of the screen
- Runs silently in the background: it does not show its own UI or controls to the guest
- Makes the recorded clip available to later steps that are designed to work with videos (for example, Preview or sharing steps)
From the guest's perspective:
- They simply see the experience you designed: welcome screens, selection menus, games, AI effects, previews, and so on
- They are not shown any special screen recording UI coming from this step
- If you want them to know the on-screen journey is being recorded, you communicate that with your own instructions, graphics, or animations
- When the recording ends, the experience continues normally
When Should You Use Screen Recording?
Use a Screen Recording sequence when you want to capture the on-screen experience itself, not just a still photo or a video from the camera.
Typical reasons:
- Record guests' reactions when they first see their AI result, layout, or final photo on the screen
- Capture gameplay and interactive screens for sponsor recaps or social media content
- Create full experience videos that show the entire on-screen flow from welcome to sharing
- Produce demo and training clips that show exactly how the booth behaves step by step
- Build branded, screen-only videos that focus on your layouts, animations, and user interface
You usually don't need Screen Recording for:
- Simple photo booth flows where only the final still photo is important
- Standard camera video recording: that is handled by the Record Video step
- Experiences where you only care about the final media, not the journey shown on screen
How Screen Recording Fits in the Workflow
In the Workflow Builder, add Screen Recording like any other step:
- Select Screen Recording in the Steps Library
- Add a Screen Recording step with Mode set to Start, where you want the recording to begin
- Add another Screen Recording step with Mode set to Stop, where you want the recording to end
- Choose whether the recording should capture the full screen or only a specific area of the screen
- Connect both Screen Recording steps to the steps that come before and after them in the guest journey
Typical patterns:
Record just the reaction:
Take Photo → AI Effect → Screen Recording (Start) → Preview (guest reaction) → Screen Recording (Stop) → Share
Record the whole journey:
Screen Recording (Start) → Welcome → Selection Screen → Capture → Effect or Layout → Preview → Share → Screen Recording (Stop)
Why Screen Recording Is Useful
For event operators:
- Extra content: creates experience videos that show the full on-screen journey, not only the final photo or a camera video
- Flexible: you decide exactly which part of the experience to record by choosing where the Start and Stop steps appear
- Non-intrusive: runs silently in the background and does not change what guests see or how they interact with the booth
- Great for demos: ideal for capturing sample flows for sales decks, client previews, social media, and staff training
- Easy to add: can be dropped into existing workflows without changing the structure of the guest journey
For clients and guests:
- More engaging outputs: guests can receive not only a photo, but also a short video that shows how the experience looked on screen
- Stronger storytelling: screen recordings capture animations, transitions, games, and UI that make the brand experience feel richer and more dynamic
- Shareable moments: reaction clips, gameplay segments, and reveal moments are perfect for social media and event recap videos
Was this helpful?
Related articles
FMX for Windows: Customizing Your Experience
Everything at a photo booth event (the overlays, the countdown, the on-screen text, the email guests receive, the gallery they get a link to) is something you control. This guide m
FMX for Windows: System Requirements
Before installing FMX on your Windows computer, make sure your system meets the requirements below. Meeting the recommended specifications will ensure smooth performance during eve
Installing FMX on Windows
When to Use First-time installation of FMX on a Windows PC Reinstalling FMX on the same machine Upgrading FMX to a newer version using the latest installer Requirements Windows 10
Login to FMX
When to Use Immediately after installing FMX When switching operators or moving the license to a different PC Requirements A Foto Master Cloud Account (email and password) At least
Building a FMX Preset From Scratch: Video Tutorial
This video covers the basics of building a workflow and layout in FMX: a good starting point before exploring the individual workflow step articles.