
Step Types Quick Reference
This reference covers all workflow step types available in the FMX Workflow Builder. Use it to understand what each step does, when to use it, and what settings are available.
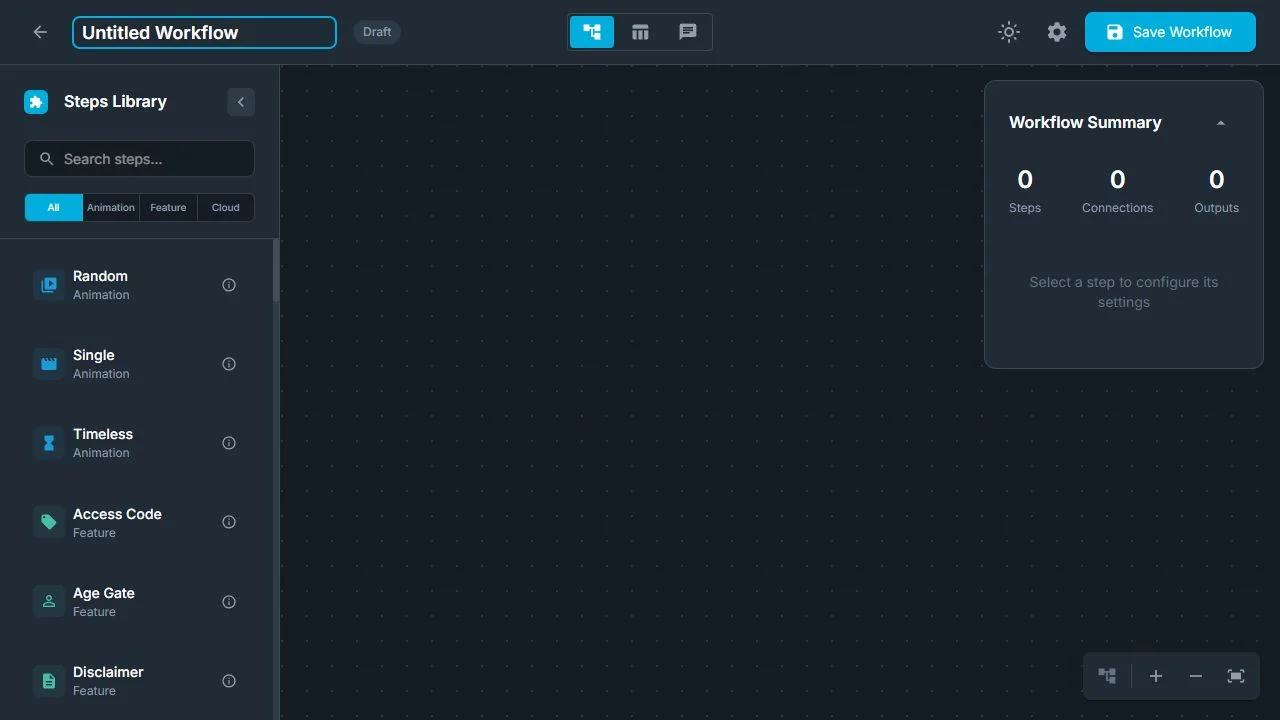
Quick Reference Table
| Step Type | Kind | What It Does | Platform |
|---|---|---|---|
| Selection Screen | Feature | Displays a menu for actions, paid choices, or multi-area layout combinations | All |
| Take Photo | Feature | Triggers the camera to capture a photo | All |
| Live View | Feature | Starts or stops the live camera preview | All |
| Preview | Feature | Shows captured media with retake/accept options | All |
| Drag & Drop Layout | Feature | Lets guests place Raw or AI photos into the active photo layout | All |
| Disclaimer | Feature | Displays terms/consent screen | All |
| Print Copies | Feature | Sends photos to the printer | All |
| Save Final Photo | Feature | Renders and saves the final composited photo | All |
| Record Video | Feature | Starts or stops video recording | All |
| Video from Photos | Feature | Creates a short MP4 sequence from photos | All |
| Screen Recording | Feature | Records the screen output | Windows only |
| Screen Capture | Feature | Takes a screenshot of the display | Windows only |
| Sign & Draw | Feature | Touch canvas for drawing or signing | All |
| Games | Feature | Interactive games (Tic Tac Toe, Shell Game) | All |
| Access Code | Feature | Requires a code to proceed | All |
| Scan | Feature | Captures a hand scan for AI Palm Reading | Windows only |
| External Script | Feature | Launches an external program | Windows only |
| LED Ring | Feature | Controls the LED ring via serial | Windows only |
| iPad LED Light | Feature | Controls a paired external LED light | iPad only |
| LED Strip V180 | Feature | Controls the RGBW strip on V-Motion 180 hardware | iPad only |
| Draw Me Offline | Feature | Queues the Final Photo to a connected Draw Me computer | iPad only |
| V180 | Feature | Controls V-Motion 180 motor movement | iPad only |
| End Session | Feature | Ends one session segment while the workflow continues | All |
| Slideshow Start / Stop | Feature | Starts or stops rotating background media | All |
| Video to Flipbook | Feature | Converts video frames into printable Flipbook pages | All |
| Photos to Lenticular | Feature | Produces a calibrated lenticular print raster | All |
Feature Steps -- Detailed Reference
Selection Screen
What it does: Displays a full-screen menu with clickable areas. A screen can route to steps, store AI prompts, activate Photo Layouts or Video Fusion templates, open workflows, collect payment, or map several guest choices to one layout.
When to use it: Use it when guests choose an experience, AI style, template, product, or combination of items. It can sit at the start of the workflow or anywhere a guest decision is needed.
Key settings:
- Selection Type -- Step, Prompt, Photo Layout, Video Fusion, Workflow, Payment, or Mixed
- Background Media -- Image or video displayed behind the clickable areas, with Fit, Crop, or Stretch
- Expected Aspect Ratio -- 9:16, 16:9, 4:3, 3:4, 2:3, 3:2, or 1:1; use 3:4 for a portrait iPad
- Auto-Select Random Area -- Bypasses the menu and runs one complete area; unavailable on Payment and disabled by Multi Area Selection
- Mixed -- Gives each area its own Step, Prompt, Photo Layout, Video Fusion, Workflow, or Payment action
- Payment -- Gives each area a Price and Continue to Step, plus Initial Selection, Selection Effects, and optional Stripe/Shopify Payment QR placement
- Multi Area Selection -- Photo Layout only; guests select exactly 2-8 areas and tap Done, then FMX loads the layout mapped to that exact combination
- Next/Back -- Pages between Selection Screen steps using buttons, swipe, or both; not used by multi-area selection, and Payment has no Next-to-pay control
- Areas -- Rename, position, size, lock, duplicate, delete, assign Media, and configure the applicable action
Continuation: Step areas and Payment areas use area-specific destinations. Prompt, Photo Layout, and Video Fusion choices use the screen's normal continuation after applying their selected value. Workflow areas open the selected child workflow. A Mixed screen that contains non-branching actions still needs a normal outgoing connection.
Important: The eye icon is an editor-canvas aid, not a runtime visibility control. Hidden areas remain rendered, tappable, and eligible in FMX. Delete an unwanted area.
See Selection Screen: Types, Mixed Menus, Payments, and Multi-Area Layouts for the complete guide.
Take Photo
What it does: Triggers the configured camera to capture a photo. On Windows, this can command a Canon, Nikon, Sony, or GoPro camera or grab a frame from a webcam. On iPad, it uses the built-in camera or a selected external Canon, Nikon, Sony, or GoPro camera.
When to use it: Place this step after a Live View Start step and any countdown animation.
Key settings: Take Photo is a simple trigger step with an optional per-step camera device override. When no override is enabled, it uses the camera selected in Global Settings; exposure settings remain on the camera or in the applicable global camera configuration.
Common triggers on incoming edge: Time (after a countdown), Touch (guest taps to capture), Volume Changed (iPad, guest presses volume button), Space Bar (Windows, operator triggers).
Live View
What it does: Controls the live camera preview display. In Start mode, it activates the camera's viewfinder and shows the feed on screen. In Stop mode, it turns off the preview.
When to use it: Add a Live View Start step before Take Photo so guests can see themselves. Add a Live View Stop step after capture to release camera resources.
Key settings:
- Mode -- Start or Stop
Camera selection and live chroma-key behavior are configured in Global Settings, not on the Live View node.
Tip: Always pair Live View Start and Stop steps. Forgetting to stop live view can cause resource conflicts with subsequent steps.
Preview
What it does: Displays captured photos or videos to the guest, typically with options to accept or retake.
When to use it: Place after the capture and processing steps to let guests review their photo before sharing or printing.
Key settings:
- Preview Type -- choose the required Raw Photo, Final Photo, AI, video, GIF, Flipbook, Lenticular, or supported media preview
- Layout -- Raw Photo uses its capture presentation; Final Photo shows the completed layout produced by Save Final Photo
- Retake -- route the guest back to the correct capture branch
- Timer and loop options -- control automatic continuation and playback behavior
- Filter Selection -- let guests apply filters, with Apply Filters On set to Raw Photos or Final Photos
See Preview: Complete Setup Guide for the full list of Preview Types, ordering rules, Drag & Drop behavior, filters, and troubleshooting.
Drag & Drop Layout
What it does: Displays the active Photo Layout beside a tray of Raw Photos, AI Raw Photos, or both from the current session. Guests drag a photo into every Camera space and can replace or reuse photos before continuing.
When to use it: Place it after all capture and AI source steps and before Save Final Photo. It is designed for interactive strips, collages, and guest-selected AI results.
Key settings:
- Type -- Raw Photo, AI Raw Photos, or both
- Raw Photos Placement -- Right, Left, Top, or Bottom
- Fit container to content -- Adapts tray holders to each photo's ratio
- Image Fit -- Crop, Fit, or Fill for fixed-size tray holders
The guest can continue only after every distinct Camera position in the active layout has an assignment. See Drag & Drop Layout for Windows or Drag & Drop Layout for iPadOS for complete setup and platform behavior.
Disclaimer
What it does: Shows a terms, consent, or legal disclaimer screen that the guest must accept or decline before proceeding.
When to use it: Use at the beginning of the experience if you need guests to agree to terms of service, photo usage rights, or data collection policies.
Key settings:
- Content text and formatting
- Agree/Disagree button text
Branching: The agreed action follows the normal edge. The disagree action can optionally route to a different step (e.g., back to the welcome screen or an exit message).
Print Copies
What it does: Sends the final photo to the printer. Can either print automatically (Direct mode) or display a screen where guests choose how many copies they want.
When to use it: Near the end of the workflow, after final media is ready. An explicit Save Final Photo checkpoint immediately beforehand is useful when the exact printed composition must be fixed at that point.
Key settings:
- Mode -- Direct (auto-print) or Show Copy Selection (guest chooses)
- Min copies -- Minimum number of copies (0-10)
- Max copies -- Maximum number of copies (1-10)
- Allow User Selection -- Let guests pick their copy count
- Show Skip Button -- Add a skip option
- Skip Step ID / Zero Copies Step ID -- Route guests who skip to a different step
- Print Quality -- Draft, Normal, or High
- Paper Size -- Photo 4x6, Photo 5x7, Photo 8x10, A4, or Letter
- Show Preview -- Display a print preview
- Media to Print -- Which media type to print (typically Final Photo)
Tip: Set Min to 0 and enable Show Skip Button if you want printing to be optional for guests.
Save Final Photo
What it does: Explicitly renders the current composited photo by combining the captured images with the active layout and saves it to disk at this point in the workflow.
When to use it: Place it after the capture, AI, Draw, or Drag & Drop work you want to lock into a known Final Photo. It is especially useful before a consumer that needs the file to exist immediately.
Key settings: Save Final Photo is a marker step with no additional configuration. It uses the layout defined in your experience design on Foto Master Cloud.
Tip: This is an explicit checkpoint, not a universal prerequisite. FMX can prepare final media on demand for common preview, print, sharing, and session-end paths; use this step when the exact save point matters.
Record Video
What it does: Starts or stops video recording from the connected camera.
When to use it: Use Start mode before the recording segment and Stop mode after. The recorded video is saved locally.
Key settings:
- Mode -- Start or Stop
- Max Duration -- Maximum recording length (1-300 seconds)
- Quality -- SD (480p), HD (720p), Full HD (1080p), or UHD 4K
- Show Countdown -- Display a countdown before recording begins
- Countdown Duration -- Length of countdown (1-10 seconds)
- Record Audio -- Enable/disable audio recording from the selected microphone
Video from Photos
What it does: Creates a short MP4 from the photos captured in the current session, cycling through them in sequence.
When to use it: After capturing multiple photos (e.g., 3-4 photo burst), add this step to create a fun animated output.
Key settings:
- Playback Speed -- Speed percentage (50-150%, default 100%)
Follow the step with a processing animation that uses the Media Saved trigger before Preview or sharing. Do not substitute a guessed Time delay.
- Edge Hold Seconds -- Hold duration at the start/end for smoother looping (0-10)
End Session
What it does: Closes the current session segment and starts a fresh one without ending the surrounding workflow. Use it when a paid package contains several separately counted sessions.
For example, if a guest pays $10 for three sessions and each session should contain one Final Photo, place two End Session steps between the three capture-and-save sections. The payment remains one package, while FMX records three distinct sessions. See How to Use the End Session Step in FMX Workflows.
Slideshow Start / Stop
What it does: Starts rotating a selected media source behind the workflow and stops it when no longer needed. It is useful behind Touch to Start and while guests wait for AI. See How to Use Slideshow in FMX for Windows.
Video to Flipbook
What it does: Extracts an ordered frame sequence from a captured video and prepares printable Flipbook pages. Follow it with the correct preview and print steps. See Video to Flipbook: Complete Guide.
Photos to Lenticular
What it does: Interlaces two or three ordered images for the active calibrated printer-and-lens profile. The generated raster must be sent through the configured FMX print route, never printed manually. See How to Create and Print Lenticular Photos in FMX for Windows.
Screen Recording
What it does: Records the screen output as a video file. Can capture the full screen or a custom rectangular region.
When to use it: Use to capture the entire booth experience as a video (e.g., for 360 booths or video-based experiences where the screen output is the final product).
Key settings:
- Mode -- Start or Stop
- Capture Mode -- Full Screen or Custom region
- X, Y, Width, Height -- Custom capture region coordinates (when using Custom mode)
- FPS -- Target frame rate
Platform: Windows only.
Screen Capture
What it does: Takes a single screenshot of the booth display at the moment this step executes.
When to use it: Use to capture a snapshot of the current screen state as part of the booth output.
Key settings:
- Mode -- Full Screen or Custom region
- X, Y, Width, Height -- Custom capture region coordinates
Platform: Windows only.
Sign & Draw
What it does: Provides a touch canvas where guests can draw, write, or sign with their finger or stylus. The drawing is saved as an image.
When to use it: Use for guestbook-style experiences, signature collection, or creative drawing activities.
Key settings:
- Drawing mode and canvas configuration
- Stamp assets (configurable through Global Settings theme)
Games
What it does: Displays an interactive game that guests can play on the touchscreen.
When to use it: Use to add an entertainment element to the booth experience, especially for events with children or when guests are waiting.
Available games:
- Tic Tac Toe -- Classic game with customizable X and O images (configurable in Global Settings theme)
- 3 Shell Game -- Guess which shell hides the ball
Key settings:
- Game Type -- Select which game to display
Access Code
What it does: Displays a code entry screen. Guests must enter a valid access code to proceed. Useful for gating the booth experience behind a password or coupon code.
When to use it: At the start of the experience to restrict access, or before a special feature that requires a code.
Key settings:
- Codes -- List of valid access codes
- Reuse Code -- Whether the same code can be used multiple times
- Star Input -- Mask input characters with asterisks for privacy
Scan
What it does: Captures an image of the guest's hand from the connected scanner and makes it available to AI Palm Reading.
When to use it: In a Fortuna AI or palm-reading workflow, before the AI Palm Reading step.
Key settings: The Scan step is a simple producer step. Use a following animation with the Scan Done trigger to wait for the scan.
Platform: Windows only (requires the supported hand scanner).
External Script
What it does: Launches an external program or script on the booth computer.
When to use it: For advanced integrations -- triggering external hardware, custom software, or automation scripts.
Key settings:
- Script Path -- Absolute path to the executable or script (e.g.,
C:\scripts\my-script.exe) - Run In Background -- If true, FMX launches the process minimized and immediately regains focus. If false, the external program opens in front of the booth.
Platform: Windows only.
LED Ring
What it does: Sends commands to an LED ring connected via serial port to change colors, brightness, or patterns.
When to use it: For lighting effects synchronized with the booth experience (e.g., countdown colors, capture flash, idle animations).
Key settings: LED ring configuration, including color, pattern, and serial port settings.
Platform: Windows only.
Cloud Steps -- Detailed Reference
AI Steps
All AI steps send the captured photo to Foto Master Cloud for processing. They share a common pattern:
- The step sends the image to the cloud API.
- FMX shows a loading/processing animation (typically a Preloader animation step placed before the AI step).
- A loading Animation normally waits on AI Processed; that gate advances only after every service in the current AI batch finishes.
| AI Step | What It Does |
|---|---|
| AI Background Removal | Removes the photo background, leaving only the subject |
| AI Cartoon | Transforms the photo into various cartoon/illustration styles |
| AI Draw Me | Creates artistic AI renderings of the photo. Six models: Monet, Donatello, Raphael, da Vinci, Picasso, Michelangelo |
| AI Face Cutout | Extracts and isolates faces from the photo |
| AI Face Swap | Swaps a guest's face onto a template image |
| AI Face Switch | Switches faces between people within a group photo |
| AI Headshot | Generates professional headshot variations with different backgrounds/styles |
| AI Line 2 Life | Converts hand-drawn sketches into realistic images |
| AI Oldify | Ages or de-ages faces in the photo |
| AI Palm Reading | Generates a palm reading from a photo of the guest's hand |
| AI Style Pop | Applies artistic style transfer effects |
| AI Sharpener | Enhances photo sharpness and detail |
| AI Modify | Custom AI image modifications using a text prompt. Choose from 6 models (Nano Banana, GPT-Image, Grok Imagine families) |
| AI Combine | Combines a guest photo with a text prompt and optional reference images. Same 6-model lineup as AI Modify |
| AI Image to Video | Generates a short video from a still image |
Tip: AI steps require an internet connection. Services placed before one AI Processed wait can share the same frozen captured source. Put a wait between batches when a later service must use an earlier AI result. See How to Run Multiple AI Services in One FMX Workflow.
Sharing Steps
| Step | What It Does | Key Settings |
|---|---|---|
| Sends the photo to the guest via email | Subject, body text, provider (Cloud or Custom) | |
| SMS | Sends the photo via text message | Message text, country code selector, provider |
| QR Code | Displays a Cloud or custom destination, including current-media links | Touch/time trigger, destination, colors, landing-page and media options |
| Survey | Collects structured or free-text answers | Open-Ended, Single Choice, Multi Choice, Rating Scale, Likert Scale, Back, keyboard options |
| Webhook | Sends selected data or Base64 media to an HTTPS endpoint | URL, fields, headers/signing, wait mode, timeout, response variables, error route |
Detailed setup: QR Code Workflow Step, Surveys, and Webhooks.
How to Chain Steps Together
Steps are connected through edges in the Workflow Builder. Each edge has a trigger that determines when the transition occurs.
Linear Flow
The simplest pattern: each step connects to the next in sequence.
Step A --[Time: 3s]--> Step B --[Touch]--> Step C --[Media Saved]--> Step D
Branching Flow
A step can have multiple outgoing edges, each going to a different target:
Selection Screen --[Touch: Area 1]--> Branch A (e.g., Photo Mode)
                 --[Touch: Area 2]--> Branch B (e.g., Video Mode)
                 --[Touch: Area 3]--> Branch C (e.g., AI Mode)
Converging Flow
Multiple branches can merge back to a single step:
Branch A (Photo) --> Save Final Photo --> Share Screen
Branch B (Video) --> Save Final Photo --> Share Screen
Looping Flow
Connect the last step back to the first to create a continuous loop:
... --> Print Copies --[Time: 5s]--> Welcome Screen (start over)
Branching and Conditional Logic
Several step types support conditional branching:
- Selection Screen -- Step and Payment areas route to area-specific branches; other action types apply a value or open a workflow
- Disclaimer -- Agree vs. disagree routes to different steps
- Access Code -- Valid code proceeds; invalid code can route elsewhere
- Print Copies -- Skip/zero copies can route to a different step via the Skip Step ID or Zero Copies Step ID setting
- Preview -- Accept vs. retake can route differently
- Email/SMS -- The skip option can bypass sharing
To create conditional logic:
- Select the source step in the Workflow Builder.
- Add multiple outgoing edges.
- Set each edge's trigger and target step.
- The Workflow Builder ensures all paths are valid and connected.
See also: Workflow Builder Overview, Printing from FMX, Camera Setup, Payment Tab
Was this helpful?
Related articles
FMX for Windows: Customizing Your Experience
Everything at a photo booth event (the overlays, the countdown, the on-screen text, the email guests receive, the gallery they get a link to) is something you control. This guide m
FMX for Windows: System Requirements
Before installing FMX on your Windows computer, make sure your system meets the requirements below. Meeting the recommended specifications will ensure smooth performance during eve
Installing FMX on Windows
When to Use First-time installation of FMX on a Windows PC Reinstalling FMX on the same machine Upgrading FMX to a newer version using the latest installer Requirements Windows 10
Login to FMX
When to Use Immediately after installing FMX When switching operators or moving the license to a different PC Requirements A Foto Master Cloud Account (email and password) At least
Building a FMX Preset From Scratch: Video Tutorial
This video covers the basics of building a workflow and layout in FMX: a good starting point before exploring the individual workflow step articles.