
Creating an Interactive Selection Screen for Sharing Option
Creating a seamless user experience is essential for engaging event workflows. By setting up a custom selection screen, you can provide users with an intuitive menu to choose exactly how they want to receive their media. Following these configuration steps will allow you to route users to SMS, Email, or QR code sharing options directly from a single animated interface.
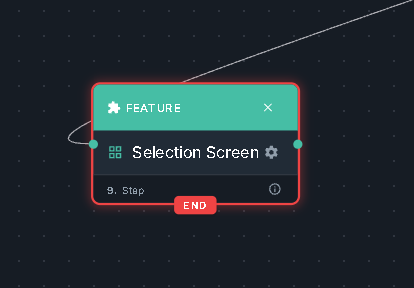
- Begin by adding a "Selection Screen" node to your workflow. Access the node's settings by clicking the Gear icon, change the Selection Type to "Step," and then click on "Open Selection Screen Editor".
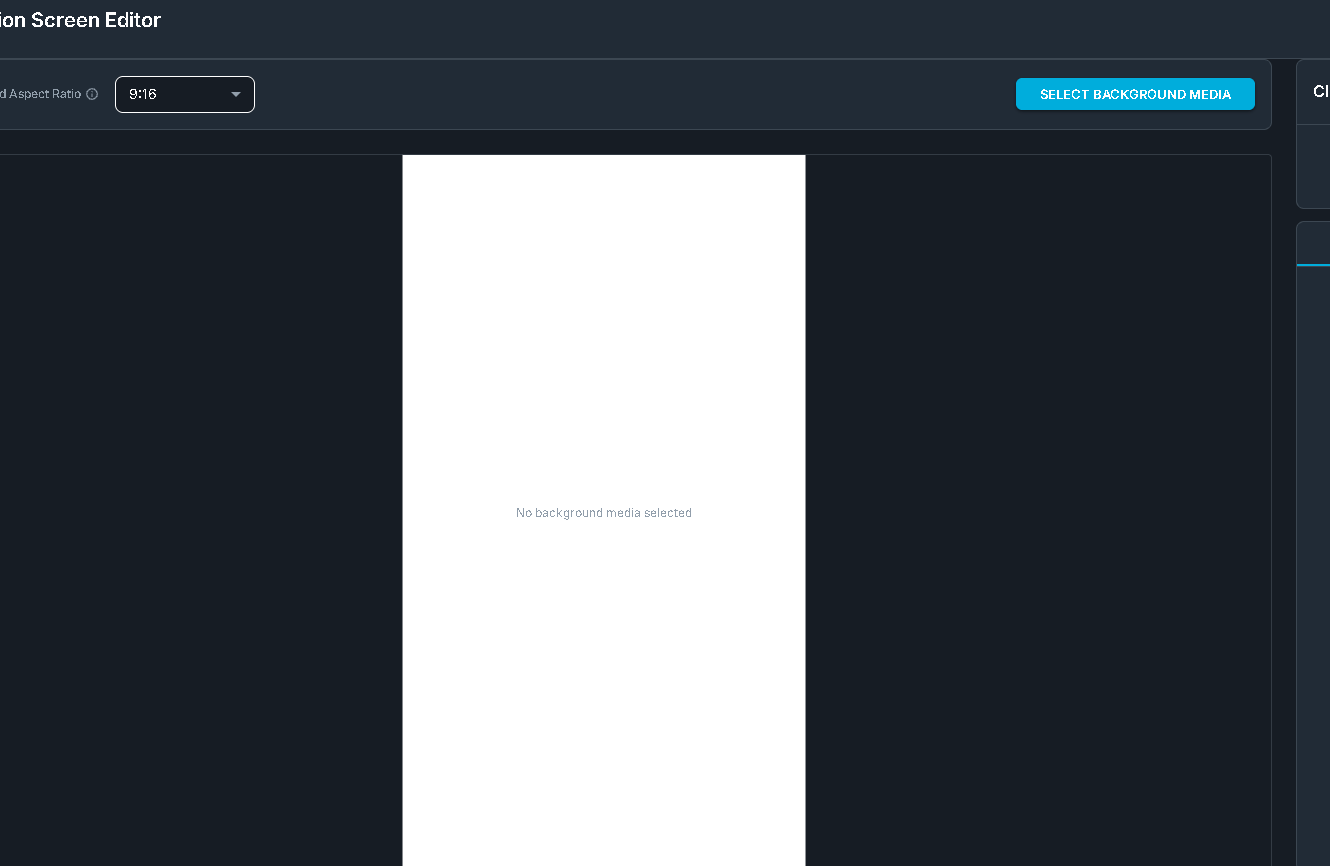
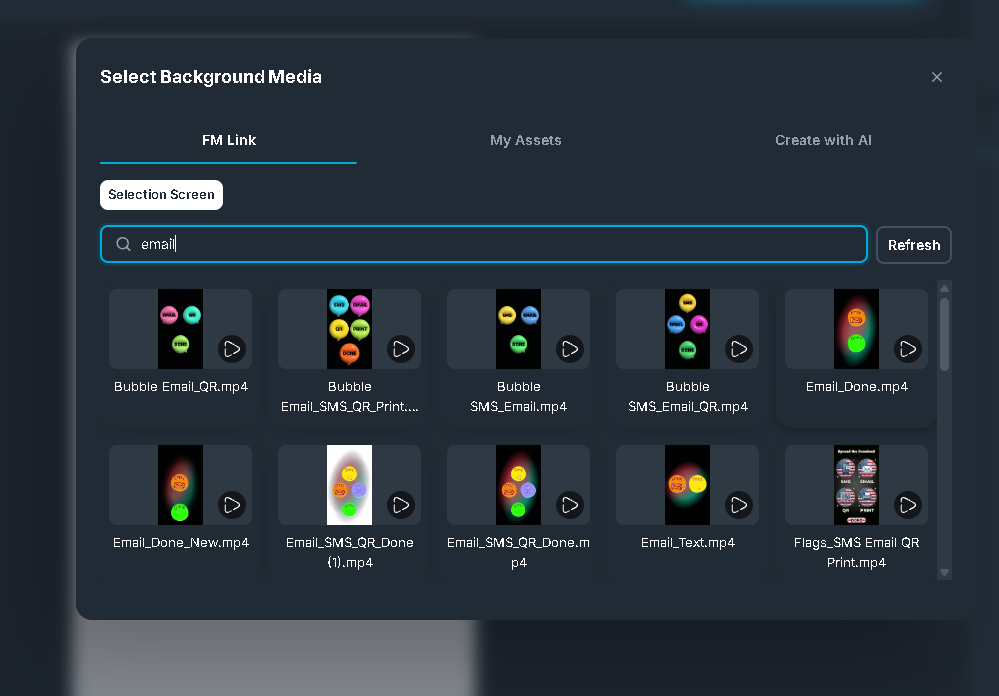
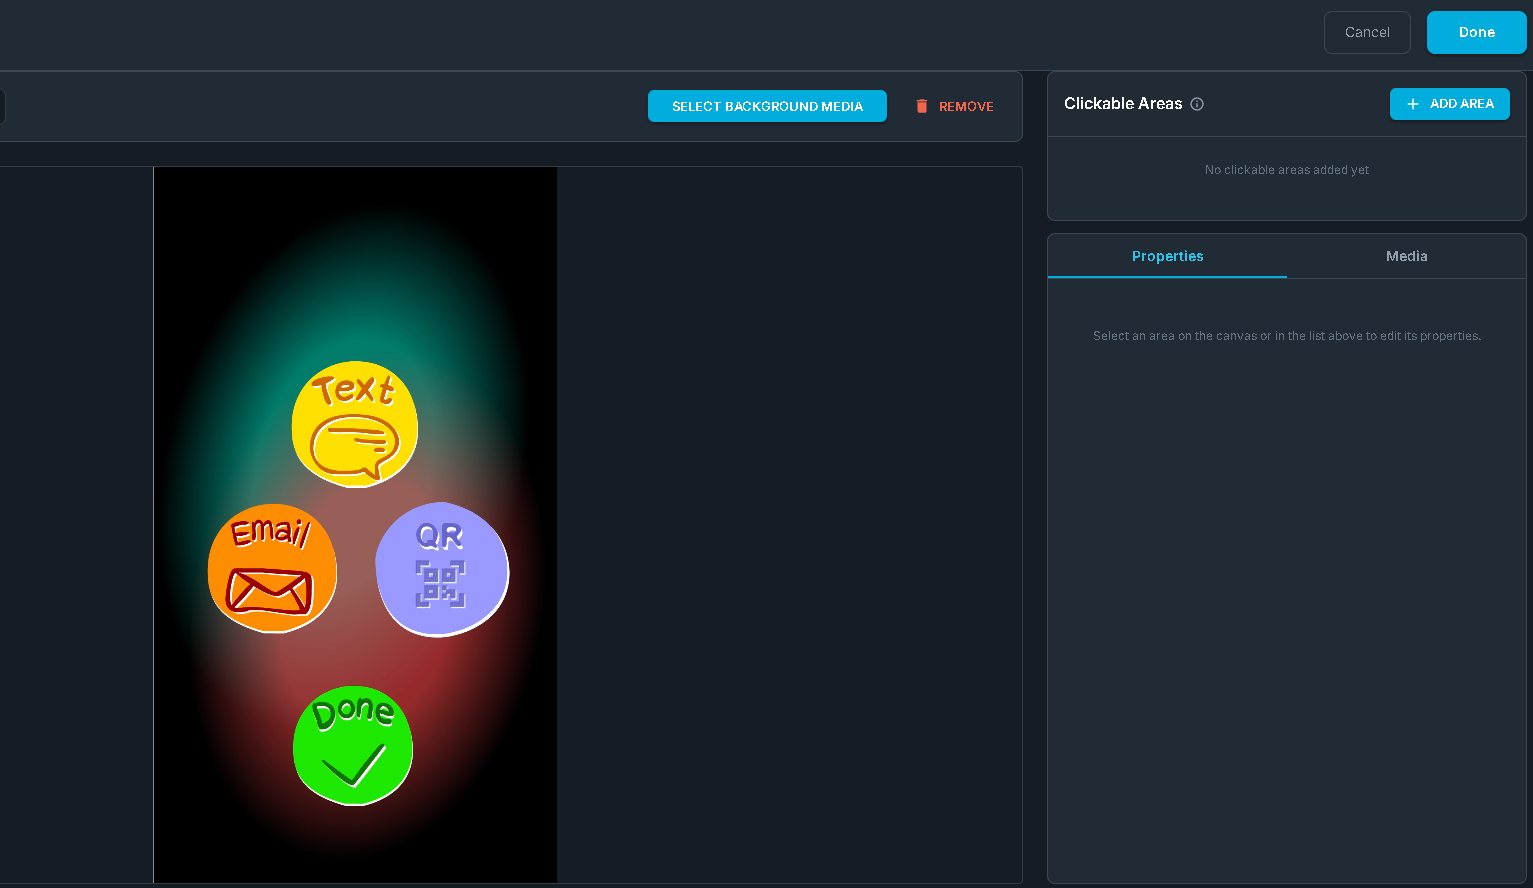
- Inside the editor, you will initially see a blank canvas. Click the "SELECT BACKGROUND MEDIA" button to open a media browser where you can select your preferred animation from FM Link, such as "Email_SMS_QR_Done.mp4" or various other bubble and text animations.
Defining Interactive Zones
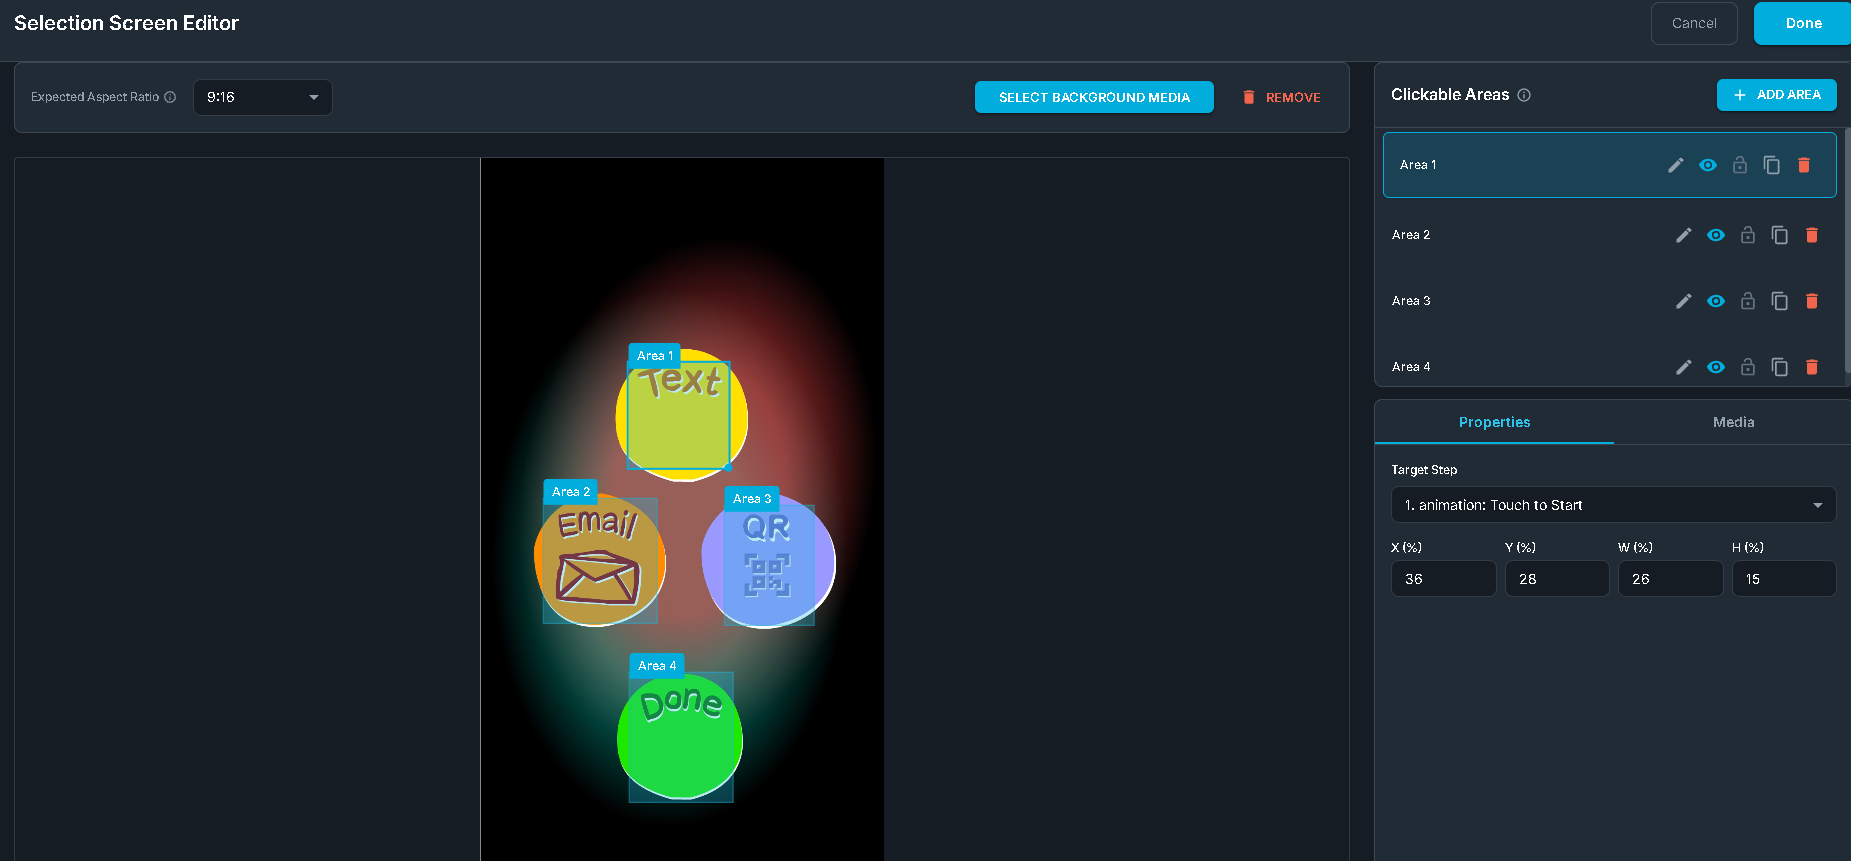
- Once your background media is loaded, navigate to the "Clickable Areas" section on the right panel and select "+ ADD AREA".
Mapping Areas to Target Features
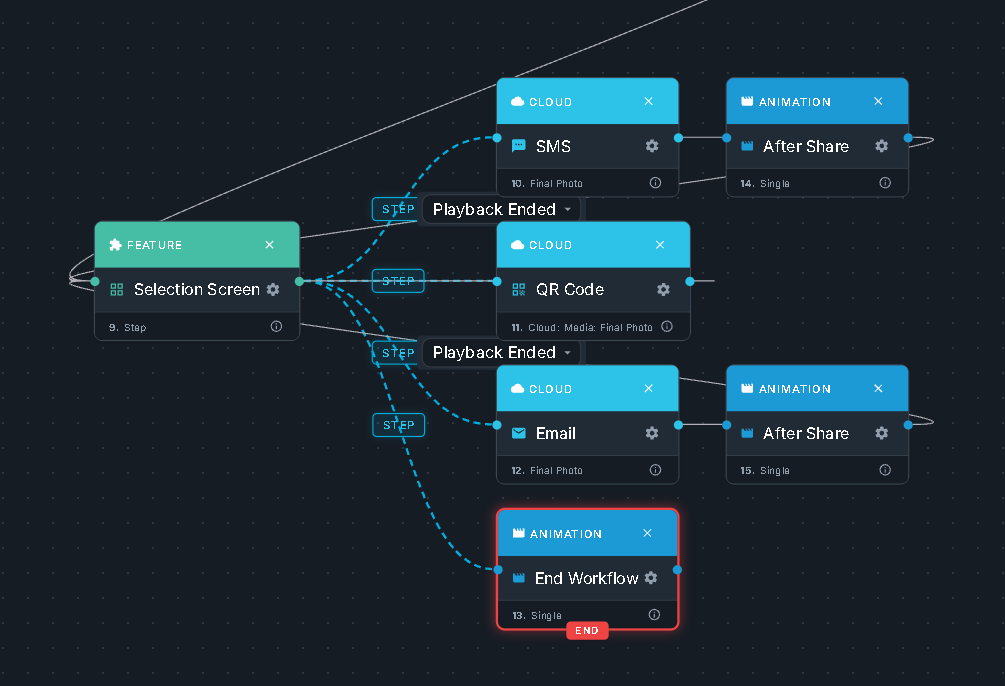
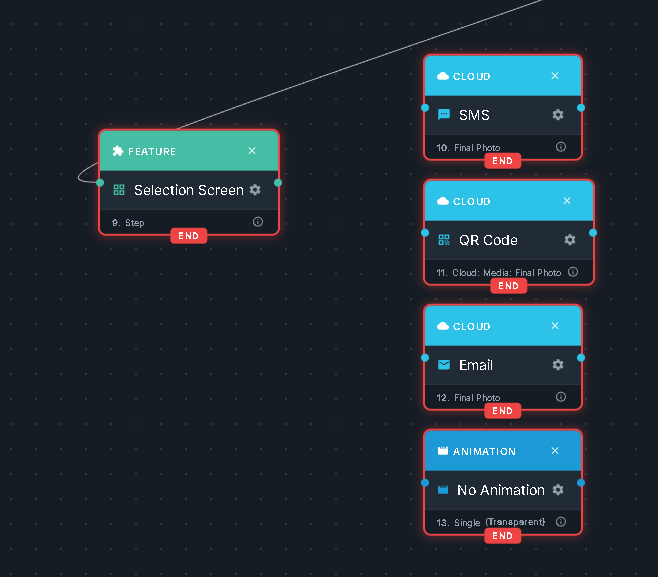
- Populate your workflow canvas with the specific feature nodes you want to offer, such as Cloud SMS, Cloud Email, Cloud QR Code, and a single Animation node to serve as the workflow's end point. Ensure these nodes are disconnected by clicking and deleting any solid black connecting lines between them.
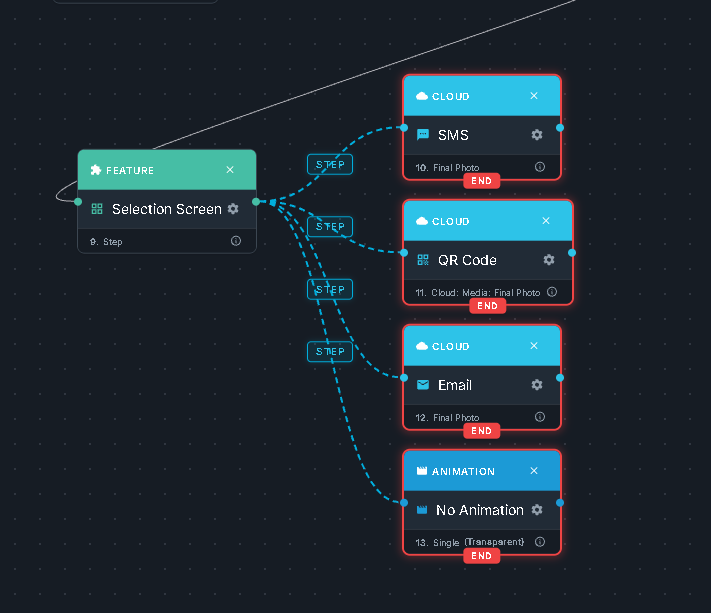
- Return to the Selection Screen Editor to map your designated areas to these standalone nodes. Select Area 1 and assign its "Target Step" to the Cloud SMS node via the dropdown menu. Continue this process by linking Area 2 to Cloud Email, Area 3 to Cloud QR Code, and Area 4 to your final Animation.
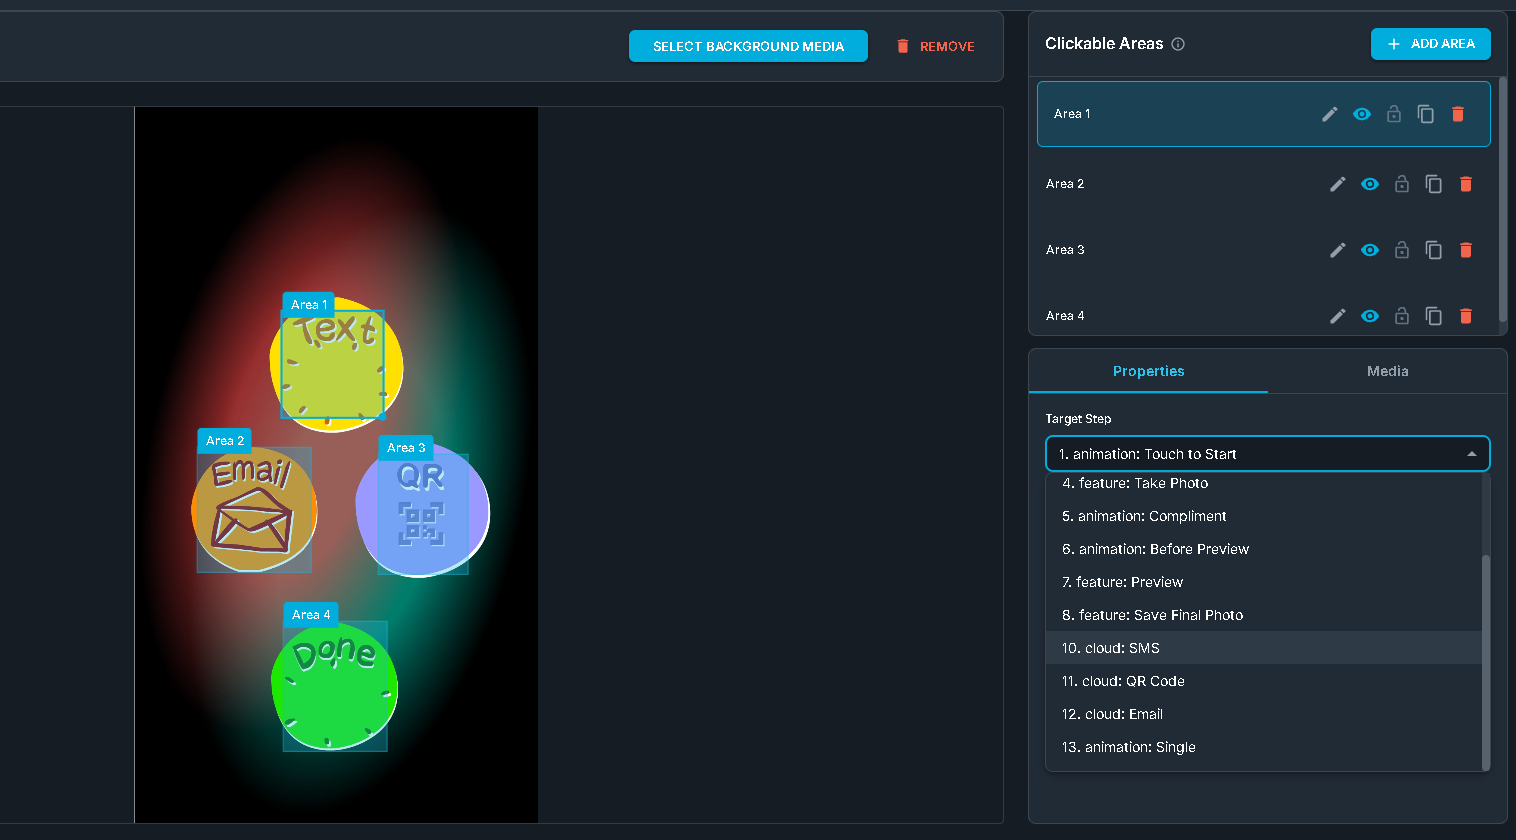
- Upon completion, dashed blue lines will appear on the canvas, visualizing the routing from the main selection screen to the targeted features.
Configuring the Workflow Loop
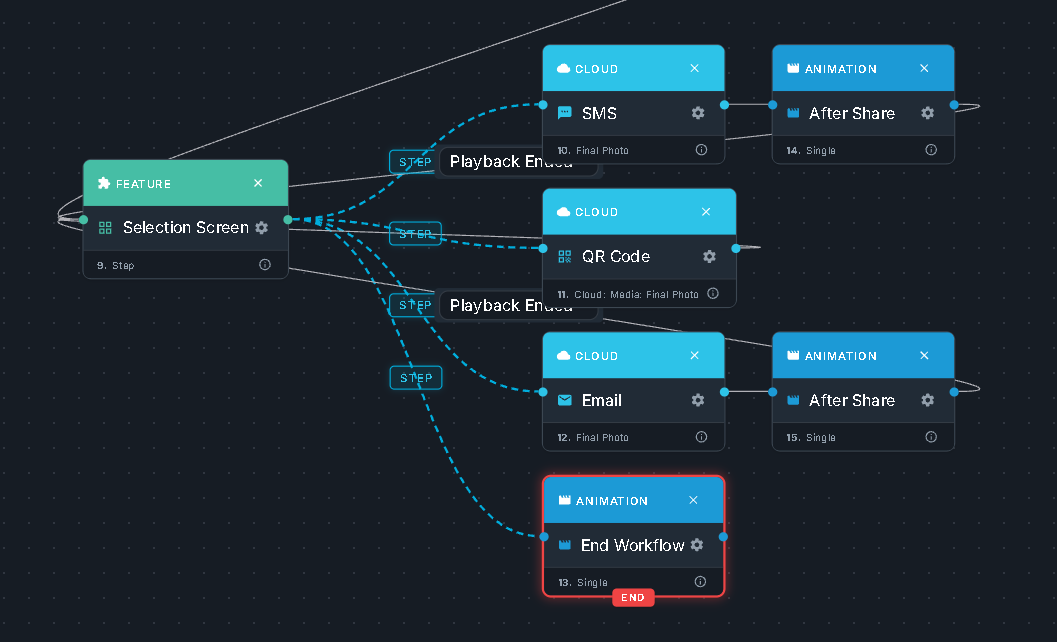
- To allow users to select multiple sharing options without the session ending prematurely, add an Animation node immediately after each Cloud sharing node (SMS, Email, and QR Code).
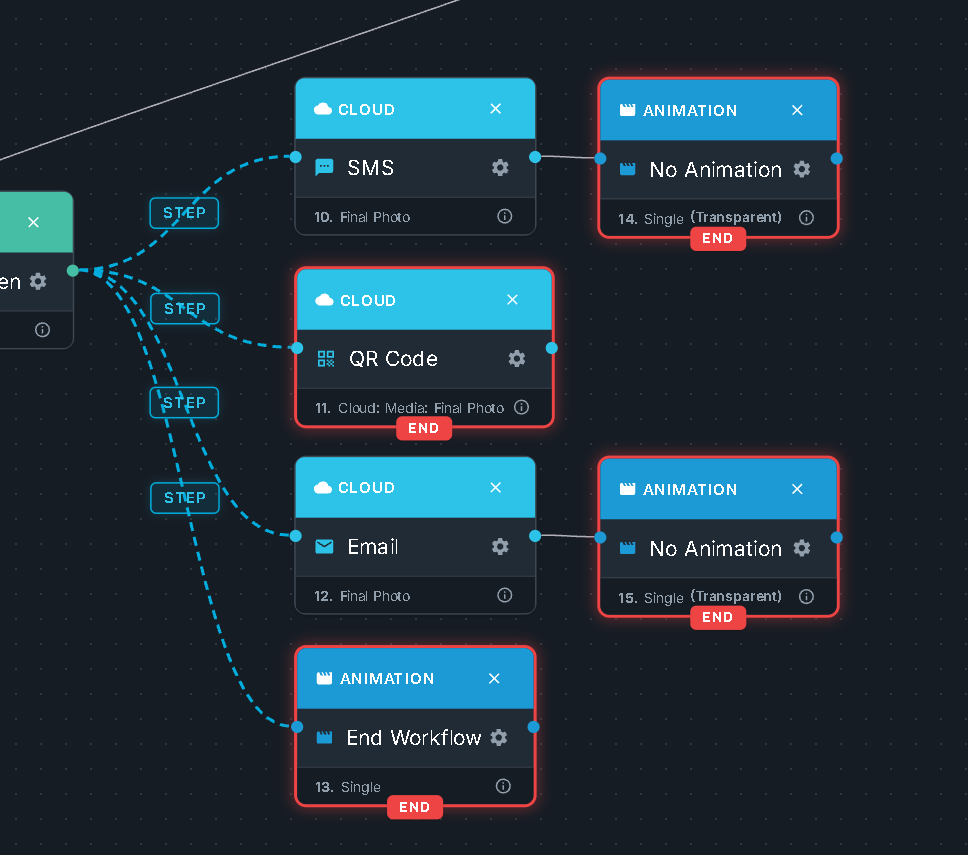
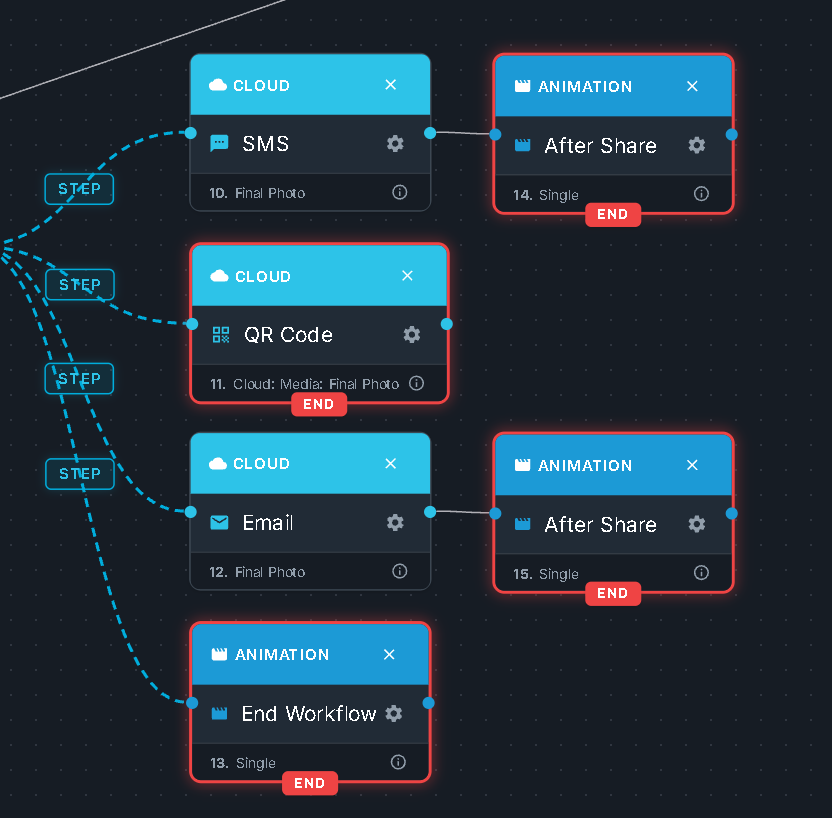
- Finally, verify that only your dedicated "End Workflow" animation retains the red "END" border at the bottom, and remove the end border from the individual sharing options to ensure the workflow remains active until the user explicitly chooses to done button.
Was this helpful?
Related articles
FMX for Windows: Customizing Your Experience
Everything at a photo booth event (the overlays, the countdown, the on-screen text, the email guests receive, the gallery they get a link to) is something you control. This guide m
FMX for Windows: System Requirements
Before installing FMX on your Windows computer, make sure your system meets the requirements below. Meeting the recommended specifications will ensure smooth performance during eve
Installing FMX on Windows
When to Use First-time installation of FMX on a Windows PC Reinstalling FMX on the same machine Upgrading FMX to a newer version using the latest installer Requirements Windows 10
Login to FMX
When to Use Immediately after installing FMX When switching operators or moving the license to a different PC Requirements A Foto Master Cloud Account (email and password) At least
Building a FMX Preset From Scratch: Video Tutorial
This video covers the basics of building a workflow and layout in FMX: a good starting point before exploring the individual workflow step articles.