
How to Set Up a Flipbook on FMX for Windows using Select-Sync-Play
Overview
This guide covers how to set up a Flipbook (AI) event on FMX for Windows, including what equipment you need, configuring your event in Cloud, and connecting your printer.
What You'll Need
- Mirror/booth running FMX for Windows
- Printer
- Printer cable
Step 1: Set Up the Event in Cloud
- Go to your Cloud account.
- Select the Events tab.
- Tap Create an Event.
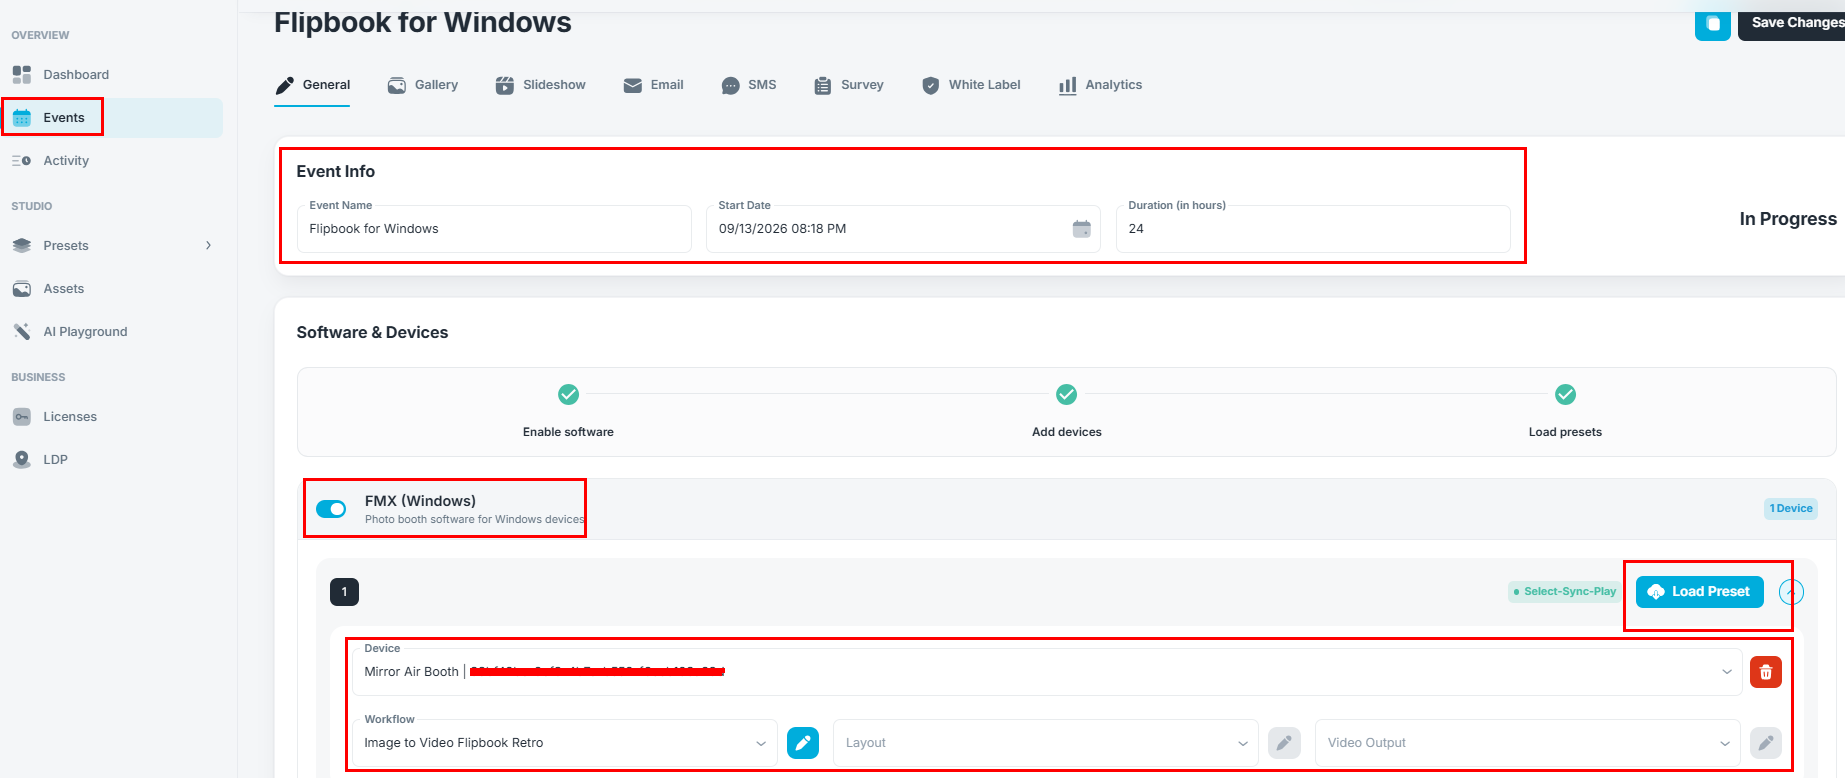
- Fill out the event information.
- Enable FMX (Windows) for the event.
- Press Load Preset.
- Select Video Recording Flipbook or Image to Video Flipbook (AI).
Step 2: Sync the Event on Your Mirror/Booth
- Open FMX and go to the Dashboard.
- Select the event name you just created.
- Press Sync Event.
Step 3: Connect Your Printer
Before you start the event, make sure your printer is connected.
- Turn on the printer and connect the printer cable to your mirror/booth.
- Once connected, go to Global Settings in the FMX software.
- Go to the Devices tab. On the right, find Printer and press the dropdown arrow to see its settings.
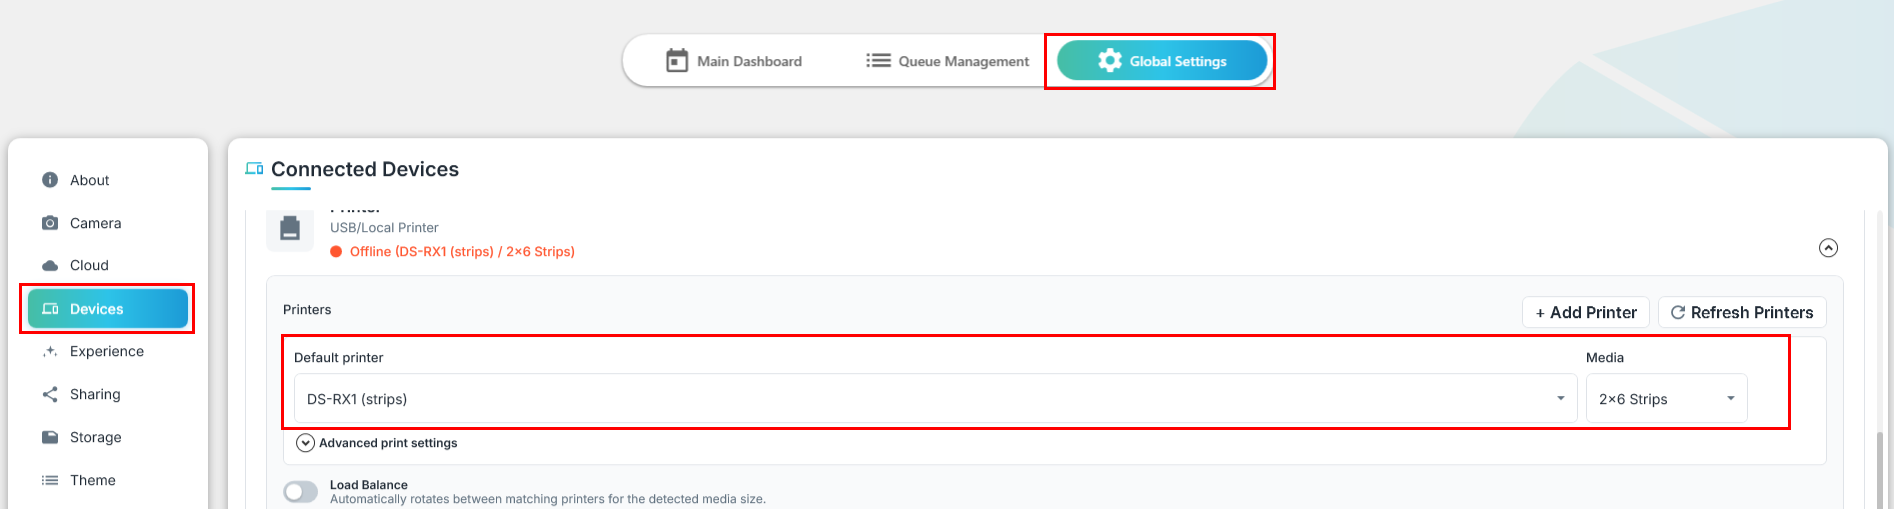
- Flipbooks typically use a strip printer, which automatically cuts the paper in half. Set it as the default printer to use.
- To adjust the print padding for flipbooks, go to the Experience tab and scroll down to the Flipbook Padding settings.
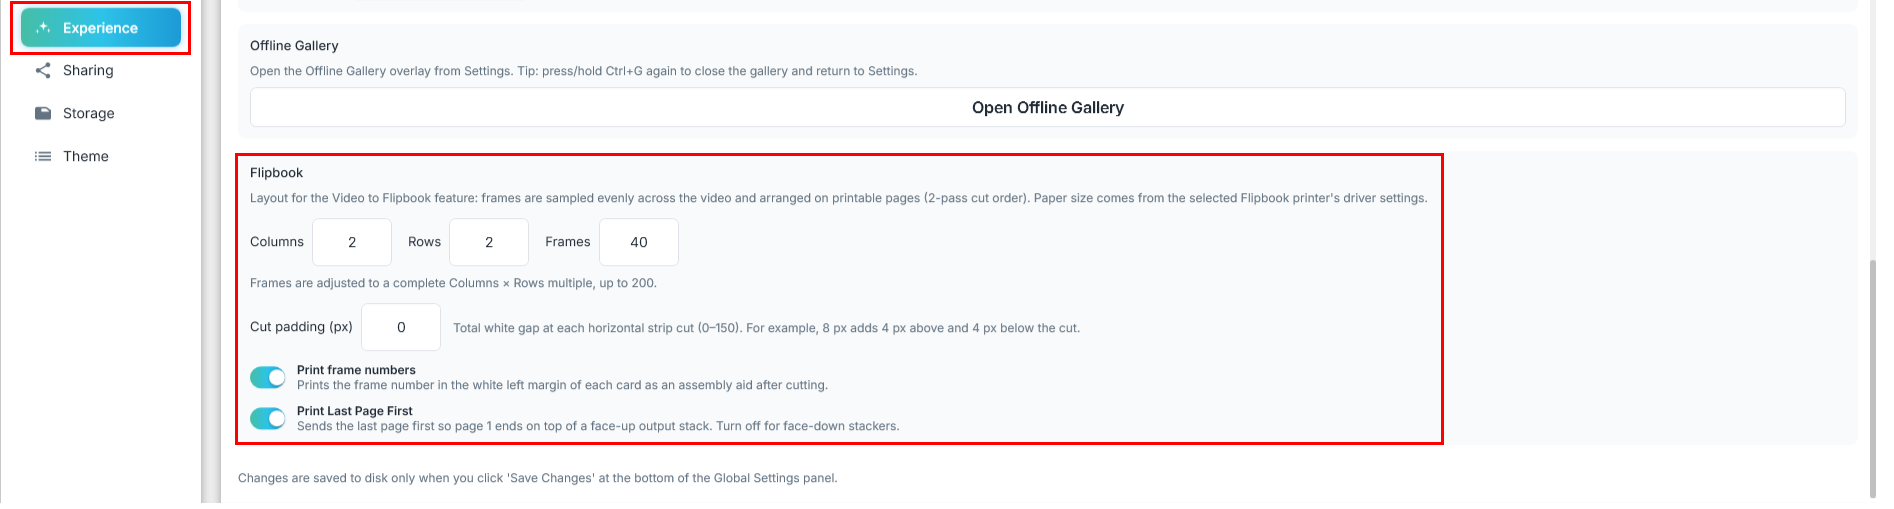
- Once everything is set up, you're ready to start recording flipbook videos.And you're good to go!For more information about settings of the flipbook, please check this article: /articles/video-to-flipbook-overview
Was this helpful?
Related articles
FMX for Windows: Customizing Your Experience
Everything at a photo booth event (the overlays, the countdown, the on-screen text, the email guests receive, the gallery they get a link to) is something you control. This guide m
FMX for Windows: System Requirements
Before installing FMX on your Windows computer, make sure your system meets the requirements below. Meeting the recommended specifications will ensure smooth performance during eve
Installing FMX on Windows
When to Use First-time installation of FMX on a Windows PC Reinstalling FMX on the same machine Upgrading FMX to a newer version using the latest installer Requirements Windows 10
Login to FMX
When to Use Immediately after installing FMX When switching operators or moving the license to a different PC Requirements A Foto Master Cloud Account (email and password) At least
Building a FMX Preset From Scratch: Video Tutorial
This video covers the basics of building a workflow and layout in FMX: a good starting point before exploring the individual workflow step articles.