
Create Your First Workflow (Step-by-Step Guide)
This guide walks you through building a simple workflow from scratch:
Touch to Start → Countdown Animation → Take Photo → AI Effect → Preview → Print or Finish
You can expand this structure into more advanced or branded experiences.
1. Open the Workflow Builder
- Sign in to Foto Master Cloud.
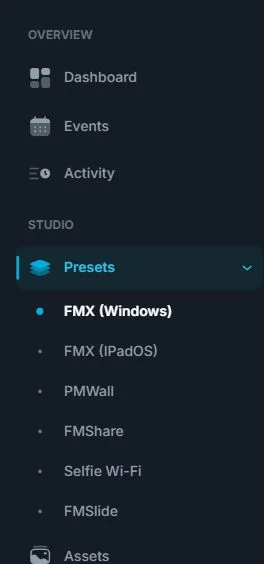
- Go to Presets → FMX (Windows) → Workflows.
- Select New Workflow.
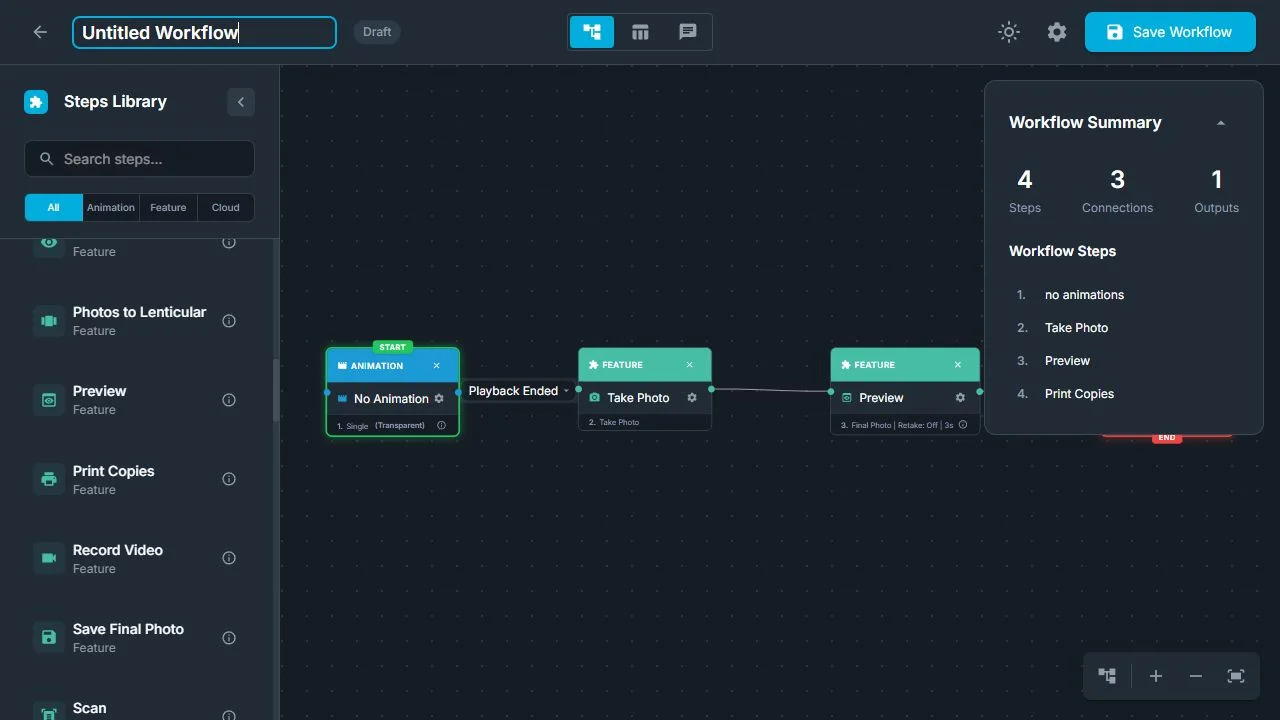
You'll start with an empty canvas ready for steps and connections.
2. Name and Describe Your Workflow
- Open the workflow settings or header.
- Enter a clear name, for example: Basic Single Photo.
3. Add a Touch to Start Animation
- Drag a Single Animation step onto the canvas.
- Click Select Animation → FM Link and choose any animation from the Touch to Start category.
- Set the Trigger to Touch.
This becomes the entry point of the experience.
4. Add a Countdown Animation
Most operators prefer to show a visual countdown animation before the actual capture.
- Drag another Single Animation step onto the canvas.
- Select an animation from the Countdown category in FM Link (3-2-1, circle countdown, etc.).
- Set the Trigger to Playback Ended.
- Connect: Touch to Start → Countdown (Navigation Edge).
This ensures the animation plays fully and automatically transitions to the camera.
5. Add a Take Photo Step
- Add a Take Photo step to the canvas.
- Connect: Countdown → Take Photo.
Your flow now moves smoothly into photo capture.
6. Add an AI Effect Step
- Drag an AI step (e.g., AI Background Removal, AI Headshot, AI Cartoon).
- Connect Take Photo → AI Step.
The captured image is now sent to the AI service.
7. Add a Preloader Animation
This gives the user visual feedback while the AI processes the image.
- Drag a Single Animation step onto the canvas.
- Choose a Preloader animation from FM Link.
- Set Trigger: AI Processed.
- Connect:
- AI Background Removal → Preloader (Navigation Edge)
- Then connect Preloader → Preview in the next step
This step plays until the AI result is ready, ensuring a smooth UX.
8. Add a Preview Step
- Drag a Preview step onto the canvas.
- Connect Preloader → Preview.
9. Add Retake Logic (Recommended)
- Create a Retake edge from the Preview step.
- Connect Preview → Countdown Animation.
- Map the Retake button to that edge.
Users can re-shoot the photo.
10. Add a Print or Final Step
Option A: Print then Finish
- Drag Print Copies onto the canvas.
- Connect Preview (Use This) → Print Copies.
- Configure print count limits (min/max).
- Add a Thank You / End Animation step.
- Connect Print Copies → End Animation.
Option B: Finish Without Printing
- Add a Thank You / End Animation step.
- Connect Preview (Use This) → End.
- Add a simple completion message.
11. Set the Start Step
Set Touch to Start as the workflow's entry step.
12. Validate the Workflow
Check for:
- Unconnected steps
- Missing outgoing edges
- No start step
- Incorrect loops
Your flow must be continuous from start to finish.
13. Test the Workflow
- Select Save Workflow, then assign the workflow to the relevant event in Foto Master Cloud.
- Sync your event.
- Click Start Photo Booth in FMX to test.
Was this helpful?
Related articles
FMX for Windows: Customizing Your Experience
Everything at a photo booth event (the overlays, the countdown, the on-screen text, the email guests receive, the gallery they get a link to) is something you control. This guide m
FMX for Windows: System Requirements
Before installing FMX on your Windows computer, make sure your system meets the requirements below. Meeting the recommended specifications will ensure smooth performance during eve
Installing FMX on Windows
When to Use First-time installation of FMX on a Windows PC Reinstalling FMX on the same machine Upgrading FMX to a newer version using the latest installer Requirements Windows 10
Login to FMX
When to Use Immediately after installing FMX When switching operators or moving the license to a different PC Requirements A Foto Master Cloud Account (email and password) At least
Building a FMX Preset From Scratch: Video Tutorial
This video covers the basics of building a workflow and layout in FMX: a good starting point before exploring the individual workflow step articles.