
Take Photo: Overview
The Take Photo step is the core capture action in your FMX workflow.
It activates the camera, captures a still photo, and makes that photo available to the rest of the experience: for AI effects, layouts, previews, printing, and sharing.
Whenever your workflow needs a guest photo, it passes through a Take Photo step.
What Is the Take Photo Step?
Take Photo is a feature step in the Workflow Builder that performs a single photo capture and hands that image to all later steps in the flow.
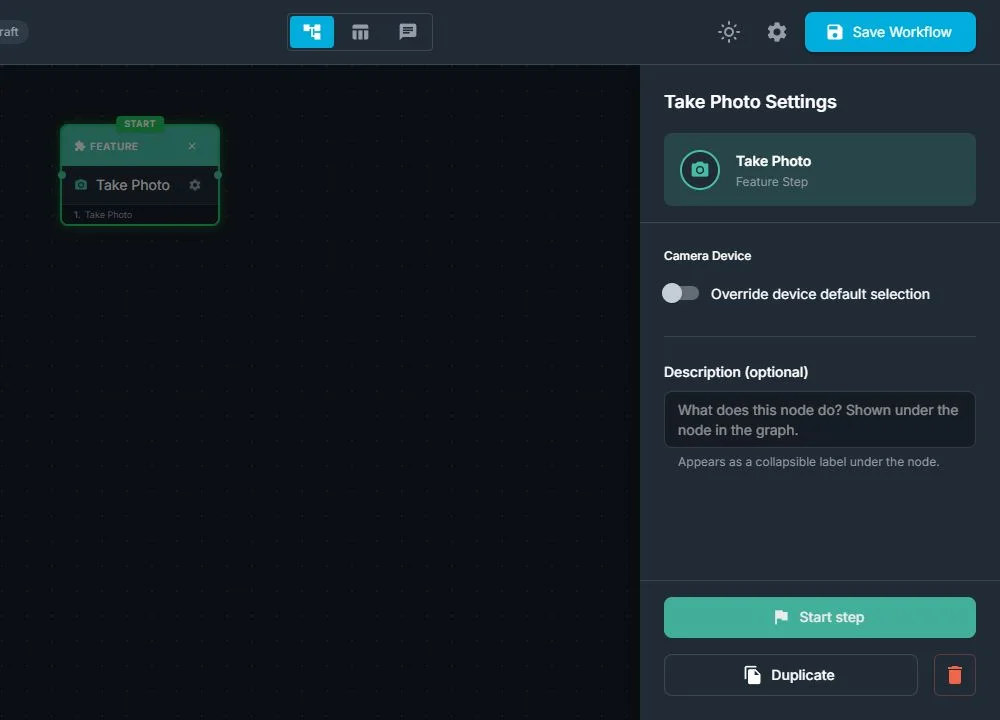
From the workflow point of view, Take Photo:
-
Loads the camera when the workflow reaches this step
-
Captures one still photo from the guest
-
Saves the photo into the current session so later steps can use it (AI, layouts, print, share)
-
Works with the camera configured for the event: a built-in iPad camera, a Windows webcam, or a supported Canon, Nikon, Sony, or GoPro camera
From the guest’s point of view:
-
The system counts down or indicates that a photo is about to be taken
-
A photo is captured, and the booth immediately moves on to the next step, such as Preview, AI, or Print
Take Photo itself is focused on capture only: timing, countdowns, and extra animations are usually handled by the steps around it.
FMX for Windows 2.0.53 and later also correctly honor a camera override assigned to the Take Photo step. When no override is assigned, the step uses the camera selected in Global Settings → Camera. Test every branch that selects a different camera before the event.
When Should You Use Take Photo?
Use a Take Photo step any time your workflow needs to capture a real photo and make it available to other features.
Typical reasons:
-
To send a photo into an AI effect (headshot, cartoon, face swap, background removal, and more)
-
To fill layouts such as strips, collages, and single-photo prints
-
To provide still images used later in videos or GIFs created from photos
-
To build a classic photo booth flow with a preview and print at the end
You can use Take Photo once for a simple single-photo experience, or several times in a row for multi-pose flows.
Canon operators can also let a guest or photographer press the camera's physical shutter. The shutter itself creates the photo, so a Take Photo step is not required and is not recommended on that capture path. Use a Raw Photo Preview to wait for and display the physical-shutter image. See How to Use the Canon Camera Shutter in FMX for Windows.
How Take Photo Fits in the Workflow
In the Workflow Builder, Take Photo is added and connected like any other step:
-
Select Take Photo in the Steps Library
-
Place it where the capture should happen in the guest journey
-
Connect it to the steps that come before (for example, Live View, Games, or Selection Screen) and after (for example, AI, Preview, Print Copies)
When the workflow reaches Take Photo:
-
FMX activates the configured camera and captures one image
-
The system waits until the capture is complete
-
The captured photo is stored for the session
-
The workflow automatically continues to the next step you connected to
Typical Use Cases (With Examples)
-
Simple Single-Photo Booth
Purpose
A fast, classic photo booth flow for most events.Example flow
Welcome → Take Photo → Preview → PrintThe guest steps in, the booth takes one photo, shows it for approval, and prints it.
-
AI-Enhanced Photo Experience
Purpose
Capture a photo and send it straight into an AI effect.Example flow
Selection Screen (choose AI style) → Live View → Take Photo → AI Effect → Preview → Email / PrintGuests pick an AI style, see themselves in live view, the booth captures a photo, processes it with AI, and then shows the final result to review and share.
Why "Take Photo" Is Useful For Your Workflows:
-
Core capture step: Take Photo is the foundation for most photo-based experiences.
-
Works with everything: AI effects, layouts, videos from photos, sharing, and printing all rely on the photos captured here.
-
Flexible: you can place it once or repeat it several times, and combine it with Live View, Games, AI, and other steps for richer flows.
For clients and guests:
-
Simple and intuitive: “Look at the camera, we’ll take your photo” is easy for anyone to understand.
-
High-quality outputs: a single capture can be transformed into many different outputs: AI art, branded layouts, prints, GIFs, and more.
-
Better overall experience: when Take Photo is placed in the right spot and combined with Preview, AI, layouts, and sharing, one simple capture step can power a complete, polished experience from start to finish.
Troubleshooting
- The wrong camera fires: Recheck the Take Photo node's camera override and the default camera in Global Settings → Camera, then sync the current workflow again.
- A physical Canon shutter does nothing: Confirm the camera is supported and connected, then use one of the documented Canon shutter workflow patterns.
- Test Mode does not capture from the Canon shutter: Physical shutter capture is not simulated in Workflow Builder Test Mode. Test on the Windows booth with the real camera.
- Repeated captures attach to the wrong step: Keep one reserved Take Photo action per intended capture and allow it to finish before the workflow reaches the next capture.
- Live View stays locked: Pair every Live View Start with a Live View Stop and check that no other camera application is open.
Was this helpful?
Related articles
FMX for Windows: Customizing Your Experience
Everything at a photo booth event (the overlays, the countdown, the on-screen text, the email guests receive, the gallery they get a link to) is something you control. This guide m
FMX for Windows: System Requirements
Before installing FMX on your Windows computer, make sure your system meets the requirements below. Meeting the recommended specifications will ensure smooth performance during eve
Installing FMX on Windows
When to Use First-time installation of FMX on a Windows PC Reinstalling FMX on the same machine Upgrading FMX to a newer version using the latest installer Requirements Windows 10
Login to FMX
When to Use Immediately after installing FMX When switching operators or moving the license to a different PC Requirements A Foto Master Cloud Account (email and password) At least
Building a FMX Preset From Scratch: Video Tutorial
This video covers the basics of building a workflow and layout in FMX: a good starting point before exploring the individual workflow step articles.