How to Create Miniature Me on FMX
Overview
This guide explains how to use the Miniature Me feature in FMX to create custom miniature cutouts. The process involves capturing a photo, applying AI modifications and background removal, outlining the image in your layout, and then printing and cutting your design with a Silhouette cutting machine.
Required Equipment and Software
To complete the Miniature Me process, you will need the following:
FMX (Beta Software)
Silhouette Cameo 5, Cameo 4, or equivalent cutting machine of your choice
0.4mm magnetic sheet (optional, for magnet mounting)
2mm blade for your cutting machine
Windows-based computer
Silhouette Studio software (Link: https://www.silhouetteamerica.com/silhouette-studio)
FMX Setup
The Miniature Me feature requires the AI BG Removal node in your workflow to achieve the white background. You can choose to include the AI Modify node for additional enhancements, or build a simpler workflow without it. Follow the appropriate section below based on your preference.
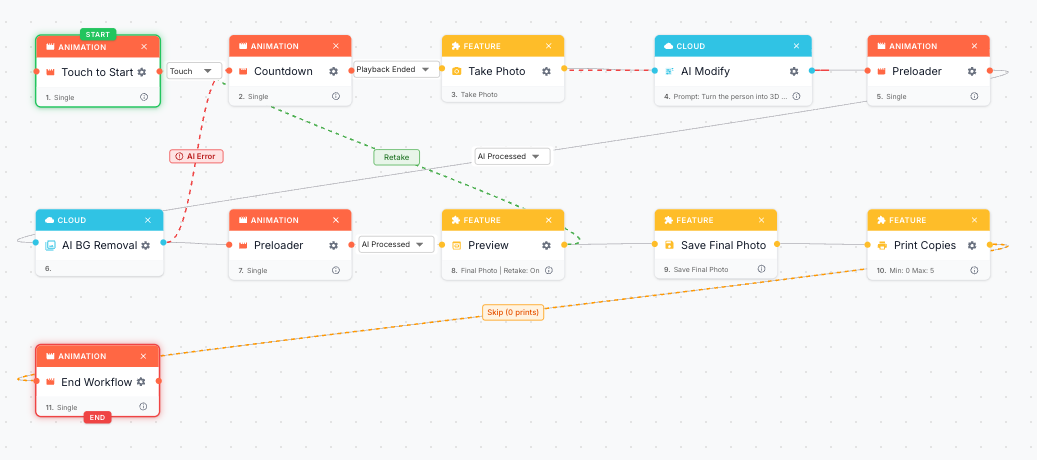
Workflow With AI Modify
Download the FMX Beta Software here.
Open a new workflow or use the sample workflow - under Load Presets - Search for Miniature Me AI
Ensure your workflow includes both the AI Modify node and the AI BG Removal node
Place an Animation node between the AI Modify and AI BG Removal nodes, and set it to AI Process
Place another Animation node after the AI BG Removal node and set it to AI Process
In Layout, scale your image to 1200 by 1800 pixels and select Filter > Outline. You can choose your own scale, however it is imperative that Outline is selected from Filter, otherwise the process will not work
Once the photo is taken, save the image as .PNG format. You can then print it out manually, or alternatively use our FMSlide feature to have the photos appear automatically on the computer that is connected to your Silhouette cutting machine or other similar devices.
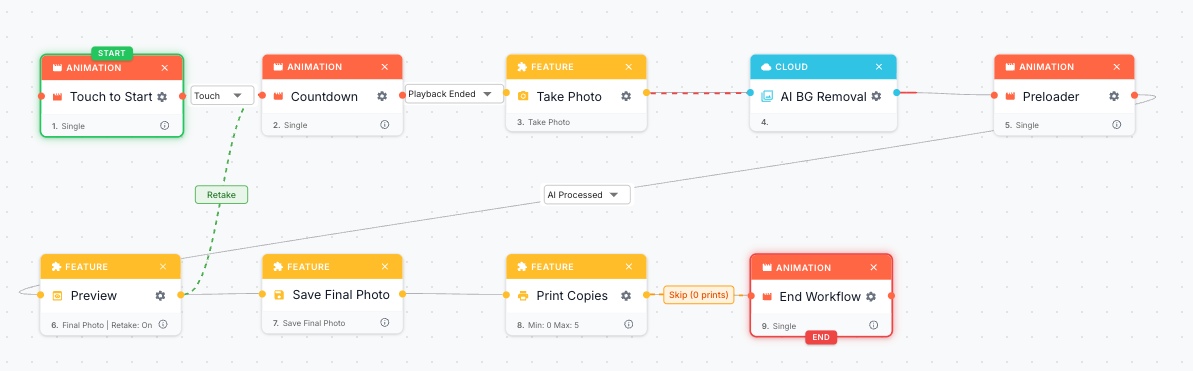
Workflow Without AI Modify
Download the FMX Beta Software here.
Open a new workflow or use the sample workflow - under Load Presets - Search for Miniature Me
Ensure your workflow includes the AI BG Removal node, which is required to achieve the white background for the Miniature Me feature
Place an Animation node after the AI BG Removal node and set it to AI Process
In Layout, scale your image to 1200 by 1800 pixels and select Filter > Outline. You can choose your own scale, however it is imperative that Outline is selected from Filter, otherwise the process will not work
Once the photo is taken, save the image as .PNG format. You can then print it out manually, or alternatively use our FMSlide feature to have the photos appear automatically on the computer that is connected to your Silhouette cutting machine or other similar devices
Silhouette Studio Configuration
Once your photo is ready, you will need to upload it to the Silhouette Studio software. Please ensure you have updated to the newest version of Silhouette Studio before proceeding.
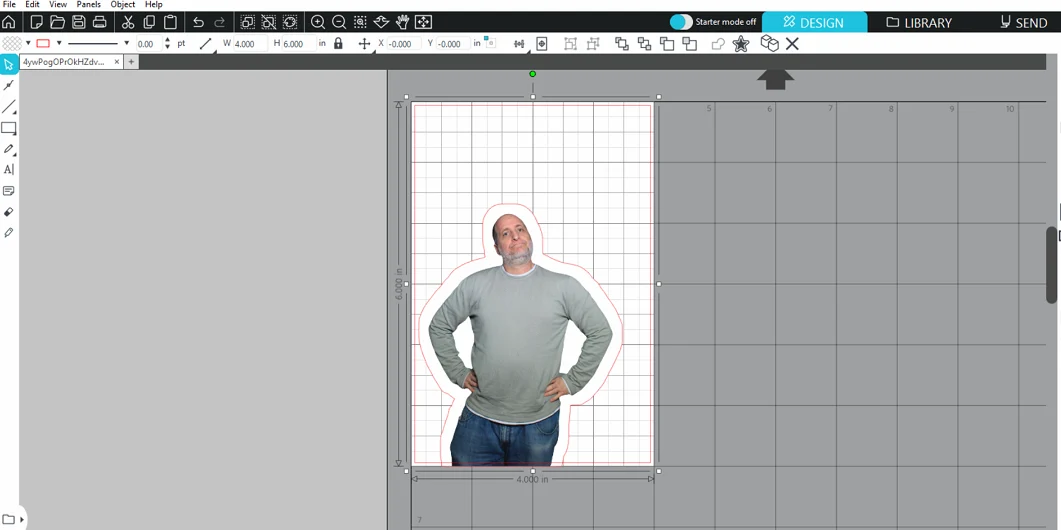
Open Silhouette Studio and import your photo (File > Open)
Verify page settings: Media Size 4x6, Portrait orientation
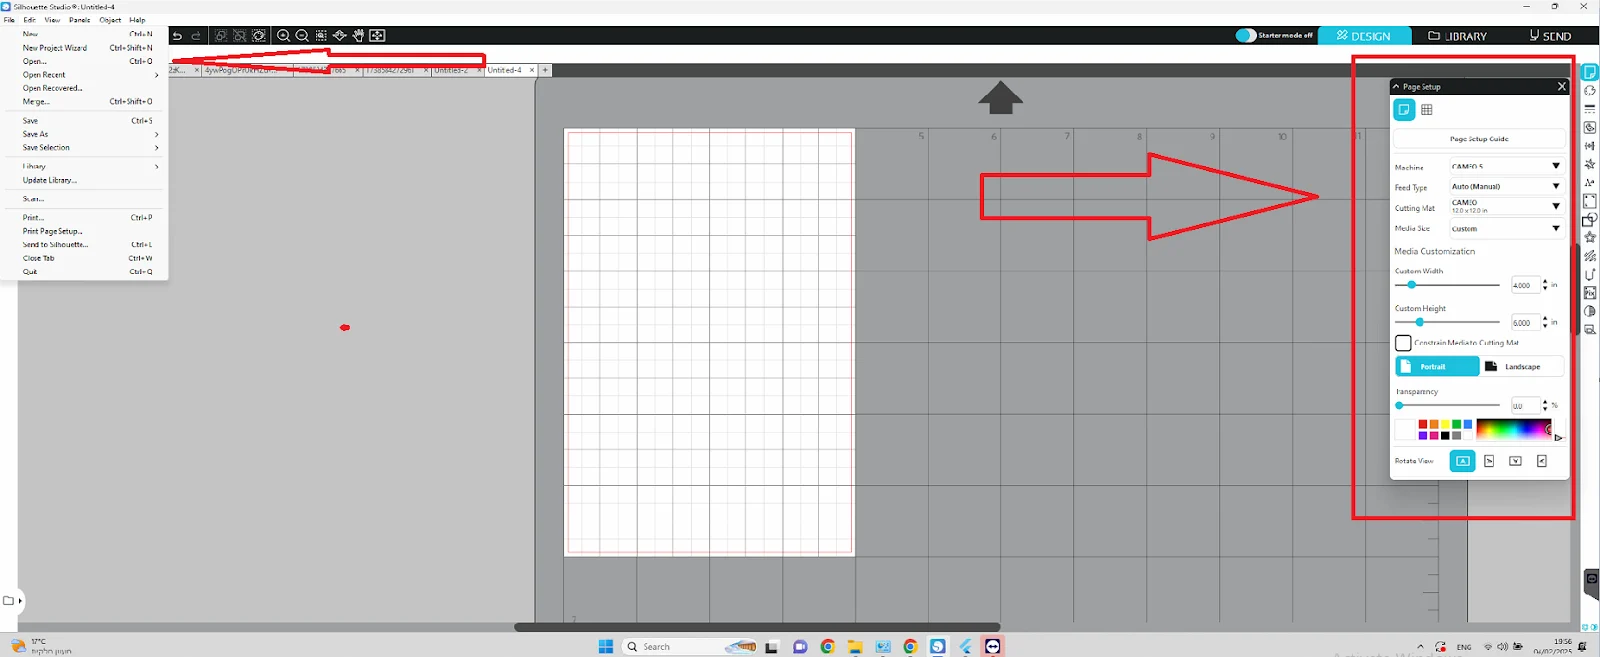
Resize the image to 4x6 dimensions

Center the image using the center button
Cutting Settings
For optimal results with your Silhouette cutting machine, use the following settings:
Force: 15
Passes: 2
Speed: 10
Cutting Process
Follow these steps to cut your miniature design:
Place the printed photo on the Silhouette mat
Feed the mat into the cutter using the Up arrow
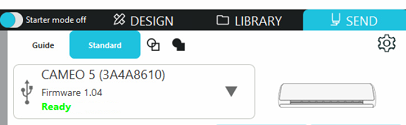
Confirm 'Ready' status appears in software
Press 'Send' to initiate cutting
Remove the finished mat using the Down button
Was this helpful?
Related articles
AI Features Overview
Foto Master Cloud brings the power of artificial intelligence directly into your photo booth workflow. With 14+ AI-powered features available at cloud.fotomaster.com, you can offer
AI Playground
AI Playground is a space inside Foto Master Cloud where you can test and explore AI features without setting up a workflow or connecting a booth. Upload a photo, pick a feature, co
AI Modify
AI Modify is a generative AI feature that transforms photos taken at the booth. It works on the original photo — the people, faces, poses, and group layout stay intact — and AI app
AI Combine
Can't see the video? Watch on YouTube AI Combine generates new AI images using a reference image and a text prompt — producing results that maintain consistent visual style, brandi
AI Background Removal
AI Background Removal automatically strips the background from any photo, isolating the subject cleanly without needing a physical green screen. This means you can place guests aga